


Hello friends!
Did you ever struggle with applying a solution from the PC-3000 Flash Solution Center? With the new “Execute (graph)” function, you can apply a solution and automatically create a transformation graph with all actions that had already been done. And it greatly facilitates your work with the PC-3000 Flash!
Before the latest update, when you apply a selected solution, you can only see the final result with or without the file structure. So you can just use Raw Recovery or Disk Analysis on the already built image without knowing what the problem or the error is. In such a case, you cannot be sure what to do to finish the task: maybe you just need to change XOR or transform your page, or something else.
The PC-3000 Flash software ver. 7.4.11.or higher allows you to execute the graph to see all the actions that had been done, so you can proceed with the task.
For example: Here is a case with the PS2251-68-5 controller, 1 chip, 8 GB.
PLEASE DON’T FORGET TO APPLY ECC AND REREADING OF BAD SECTORS FIRST ON THE TRANSFORMATION GRAPH BEFORE APPLYING THE SOLUTION!
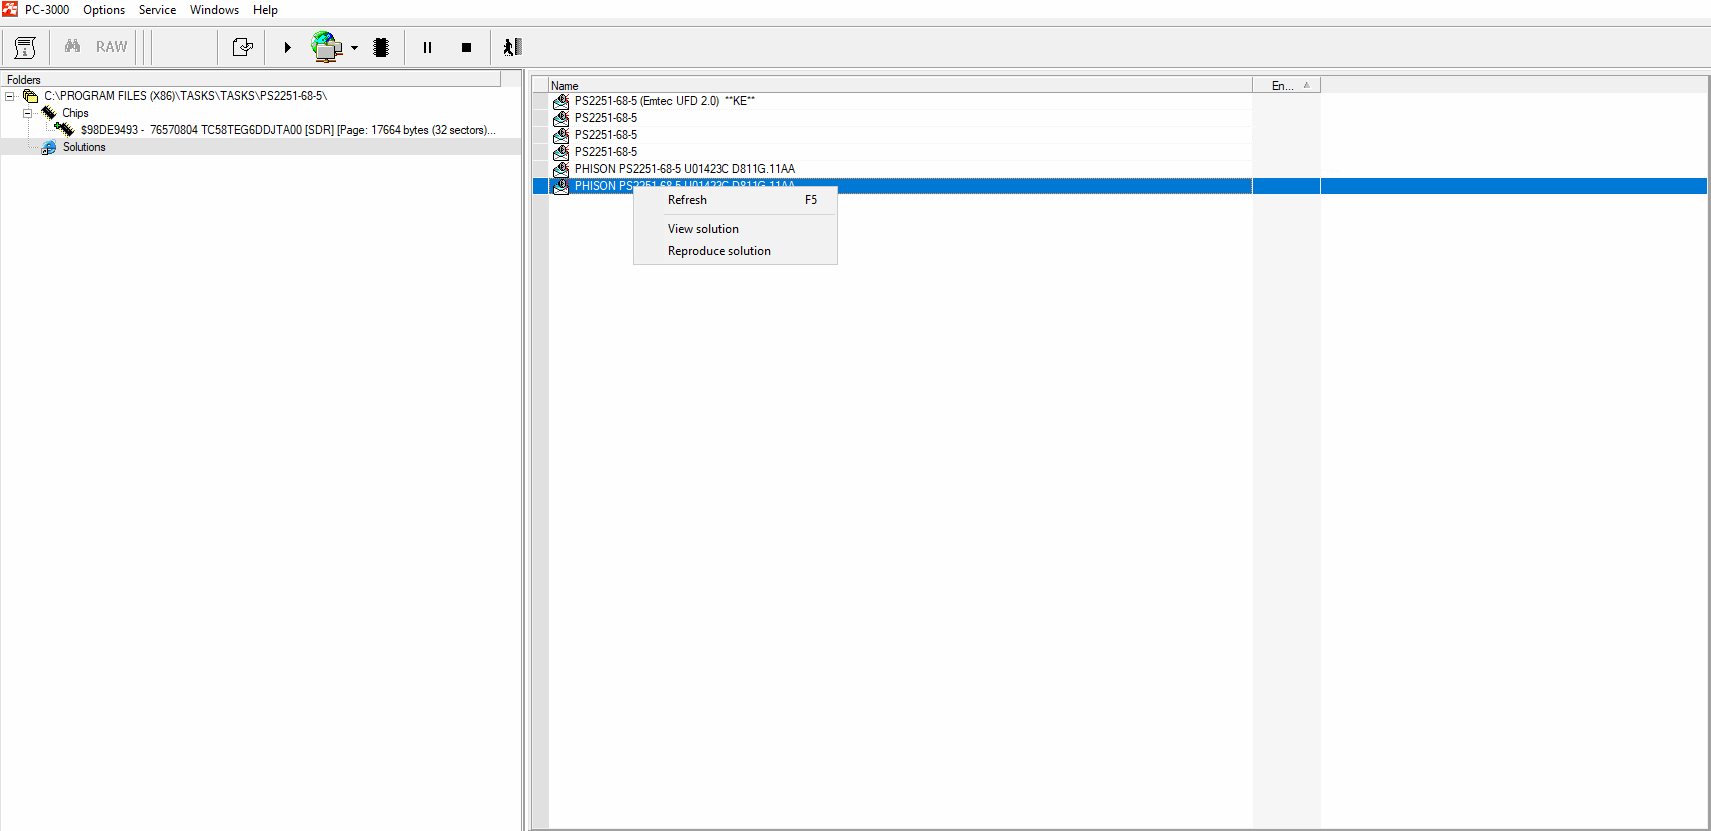
First of all, you need to pick a solution from the list of possible solutions and press (click/choose) “Reproduce solution” (don’t forget to put a correct controller name in your task beforehand!):
After that, choose the “Execute with the graph” option in a new window:

You will see the “Solution edit” window:
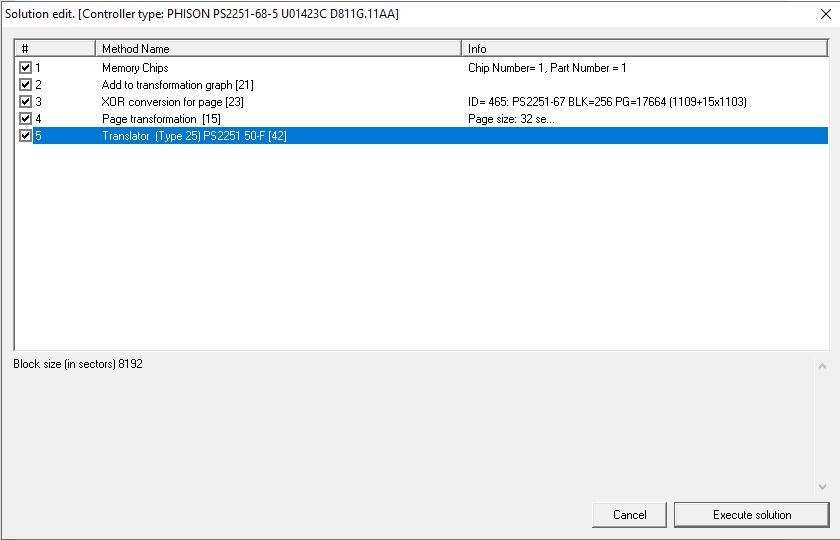
In this window, you can see what actions will be done with this solution, and you can change them here by right-clicking on it (it is possible to change the XOR, size of the block in Interleave operation, change the size of joining operations, etc.)
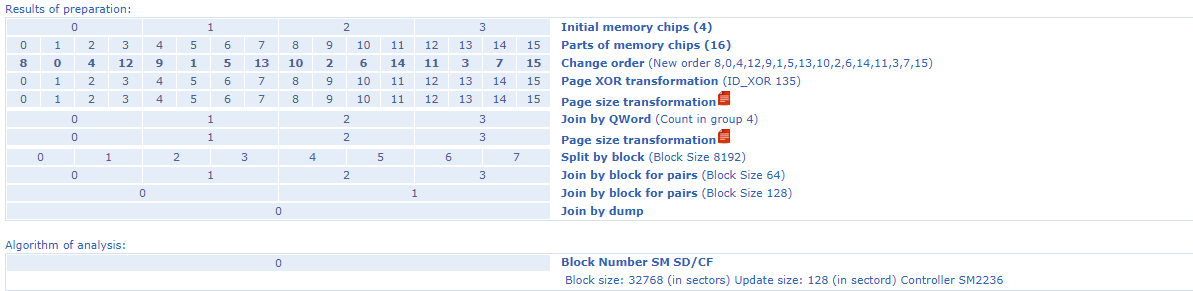
After executing the solution, you will see the Image that had been built (in our case – with a translator for PS2251-50-F) and “Transformation graph” in the “Results of preparation” folder.
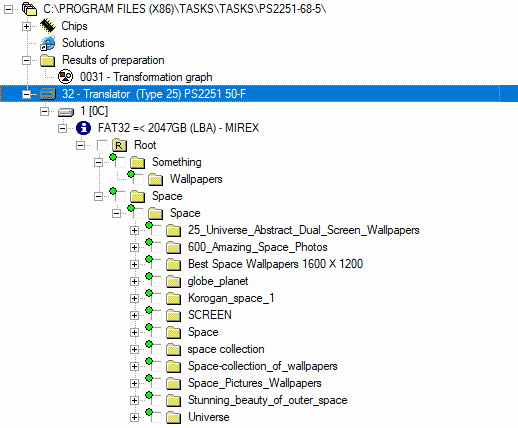
If you select “Transformation graph”, you can see actions from the solution and use all possible features on each step of the graph, like “Raw Recovery”, “Service information”, “Data analysis”, etc.
This new feature might be useful for the most tricky cases (SanDisk all types, AU6989/AU6998, SSS669x, SSS6132, CBM209x, and etc), where it isn’t easy to get a good File System but the result on the last string after all preparation is pretty good.

That’s it! You can also watch the video below, to check out all the steps from the article:
If you have any questions regarding your data recovery cases, you’re welcome to address them to the Technical Support department.

 (4 votes, average: 4.00 out of 5)