


Hello Friends!
Some SAS drives have a limitation in their FW: they work for some time (Power-on Hours value written inside of FW), but when the time is over, the drive stops working no matter its condition. Also, some NAS systems can require a special sector size: 512/520/528 bytes per sector. These issues can be successfully solved with the PC-3000 SAS, beginning with ver. 6.7.12, if a drive is supported. So, let’s see how to deal with that.
We know how to change FW, model, and vendor using the “Download microcode” feature. But after loading FW in the target system to install the HDD, you may need to change the size of a sector. There are servers with a standard sector size of 512 bytes/sector, and servers and storage systems that use a sector size of 520 or 528 bytes/sector.
You can change the size of the sector before recording FW or after that. Better done after FW recording.
To change the size of a sector, you must first actually change the size of the sector, and then perform formatting. Go to Tools->HDD->Set Max LBA:

In the Sector size field, change the size to the value, usually 512, 520, 528. In the Save into field, select Service area (the default is RAM. Click Ok.
Attention! After this procedure, if Save into Service area is selected, and not in RAM, access to data will become impossible until formatting is completed.
After changing the sector size, you must format the entire disk.
Attention! After the formatting procedure, all user data will be erased.
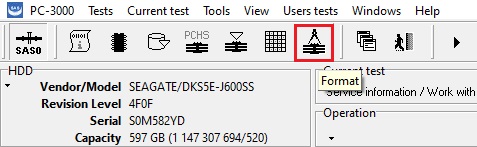
Select Tests ->Format or press the button on the toolbar:
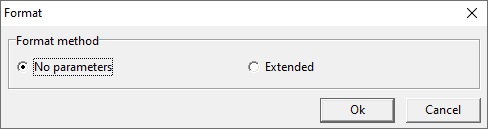
You can leave No parameters, but then the percentage of completion will not be visible and it will not be clear at what stage the process is at.
Select Extended:
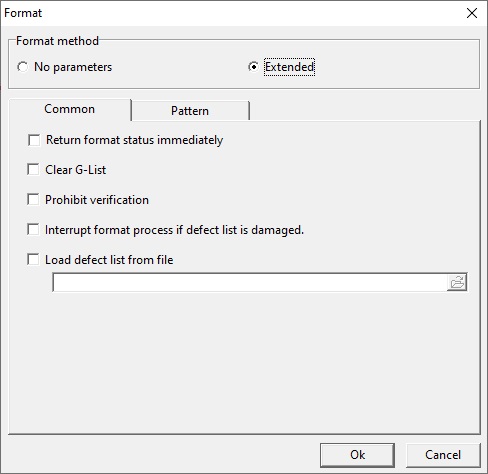
Field Assignment:
- Return format status immediately: Setting this checkbox allows the system to control the formatting process. In the case when this checkbox is not set, formatting is performed as one very long command. In such a case, an attempt to execute any other command will end only after the formatting command ends. Setting this checkbox leads to the fact that in the process of executing a formatting command, the system will request information about its execution from the HDD. The percentage of completion of the “Formatting” command is displayed in the process status display area.
- Clear G-List: Setting this checkbox clears the GList.
- Prohibit verification: Setting this checkbox allows you to speed up the formatting process because the verification of the disk surface by the internal HDD firmware after formatting is not performed.
- Interrupt format process if defect list is damaged: Some HDD models require this checkbox to be set. See the documentation on the HDD if the formatting process immediately fails.
- Load defect list from file: you can load the saved defect table from the defect file. During formatting, these defects will be written to GList.
You need to set the checkbox Return format status immediately to display the percentage of completion. And, if verification is not necessary, the flag is Prohibit verification.
Click Ok. Command execution will begin. The formatting time can be quite big, depending on the disk capacity, from 30 minutes to several hours. The formatting process cannot be interrupted. If for some reason the formatting is interrupted, then you need to start it again.
Some SAS drives can work only a limited amount of time, this value is named Power On Hours (POH) and written in HDD FW.
To edit POH we need to go to Tests->Service information->Work with service area->HDD ID editor:
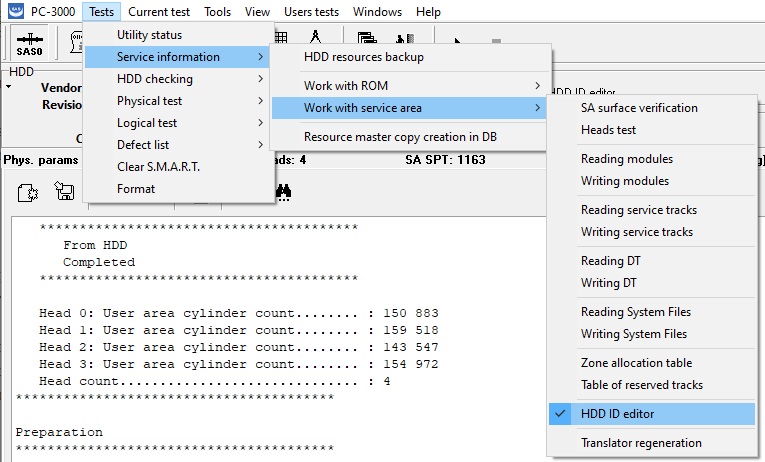
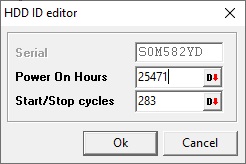
The serial number is not available to change for the moment, but we can manually enter any Power On Hours and Start/Stop cycles values, and press Ok. The feature of changing the serial number is going to be added to the PC-3000 SAS in the nearest time with the ROM writing ability.
To apply the changes the drive must be restarted. Changes are being saved to the Service Area. Go to HDD ID editor and check if POH and Start/Stop values are new.
Now the drive can be used again as a new one. Please do not forget to make a backup before any action!
If you have any questions regarding your data recovery cases, you’re welcome to address them to the Technical Support department.
