Below is the step-by-step guide how to hide BAD sectors at Seagate F3 drives – most typical task when repair BAD hard drives.
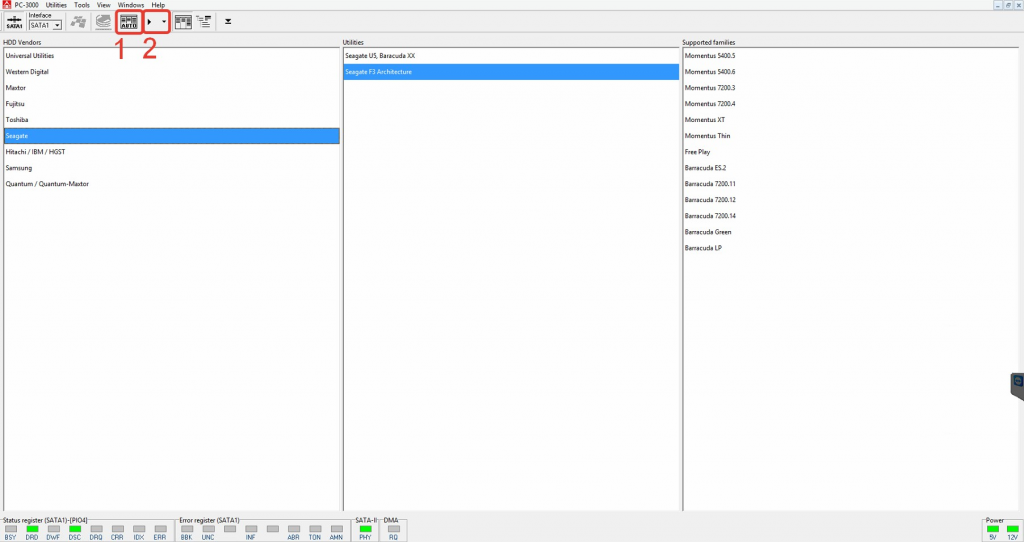
Step 1. Run utility
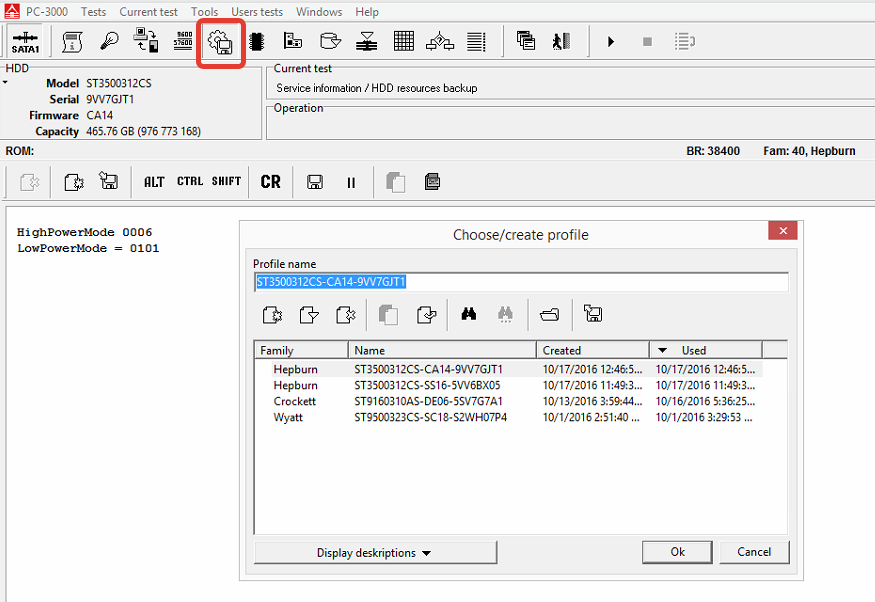
Step 2. Make backup of HDD resources in profile
Step 3. Edit HDD ID – disable all options
Check this for more details.
* Step 4 (optional). Clear G-list (T>i4,1,22) and Non-resident G-list then run Translator regeneration (T>m0,6,3,,,,,22)
Do it ONLY in two cases:
- You already run hiding defects and something got broken/hanging
- G-list has wrong items (drive already have a problem with translator)
Step 5. Run logical scans
Here is the sequence
It’s recommended to leave all logical scan parameters by default.
Let’s take a look on hiding to Slip-list stage more detailed.
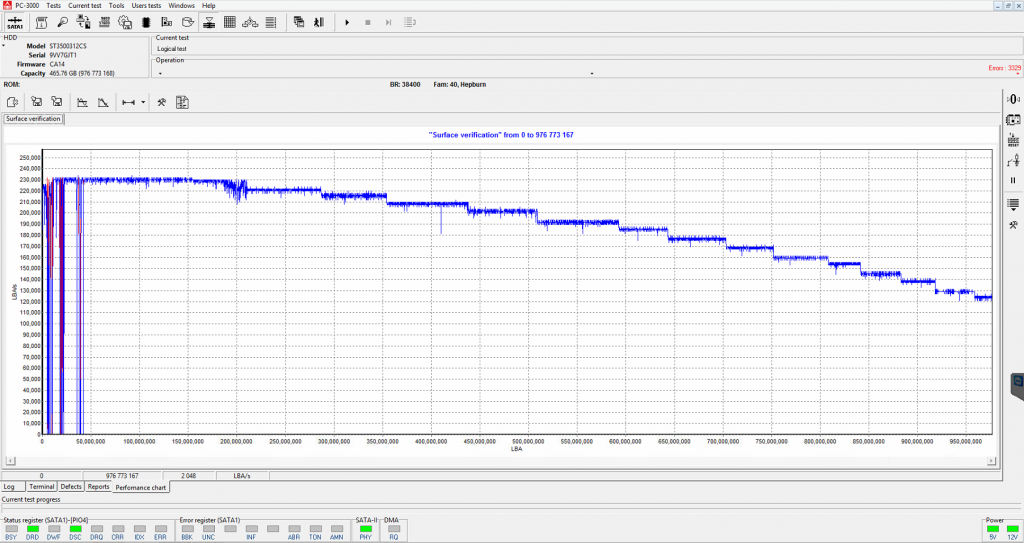
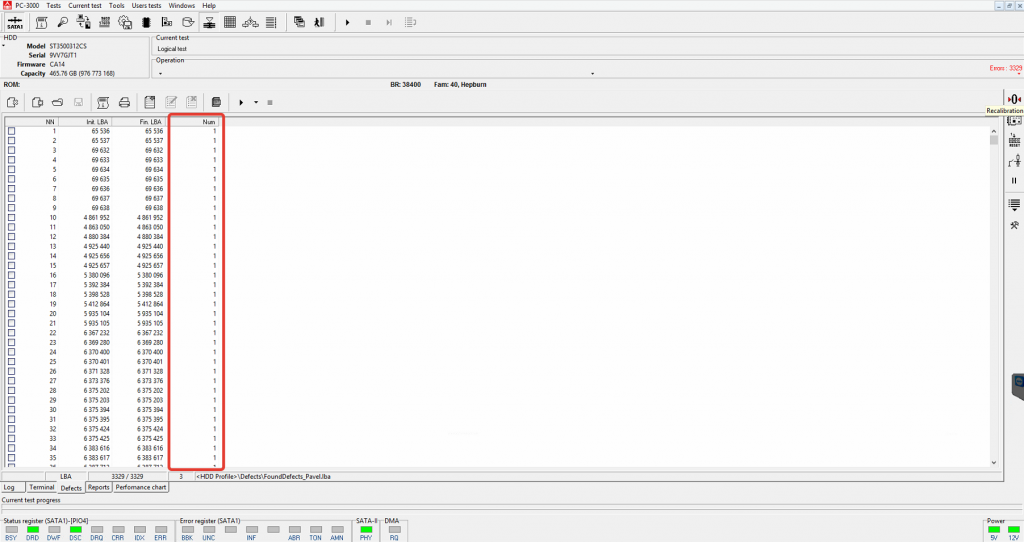
Results of logical surface scan will looks like
Now let’s move to Defects tab. As you may see, defect chains consists from only one defect.
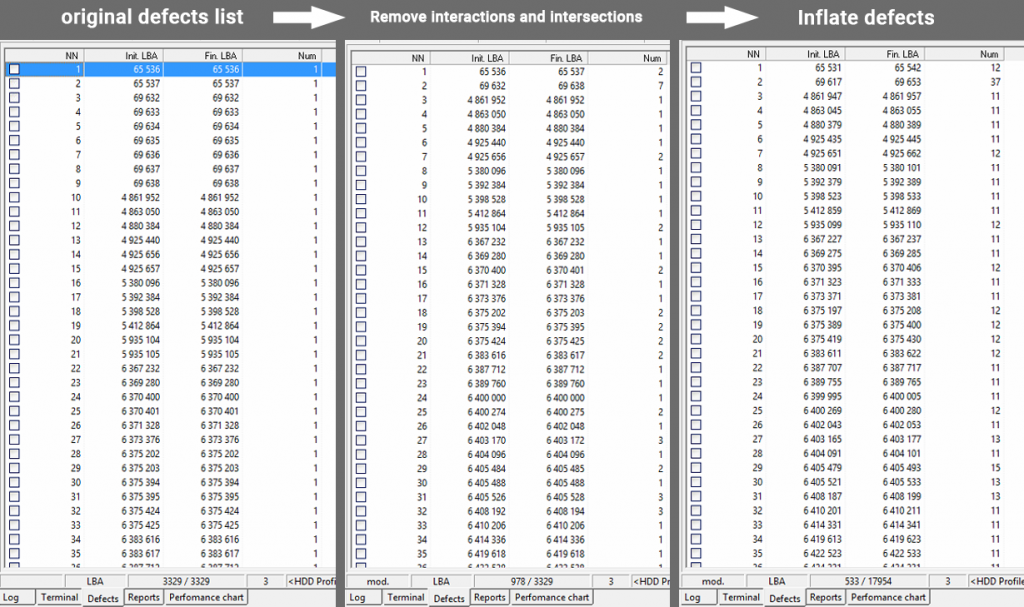
To save defects more quickly it’s recommended to group chains. For doing this you need to select at context menu of defects editor Remove interactions and intersection option:

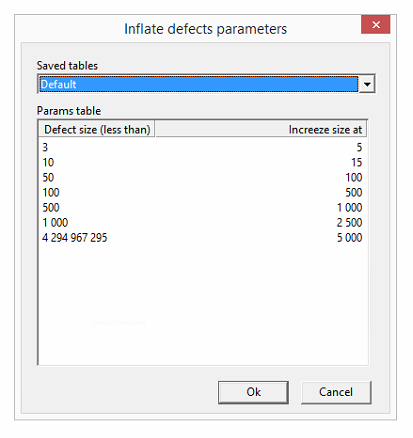
To prevent defects spread in future you can use Inflate defects option. Here is its default configuration:
To use Inflate defects option or no – it’s only your decision.
At picture below you can clearly check result of preparations:
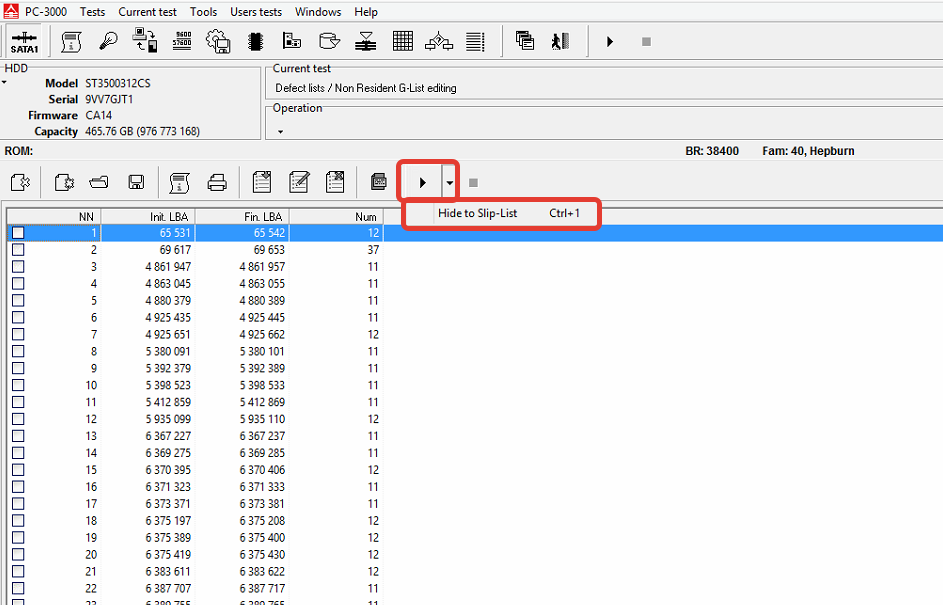
After preparations with defect list just press Hide to Slip-List button and go to next stage of block scheme:
Happy defectoscopy!


