Hey there!
In this article we are going to speak about the TRIM command which appears in the beginning of SSD era (around 14 years ago) and become a native feature in all existing Solid State Drives.
So, what is that and how’s it working?
TRIM – is an internal hardware SSD command which works in pair with Operating System. By default, TRIM was fully integrated in all OS starting from Windows Vista SP1, Windows 7 and MacOS X 10.6 (approximately from 2009-2010).
We know that NAND memory chip can write and read information extremely fast. But REWRITING is going to be extremely slow because NAND memory has to:
1. Find the place where to write new data;
2. Erase the old data (fill the NAND cells by zeroes);
3. Make a writing operation.
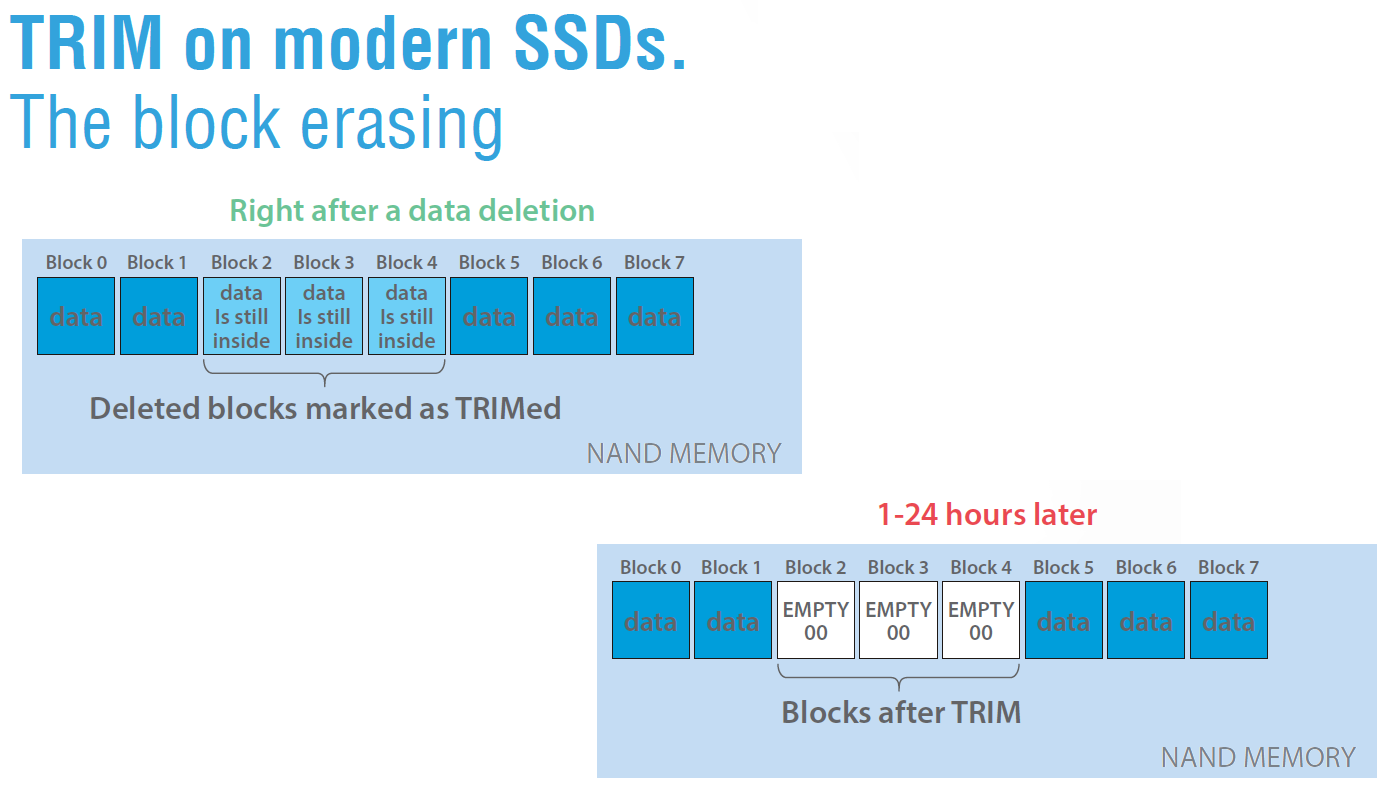
To prevent such slow processing, SSD developers decide to add a TRIM command (a garbage collector) which in the background erases all data that was marked as deleted. It helps to save time in the future, when user decides to write new data in the place which was already TRIMed and cleaned. How the SSD knows which data should be TRIMed? Well, Operating System tells the drive which data was marked as “deleted”, and SSD simply erases the blocks which belong to deleted areas.
Scheme of TRIM activity
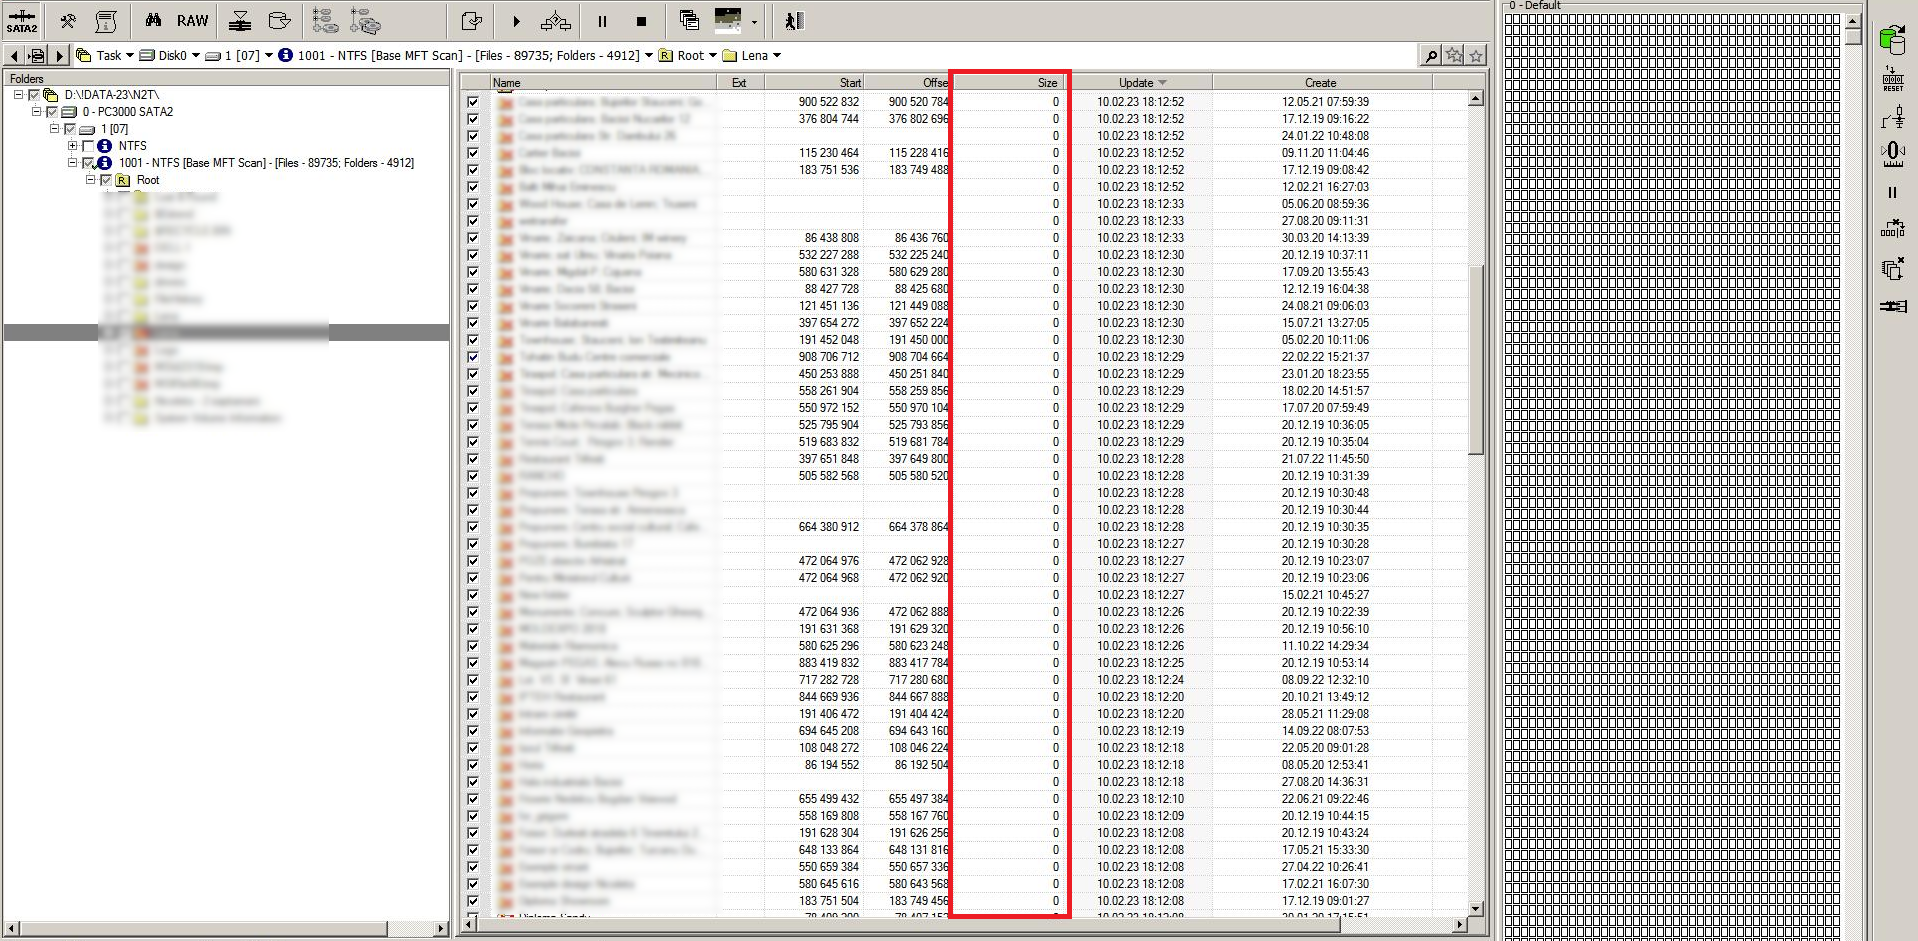
Zero size of TRIMed folders in DE
Sometimes the SSD can do even a more easier thing – in case of fast formatting, the SSD simply erases the translator – main microprogram which addresses physical to logical sectors. As a result, the SSD returns only ZEROES on attempt to read any data from it (new logic translator doesn’t know anything about old physical data, so it “reads” just zeroes).
The same thing digital cameras can do with mSD, SD and CF cards when you format them via Digital Camera by mistake. And in RAW recovery you can’t find anything because the translator has been erased, and the new version of translator also doesn’t care about any old data.
In such case, we are using the PC-3000 Flash and our method to read the NAND memory from mSD/SD and reconstruct the image. Then it would be possible to see the data in RAW and sometimes even build an image with complete or partial folder structure.
But for SSDs chip-off doesn’t work because all modern SSDs contain full hardware encryption or adaptive XOR with data compressing, so we will not see any data inside of the NAND before decryption.
Remember the old good days when customer brings you a formatted HDD and asks for recovery? Just a few buttons clicks in DE, and you’ve got a complete folder structure and a dozen gigs of data in RAW.
Unfortunately, these days are gone, because even classic Hard Disk Drives based on Shingle Magnetic Record (SMR) technology are also using the TRIM! As a result, after a fast formatting, the translator becomes erased, and you will get only zeroes instead of real data.
But let’s return to SSDs. Formatted SMR recovery would be another topic for the future blog article 🙂
So, let’s imagine that the customer did a format of his SSD by mistake, and now he wants to recover data. Will it be possible to do? It depends on such things as: drive capacity, number of data written on the drive, etc. Usually, it takes from 10 minutes to 24 hours before the drive will completely erase the data in the background.
Modern SSD controllers have a multicore structure, which allows them to do a few things at the same time. For example – when you’re trying to scan the drive and find at least something in RAW using the Data Extractor, another CPU core will continue the background process and all data will keep being erasing.
The main thing you should remember – drive is TRIMing the data, even if it’s simply plugged to a power supply source! If you disconnect the SATA based SSD from SATA cable – it will not help you because the CPU will keep erasing in the background.
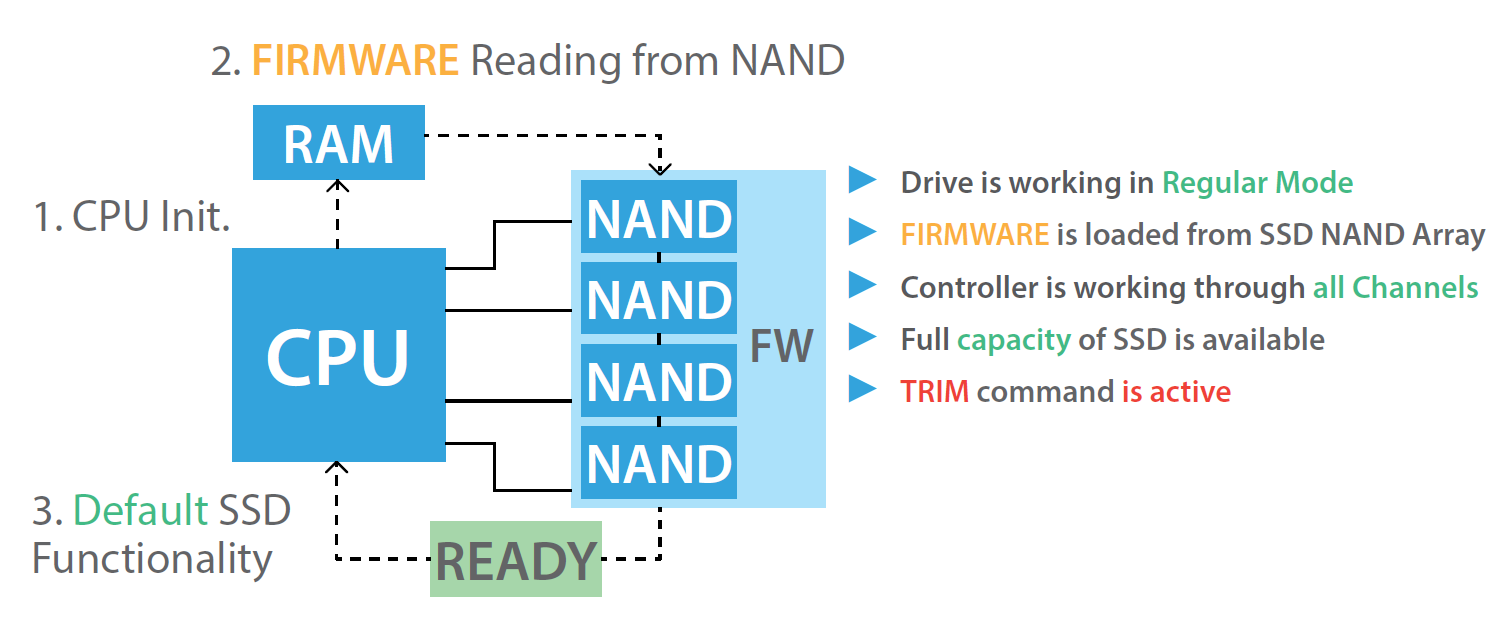
Default drive initialization and processing
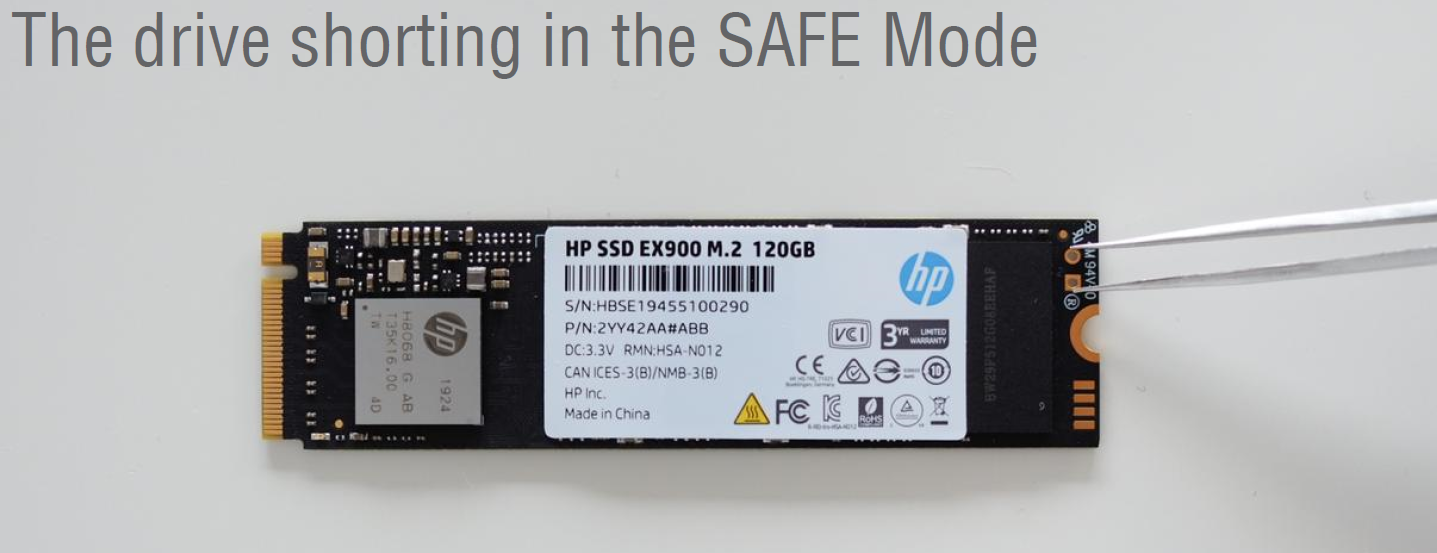
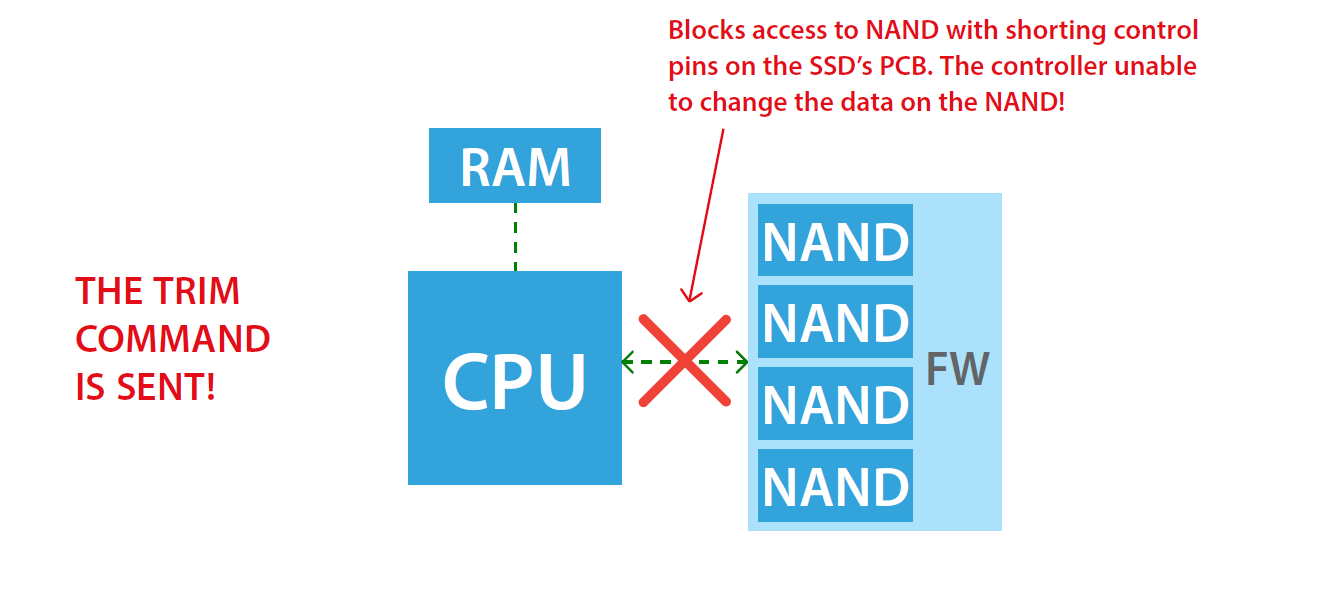
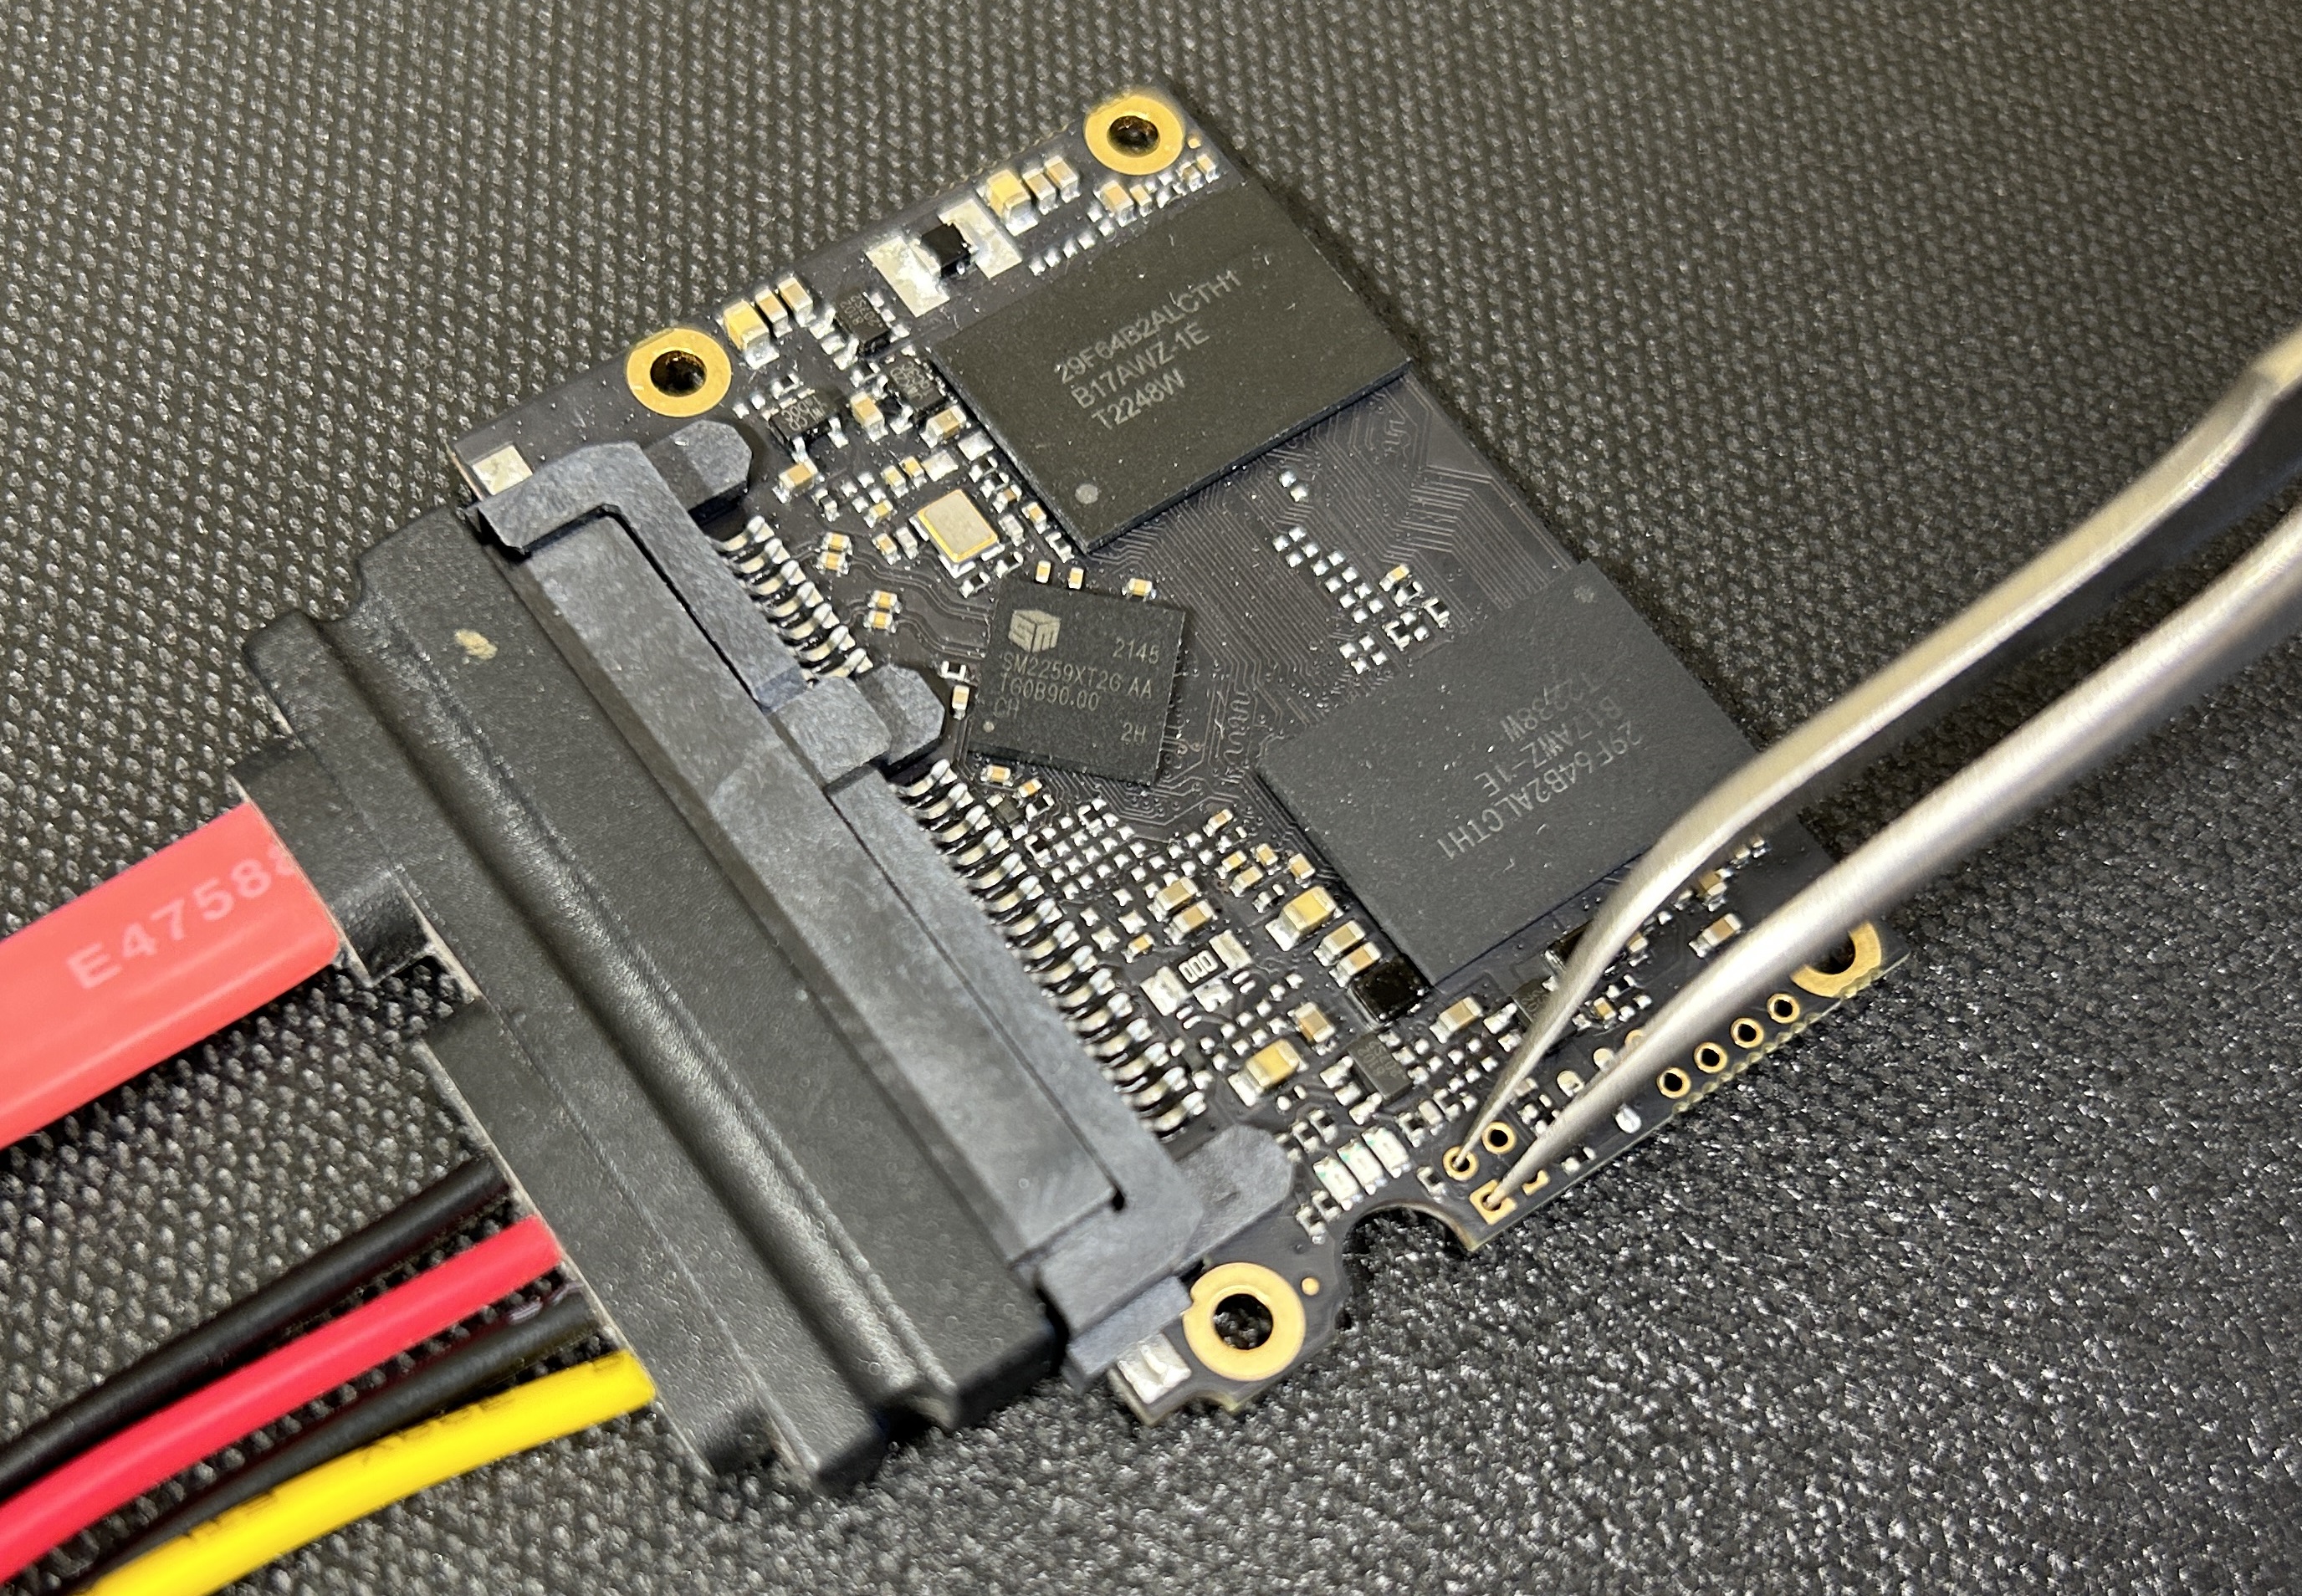
The only way to prevent the TRIM – disable access from CPU to NAND chips! How we can do that? The only way is to short the drive in SAFE MODE – it will help us to disable any access to the NAND chips and will keep the drive to be operating in CPU-RAM mode only. So, we could write something in RAM or read info from RAM chip, but it would be impossible to influence the NAND chips.
Example of SAFE MODE shorting on HP EX900 M.2 NVMe drive
Scheme of SAFE MODE on any SSD
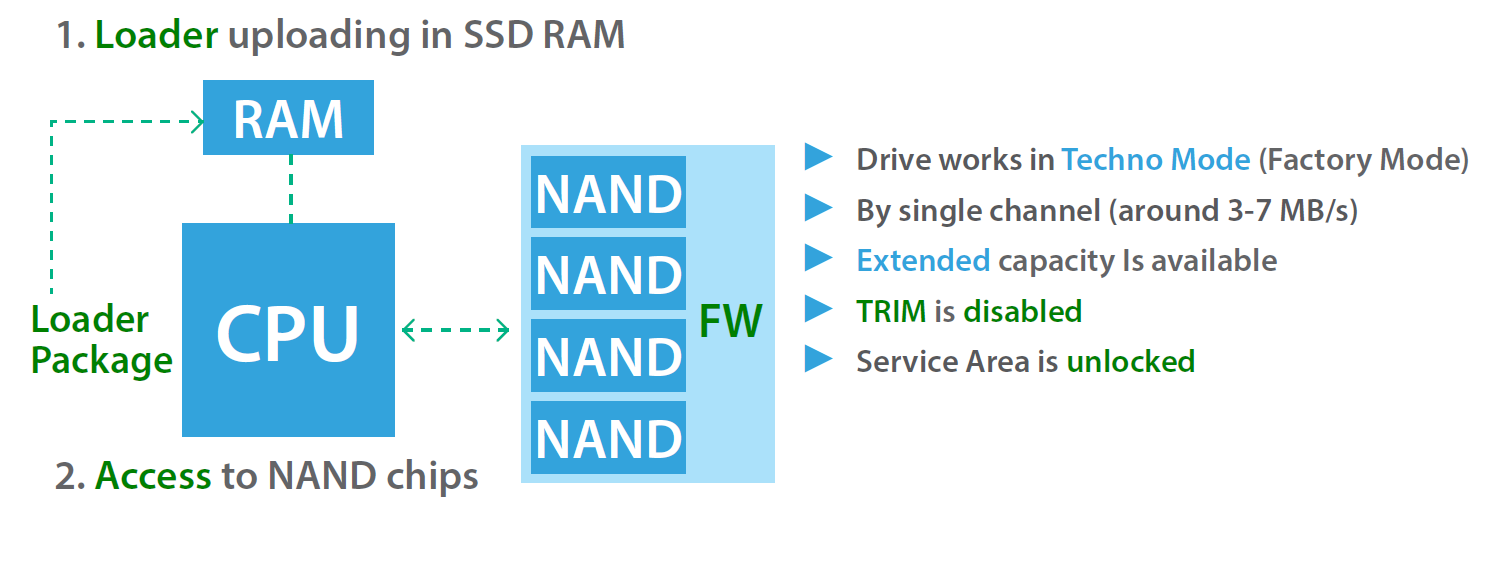
Now, we need a Loader – a specified and optimized small firmware which was made by ACELab developers. It’s something like a tiny Firmware compatible with the target controller, where ACELab developers completely switched off all background activities and unlocked some additional features which had previously been locked. If we have a compatible Utility, we can try to load the loader into the drive RAM, and get access to the Techno Mode of the current SSD. Then – try to rebuild the translator using an old copies of it, and upload it into the drive RAM. After that, we could try to access the data in Data Extractor using a custom loader that we did before. In this case, drive will work in a single-channel mode – slowly, but without any background activity.
Scheme of Techno Mode after the Loader uploading
Now let’s summarize the information:
- TRIM works very fast. If something was deleted or drive was formatted, you got just a few minutes before the data will be gone forever;
- Do not plug the drive to a power source! Any drive connection for further researching (via SATA, M.2, USB, etc) will be a cause of TRIM functionality in SSD CPU!
- Target drive MUST BE SUPPORTED by the PC-3000 SSD. If it’s not supported, we can not disable the TRIM or prevent the data erasing;
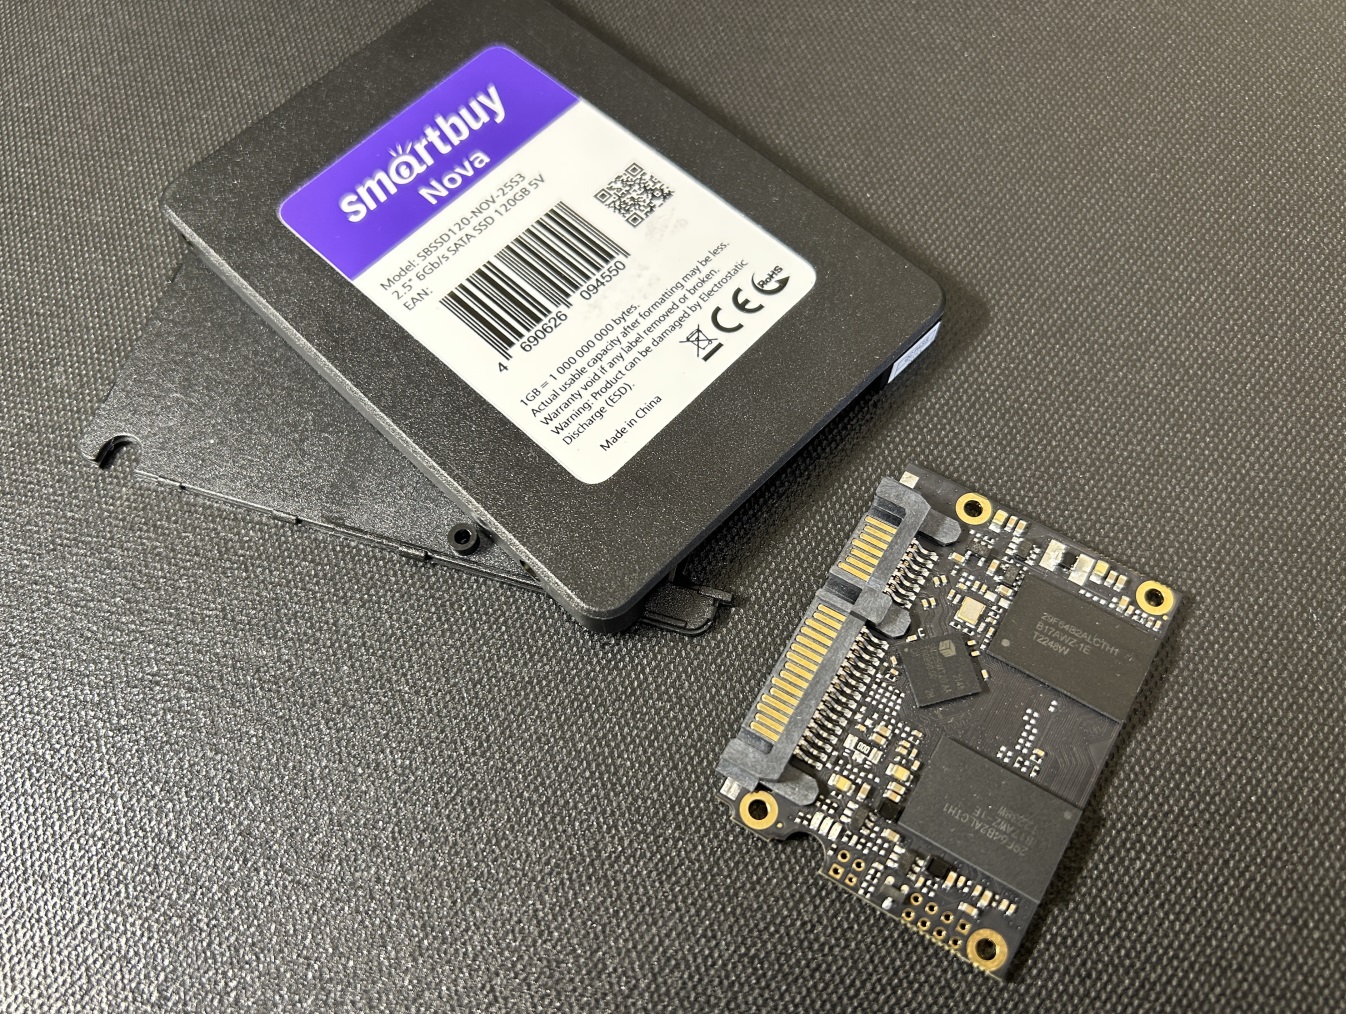
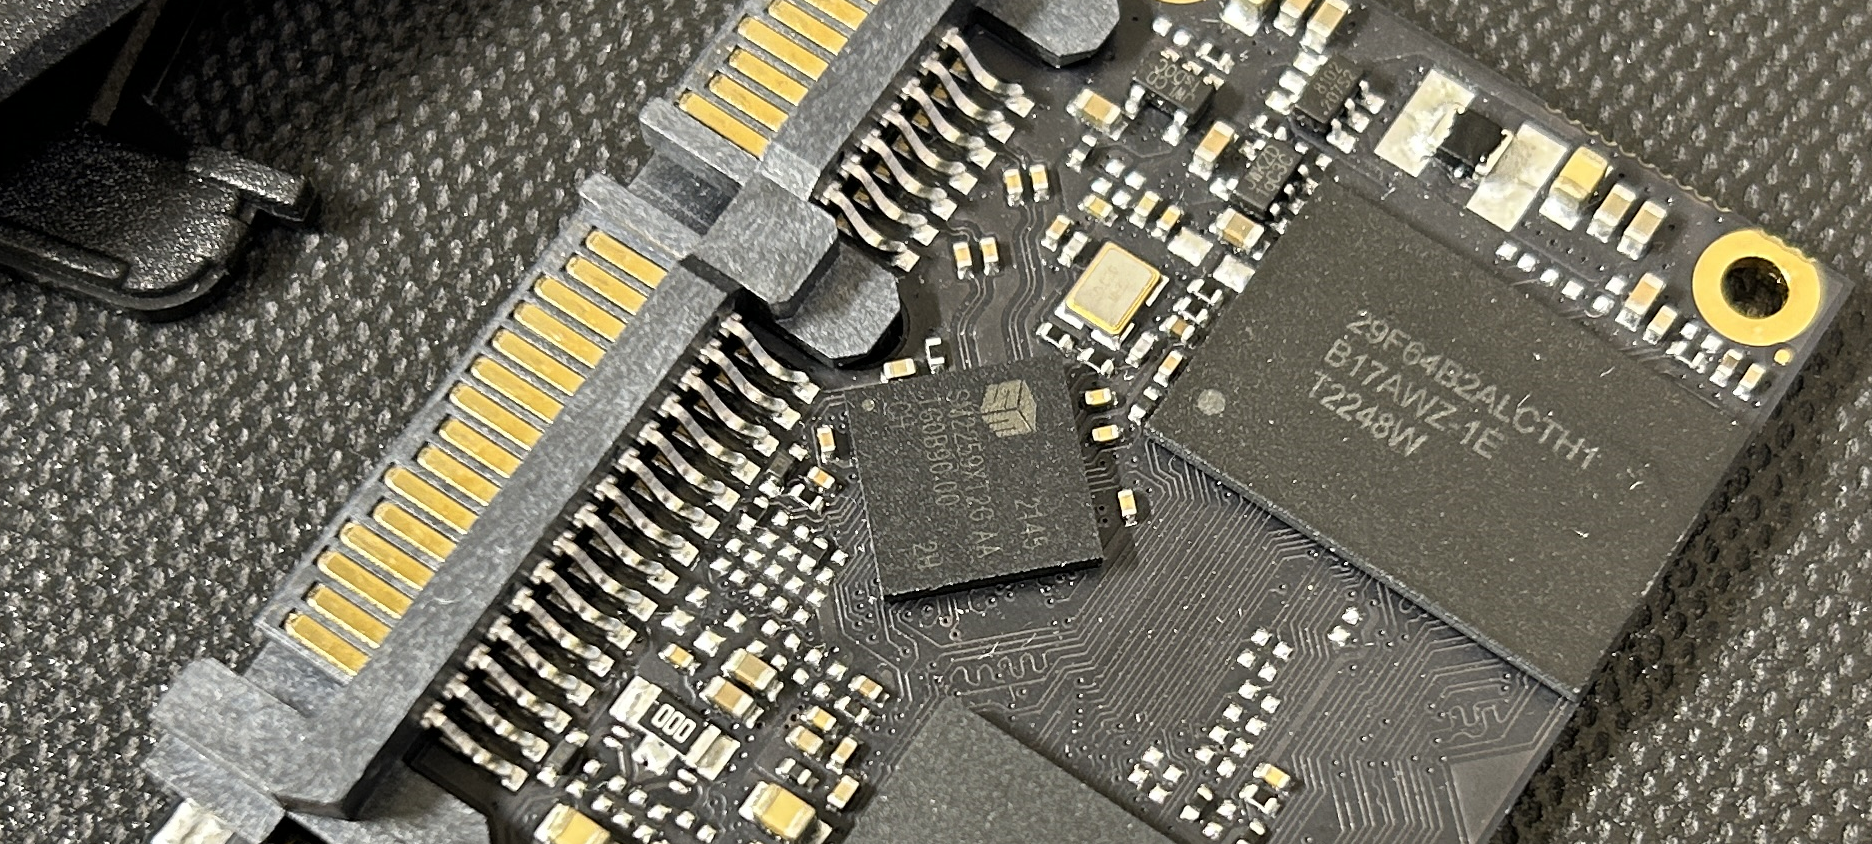
To demonstrate how it’s working, let us show you one real life example. We got here a noname (SmartBuy NOVA) drive based on SM2259XT controller and two NAND chips made by Intel/Micron.
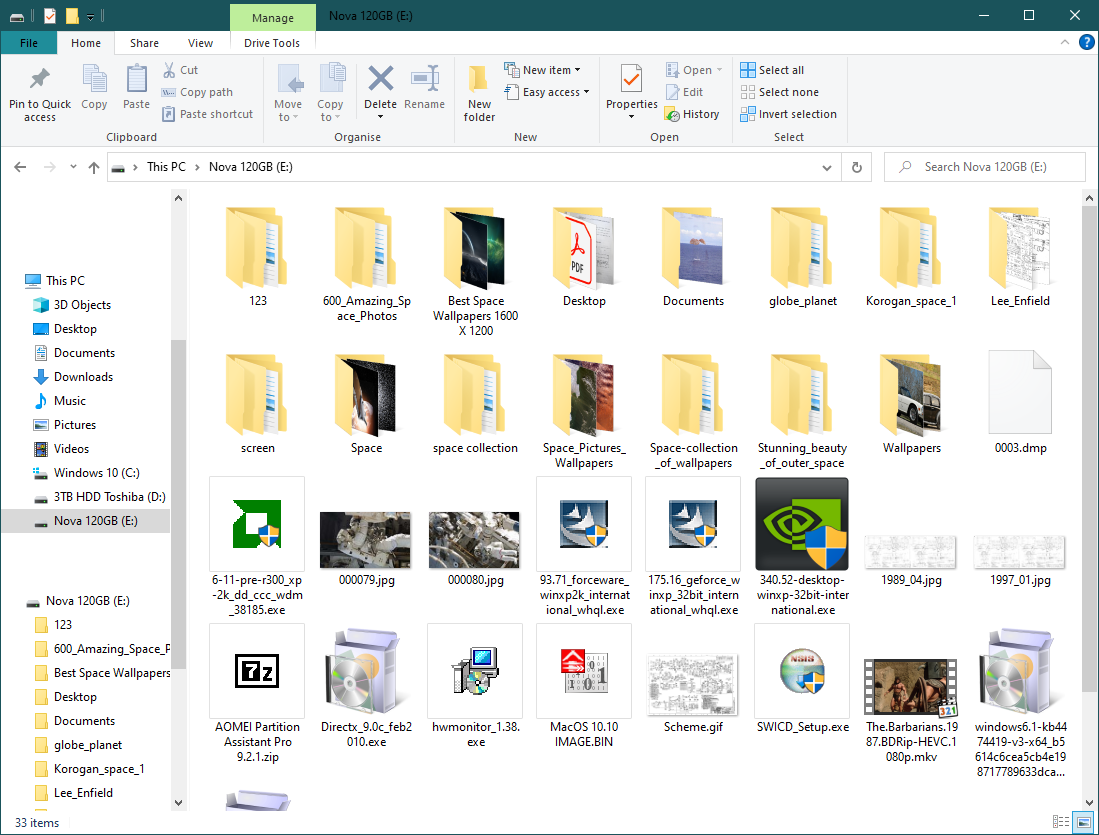
We are checking the content on this drive, and it is full of user data. Some videos, pictures, documents – everything what a random customer is using daily.
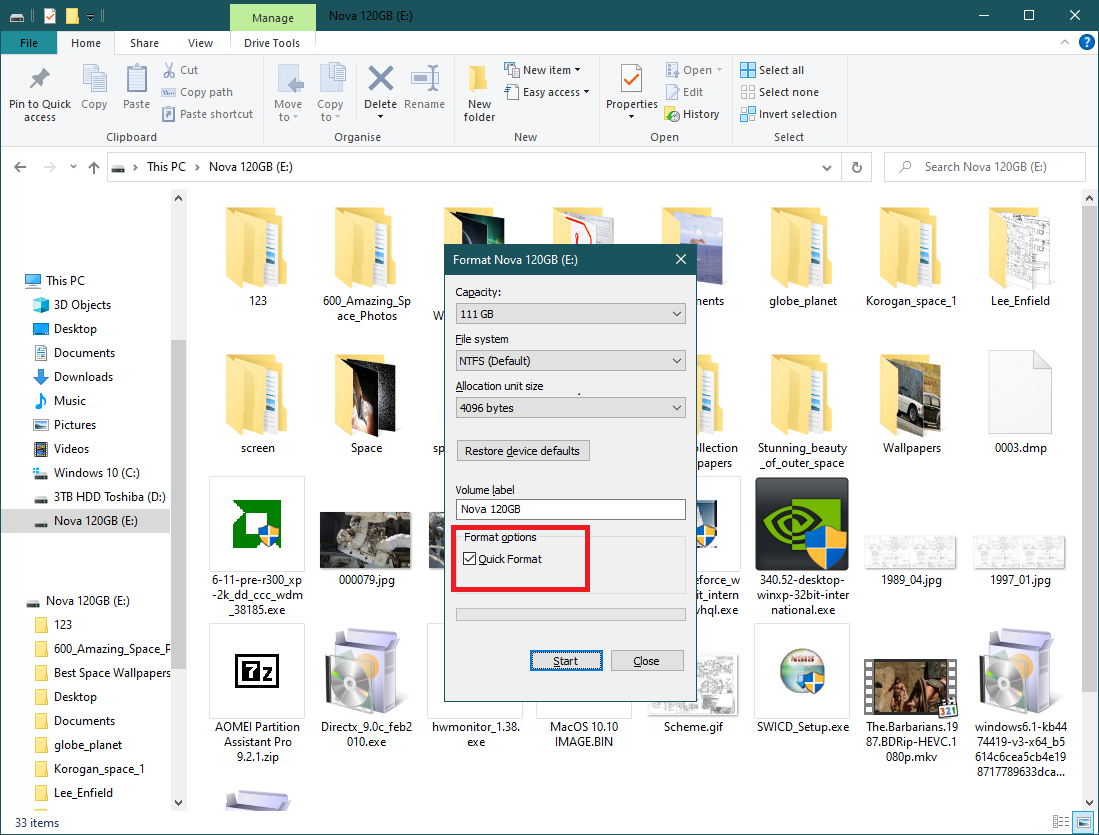
Now, let’s try to format this drive with a quick format button on Windows;
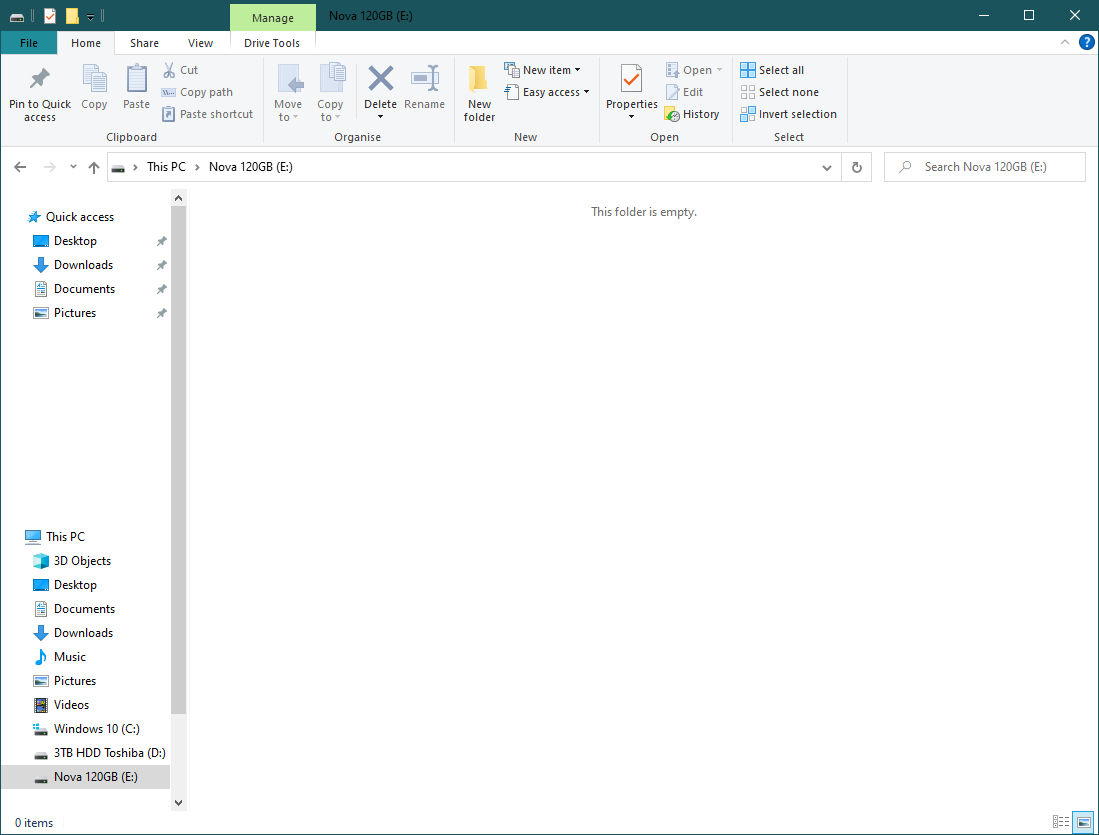
As you can see, data was gone.
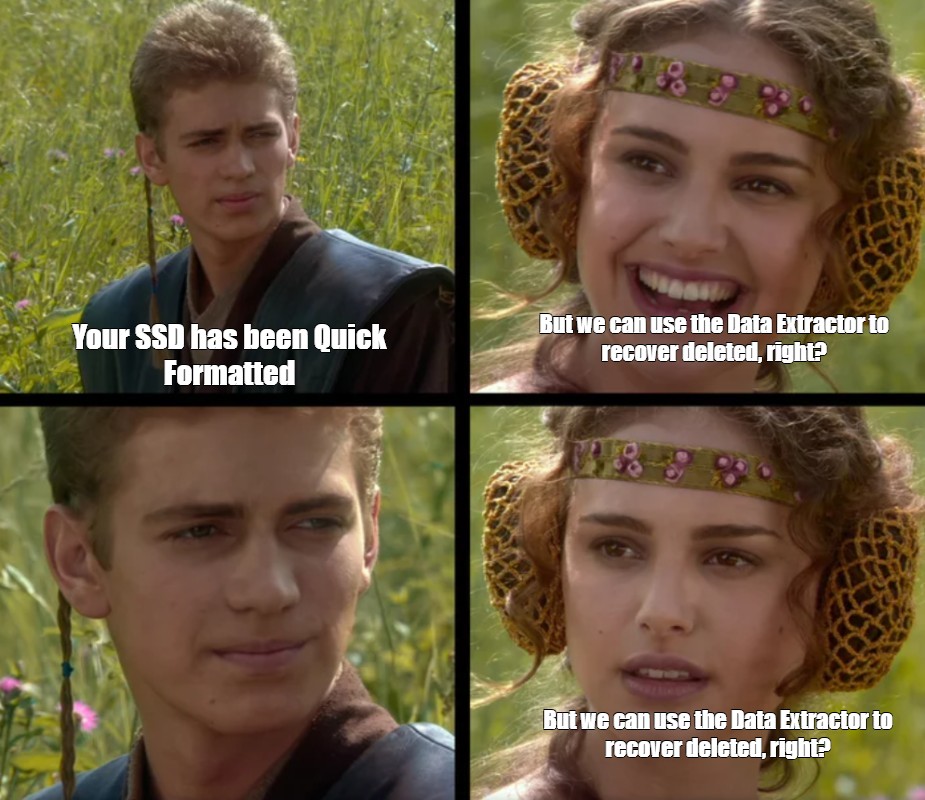
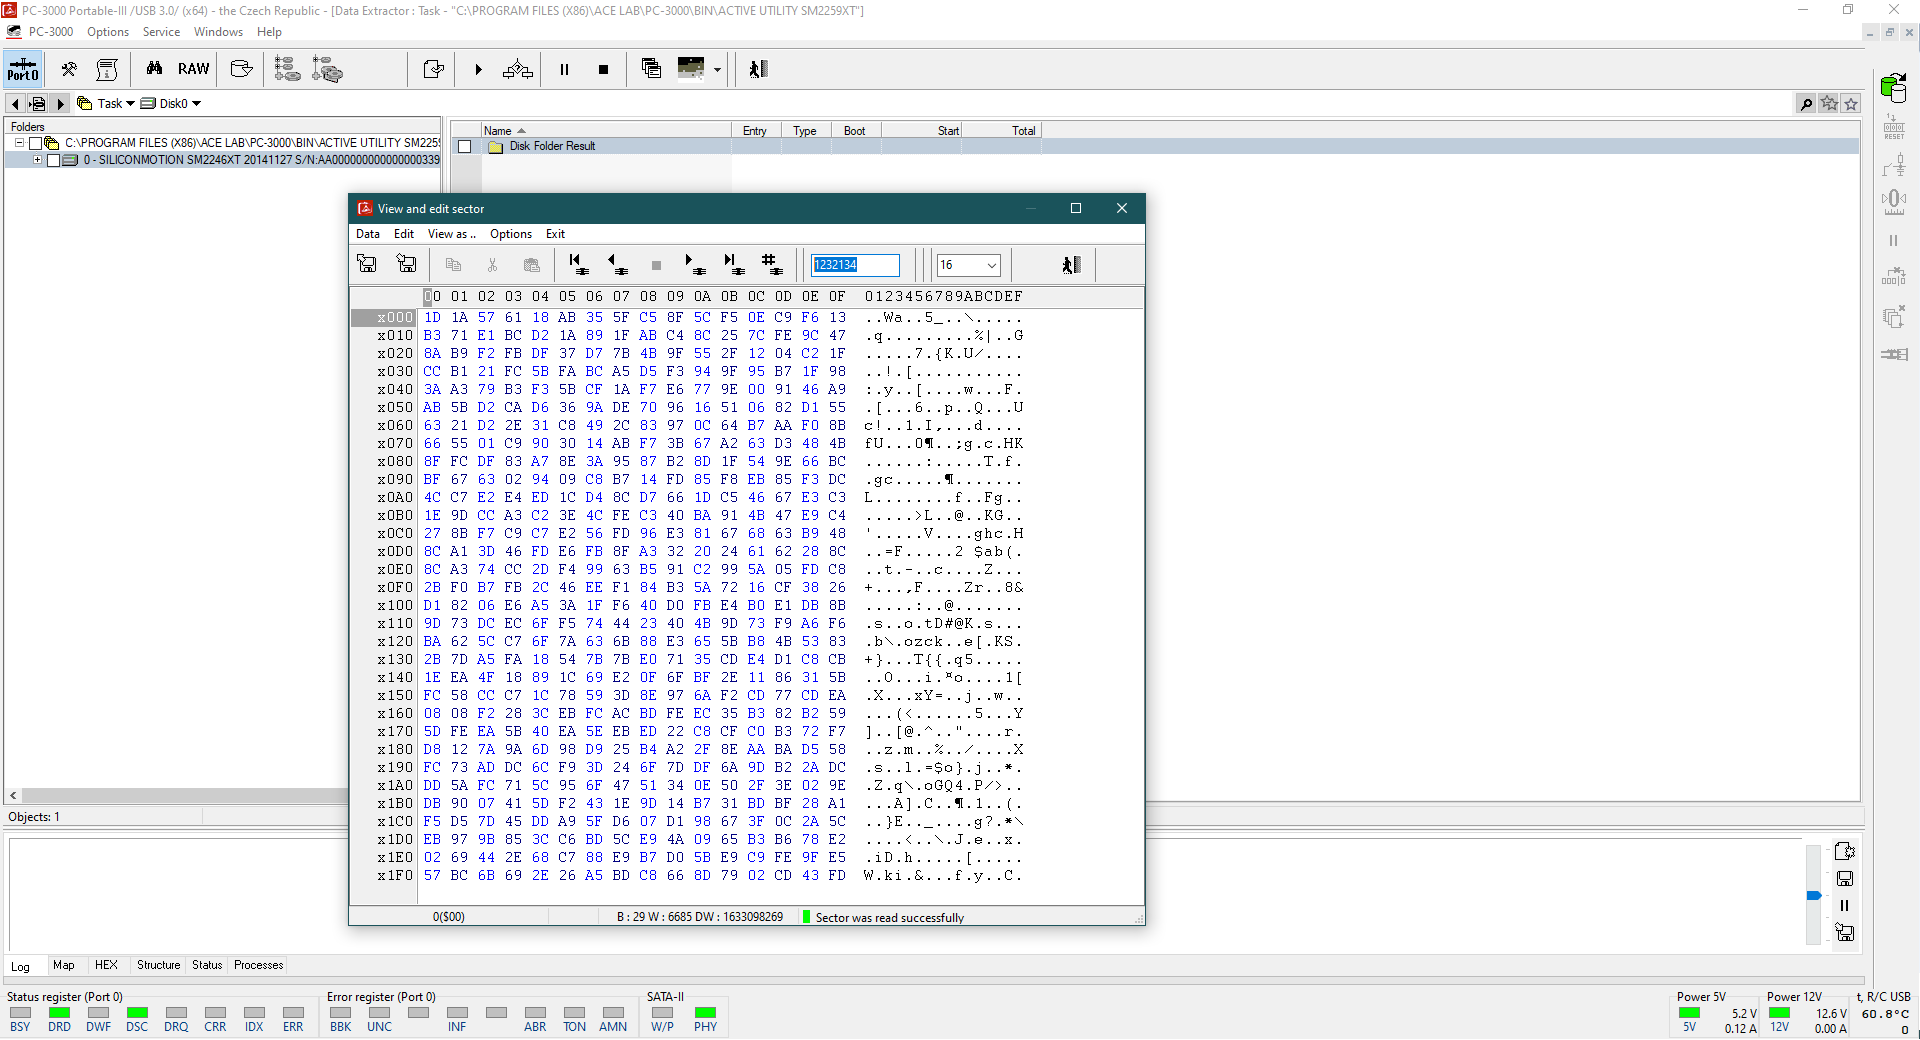
In the Universal Utility and in the Data Extractor we will see only zeroes, because DE is using the native drive translator – and it’s a new one which was made after a quick drive formatting.
Zeroes instead of data in Universal Utility in LBA 1 232 134
Empty partition after the drive formatting
RAW doesn’t have any old data – just a new NTFS records after partition formatting
We don’t have much time now, because the more we scan the drive, the more blocks will be erased in the background. We need to be in a hurry to short the drive in a SAFE MODE – this trick will help us to disable the NAND chips from the CPU.
Now, let’s keep the drive to be shorted, because for Silicon Motion and Phison controllers, we need to repower them a few times during the drive initialization. The SSD has to be in a SAFE MODE all the time.
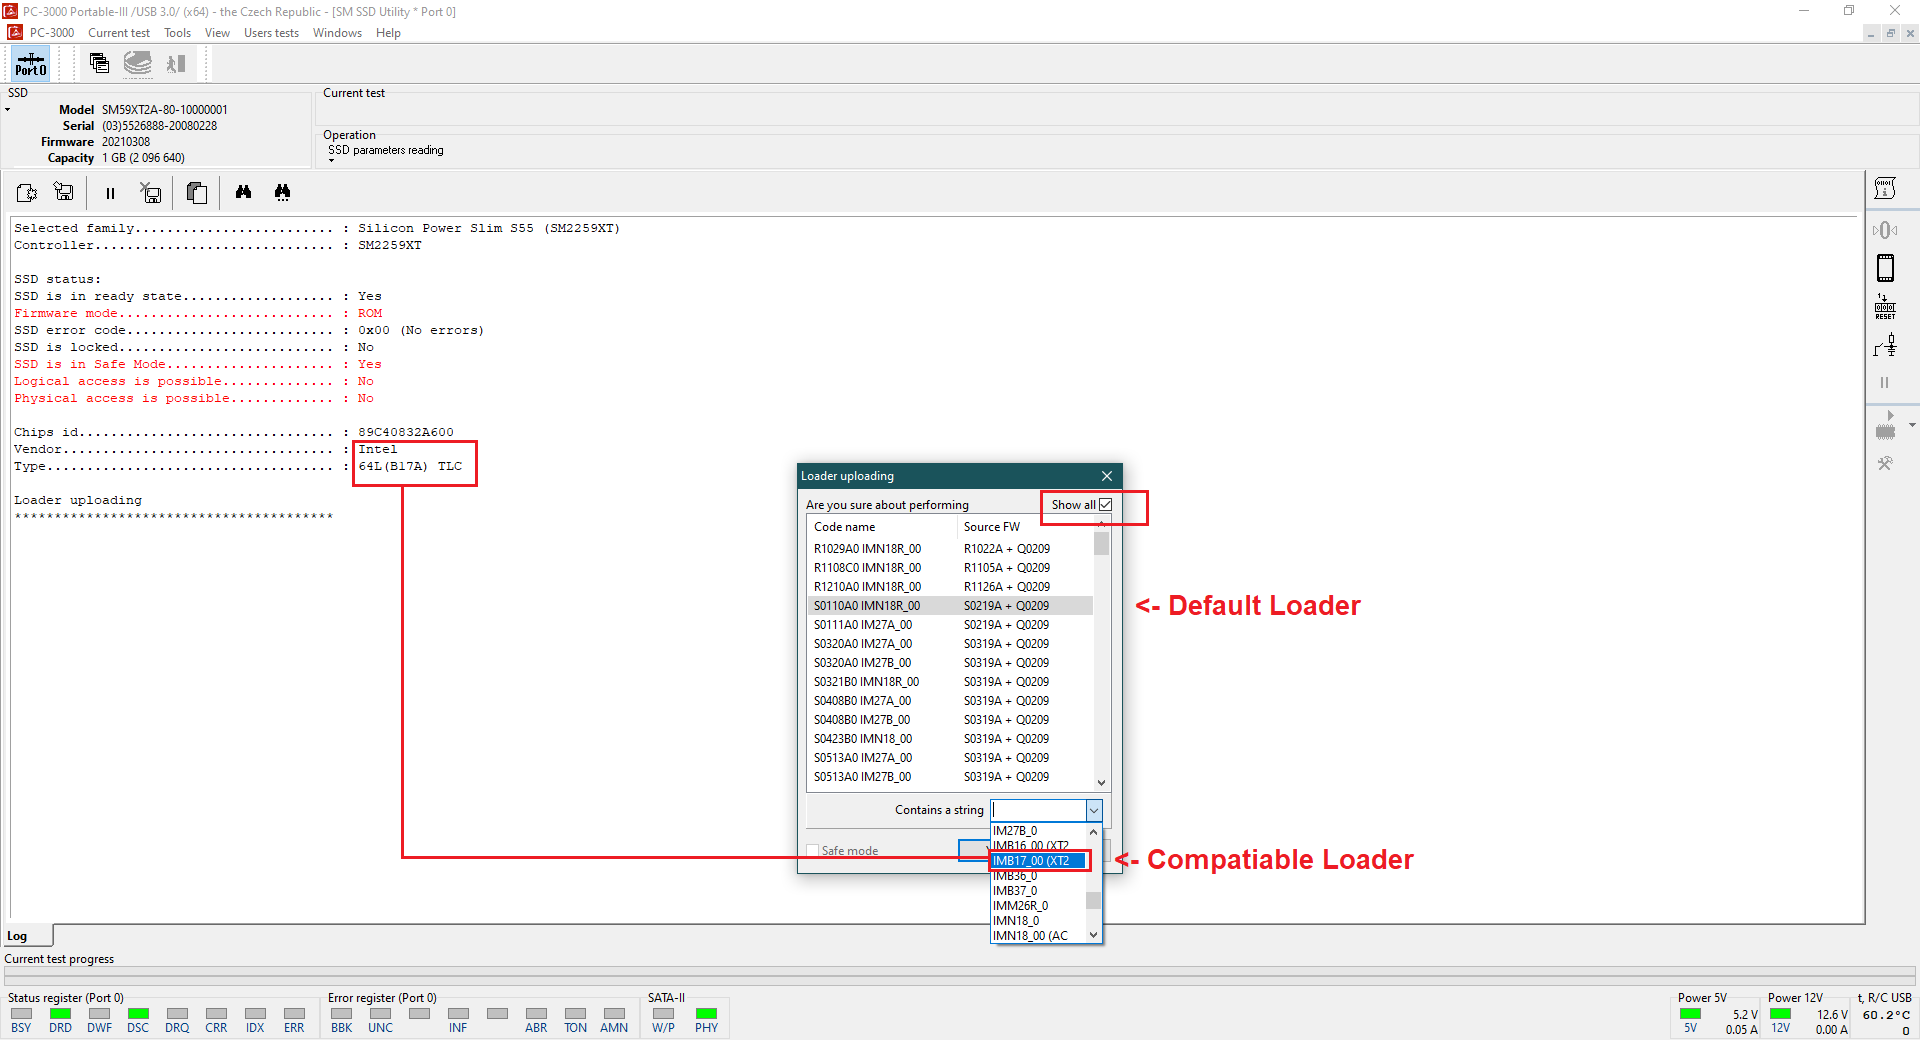
Let’s launch the compatible Utility for SM2259XT (for example – Silicon Power) and upload the loader for activating the drive extra functions.
Sometimes we need to select the compatible loader manually
When the drive will complete initialization, it will be possible to launch the translator building process. Drive will scan the Service Area, will take some important SA modules which contain information about reallocated, deleted, bad and good sectors, and will make a new translator in automatic mode.
Translator building is ready. Moving forward to the Data Extractor and making a new task using the PC-3000 UTILITY as a source.
When everything will be ready, before imaging the drive, let’s first check the LBA 1 232 134 which was filled by zeroes after drive format. Now, it contains data!
After the translator building, LBA 1 232 134 contains data, not zeroes!
And of course, we have to use RAW recovery to see the files. If we got some – let’s stop the process and start with the complete drive imaging. In case of some troubles with the drive, we still got a full content copy.
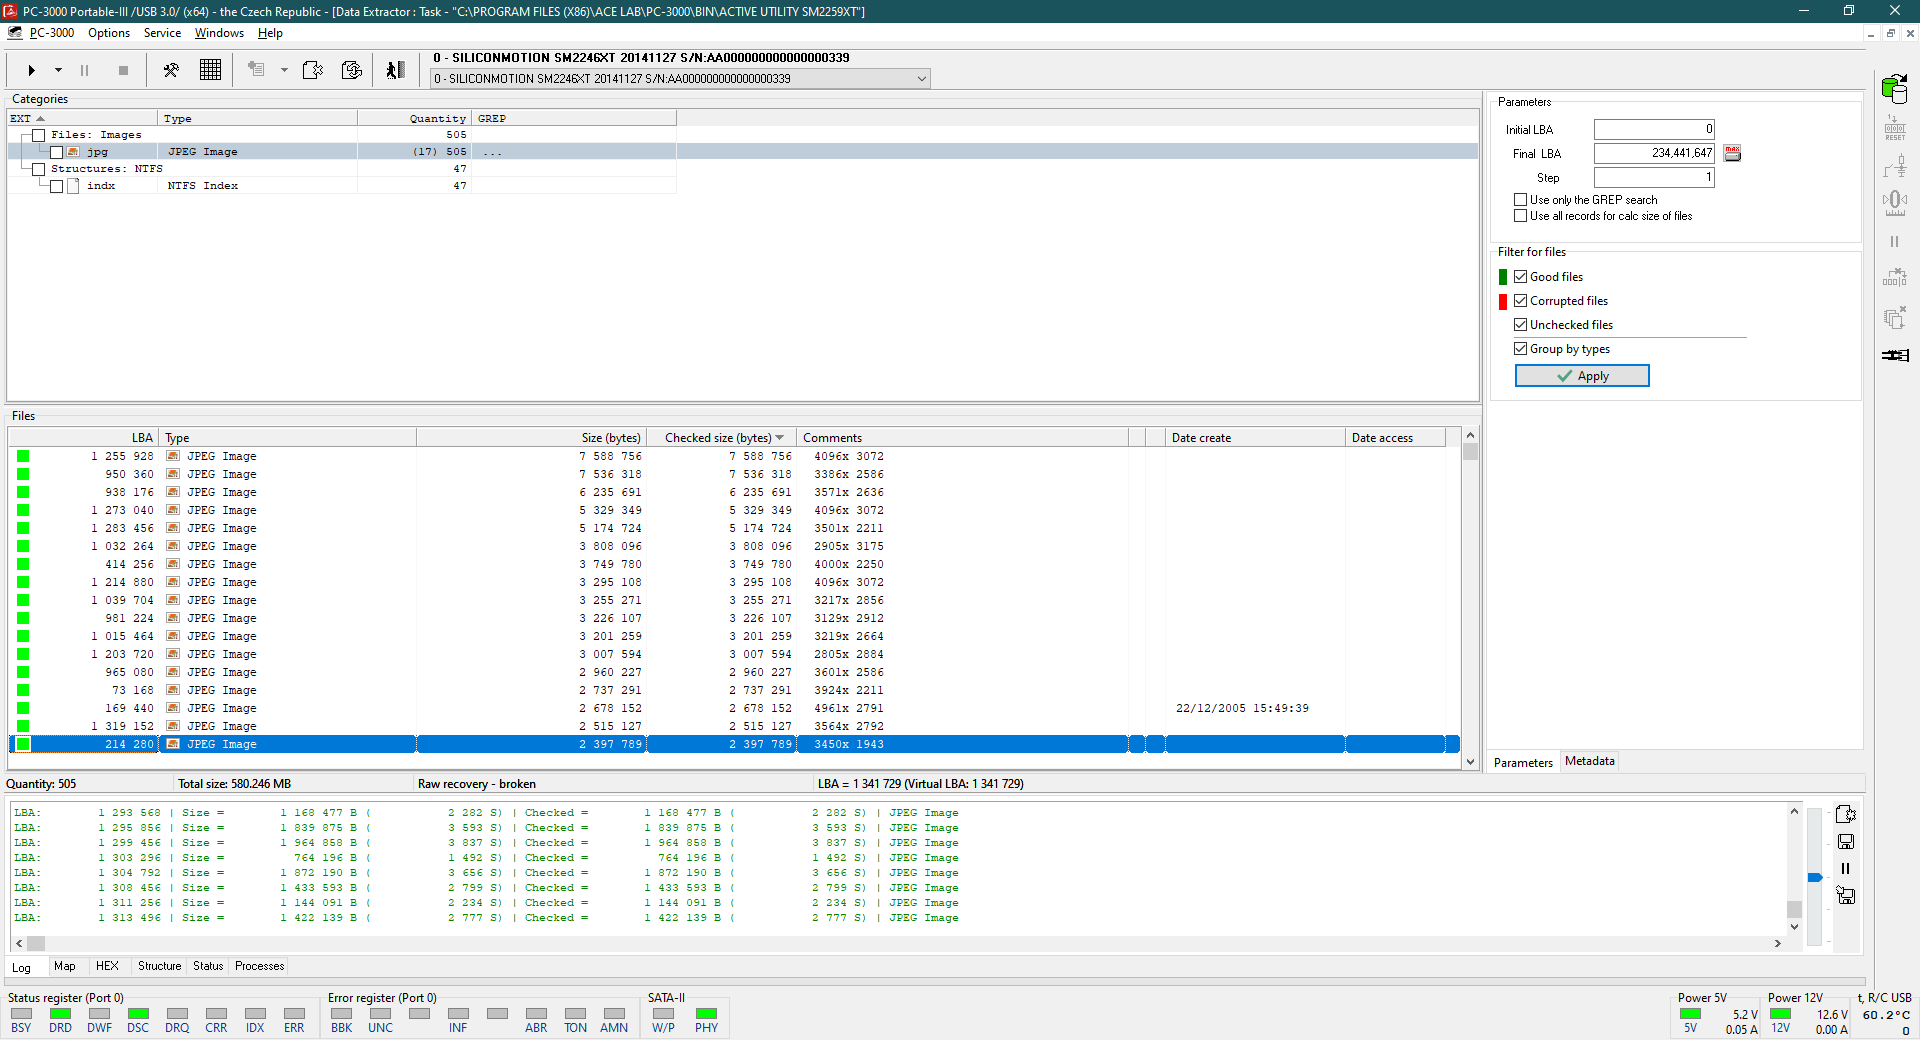
Now, in RAW we see a lot of data just after 1 000 000 LBA scanning!
Sector-by-sector copy to another drive for further analysis
When copying will be finished, let’s go back to RAW and will try to find something useful. As you can see, RAW is full of data! Unfortunately, sometimes the Folder Structure could disappear because the quick formatting overwrites Zero Block which includes information about Master Boot and BOOT sectors. Without this information File System will be absent.
Result after just 10% of RAW scan – lot of files are still on the SSD
But Data Extractor is a very powerful thing, and after disk analysis, even in case of drive formatting, it will be possible to find old copies of partitions, and recover them. Of course, it’s worse than a complete FS, but much better than just a RAW.
So guys, here it is! A large portion of information how you can use the PC-3000 SSD to prevent the TRIM. Let’s summarize the most critical information one more time:
- TRIM is switched-on by default in every OS and in every SSD since 2010;
- Data becomes TRIMed from 1 minute to 24 hours (depending on the drive capacity and amount of deleted data);
- Even a quick formatting will cause a translator erasing. All data will be displayed like ZEROES in the Data Extractor;
- The only way to prevent TRIM – switch off the drive from power source or keep it in SAFE MODE permanently;
- It’s still possible to recover data after deleting or SSD formatting, but the drive must be supported by the PC-3000 SSD!
If you have any questions regarding your data recovery cases, you’re welcome to address them to the Technical Support department.










 (8 votes, average: 4.00 out of 5)
Very useful article.
WOW guys that’s that a very good article! I appreciate the thoroughness of it and detailed explanations. Keep up the good work.
Thanks, Glen! We are glad that you find this article to be useful 🙂
That’s really interesting and informative
I appreciate this writup.
thanks a lot for this useful & valued info
what about the Disabling TRIM via Windows Command ? does it work to recover the data and stopping TRIM ?
TRIM command is useful for SSD health and your overall system speed. Also, I doubt that customers will switch it off by themselves (just in case if they will need a recovery) 🙂 Much easier for them would be to make a common data backup.
thank you
Hi I am from Iran
approximately one year ago we got a new HDD model of external Western Digital My Passport which was 2TB. Unfortunately, it was accidentally formatted (that was quick format not full format in Win 10).there was nearly 400 GB of data on that HDD and I say unfortunately we haven’t got any backup of that HDD. we tried to call many data recovery companies to explain what happened. They said unfortunately because of the TRIM feature it’s impossible to recover any data from this model of WD external HDD.some of them said that in the future the pc3000 devices will get updated. Then it’s possible to recover SSD or even this model of WD My Passport.
I am so stressed because of those lost data.it’s important to us to get recovery those files
please help us what we should do with this HDD?
Hello!
Well, it depends. Probably it is possible to recover such formatted HDD if not more than 1 hour since formatting passed and drive was not turned on after that. Otherwise, chances are going to be closer to zero.
Anyway, Western Digital My Passport which was 2TB is a trademark of the USB enclosure, good to know a real model name of the drive.
It allows understanding if it’s SMR or CMR technology drive. Based on that, we can say more detailed what an option exist for such a case (if they are).
Please note, if drive was encrypted (if it’s SED encrypted drive or/and was used software encryption – BitLocker/FileVault/and so on), the first thing which OS doing after format is a KEY erasing. So even if you know original user password / RecoveryKey, there is no possibility to reach previous decrypted files access ’cause there is no decryption key for that any more (it is overwritten by new one).
Hi
Good article!
I have one question. You said: “Data becomes TRIMed from 1 minute to 24 hours (depending on the drive capacity and amount of deleted data);”
Is it mean if capacity of ssd is smaller TRIMing function will perform faster/earlier then on drive with biger capacity?
Thank you
Correct + everything will depends on amount of data. If you delete all folders and files from 1TB SSD, TRIM will take more time than a couple files erasing on a small 128GB drive.
many thanks for this explaination
LMAO hope for more memes in the future in the articles haha
What an insightful article! Your explanation of bypassing TRIM with PC-3000 SSD is incredibly helpful. Thanks for sharing this valuable information. Looking forward to more enlightening posts from you. Keep up the great work!
A truly enlightening read! This article on bypassing TRIM with PC-3000 SSD offers clear insights into a complex process. The step-by-step guide is incredibly valuable, showing your expertise in the field. Thank you for sharing this valuable knowledge!
Thank you ace lab for such a insightful article!
Can we use PC3000UDMA for M.2 SSD or do we need to get PC3000 Portable?
Kindly explain.
Hello,
M.2 drves could be based on SATA and NVMe interface. PC-3000 UDMA/Express are able to work with M.2 SATA without any limitations. But if we are talking about M.2 NVMe, the only tool to deal with these PCIe drives is PC-3000 Portable III.
https://blog.acelaboratory.com/wp-content/uploads/2020/10/M.2.png
I found this article on bypassing TRIM with PC-3000 SSD incredibly informative! The step-by-step guide provided valuable insights into dealing with SSDs effectively. Your expertise in the field of data recovery is evident, and I appreciate your willingness to share this knowledge. Keep up the fantastic work, and thank you for contributing to the digital forensics community!
Thank you for your feedback!
This blog post on PC-3000 SSD and how to bypass the TRIM is a valuable resource for digital forensics enthusiasts and professionals. It provides essential insights into tackling TRIM, a feature in SSDs that can affect data recovery. The article offers practical guidance, enhancing our understanding of SSD data recovery techniques. It’s a must-read for anyone working in this field.
Thank you so much. Acelab is the only company in the world to achieve something impossible .Congratulations acelab developers.
Appreciation to the ACE Laboratory development team! Your SSD TRIM solution has been instrumental in recovering many cases for us. Keep up the excellent work, and thanks for your continued efforts in advancing data recovery technology.
Thank you for your kind feedback.
I appreciate the useful article.
Does turning off the TRIM function in the operating system—Windows, for example—avoid the trimming of the erased data from the SSD or SMR HDD that is connected to the system? If the answer is no, what is the OS’s TRIM function for?
Yes, but at the same time you are seriously slow down the speed of SSD operating. Moreover, the wear effect on NAND memory chips will be too high.
TRIM is switched ON by default, and most of the customers didn’t know what is TRIM. In theory you can switch it on your working PC to prevent the data erasing from SSD after deleting, but price for this would be a lower speed and a higher wear effect on the NAND.
The BEST SSD 2025 Acer FA100 256GB NVMe PCIe SSD is a budget-friendly option offering solid PCIe 3.0 speeds, ideal for light users upgrading from HDDs or SATA SSDs. Its compact M.2 design and quick boot times make it great for everyday tasks, though the QLC NAND and limited capacity may deter power users. A decent entry-level choice for basic needs, but consider higher capacities or TLC drives for better long-term performance.