


This part is a continuation of part 1.
We continue working with a RAID array and focus on the auto-detection functionality in Data Extractor RAID Edition.
RAID array parameters definition for user is tedious work that doesn’t need much creativity.
For this reason Data Extractor RAID Edition entirely automates the detection of RAID configuration for user.
Data Extractor RAID Edition solves the problem of detection and creation of RAID array for beginners.
Data Extractor RAID Edition supports two types of auto-detection:
– Auto-detection based on metadata.
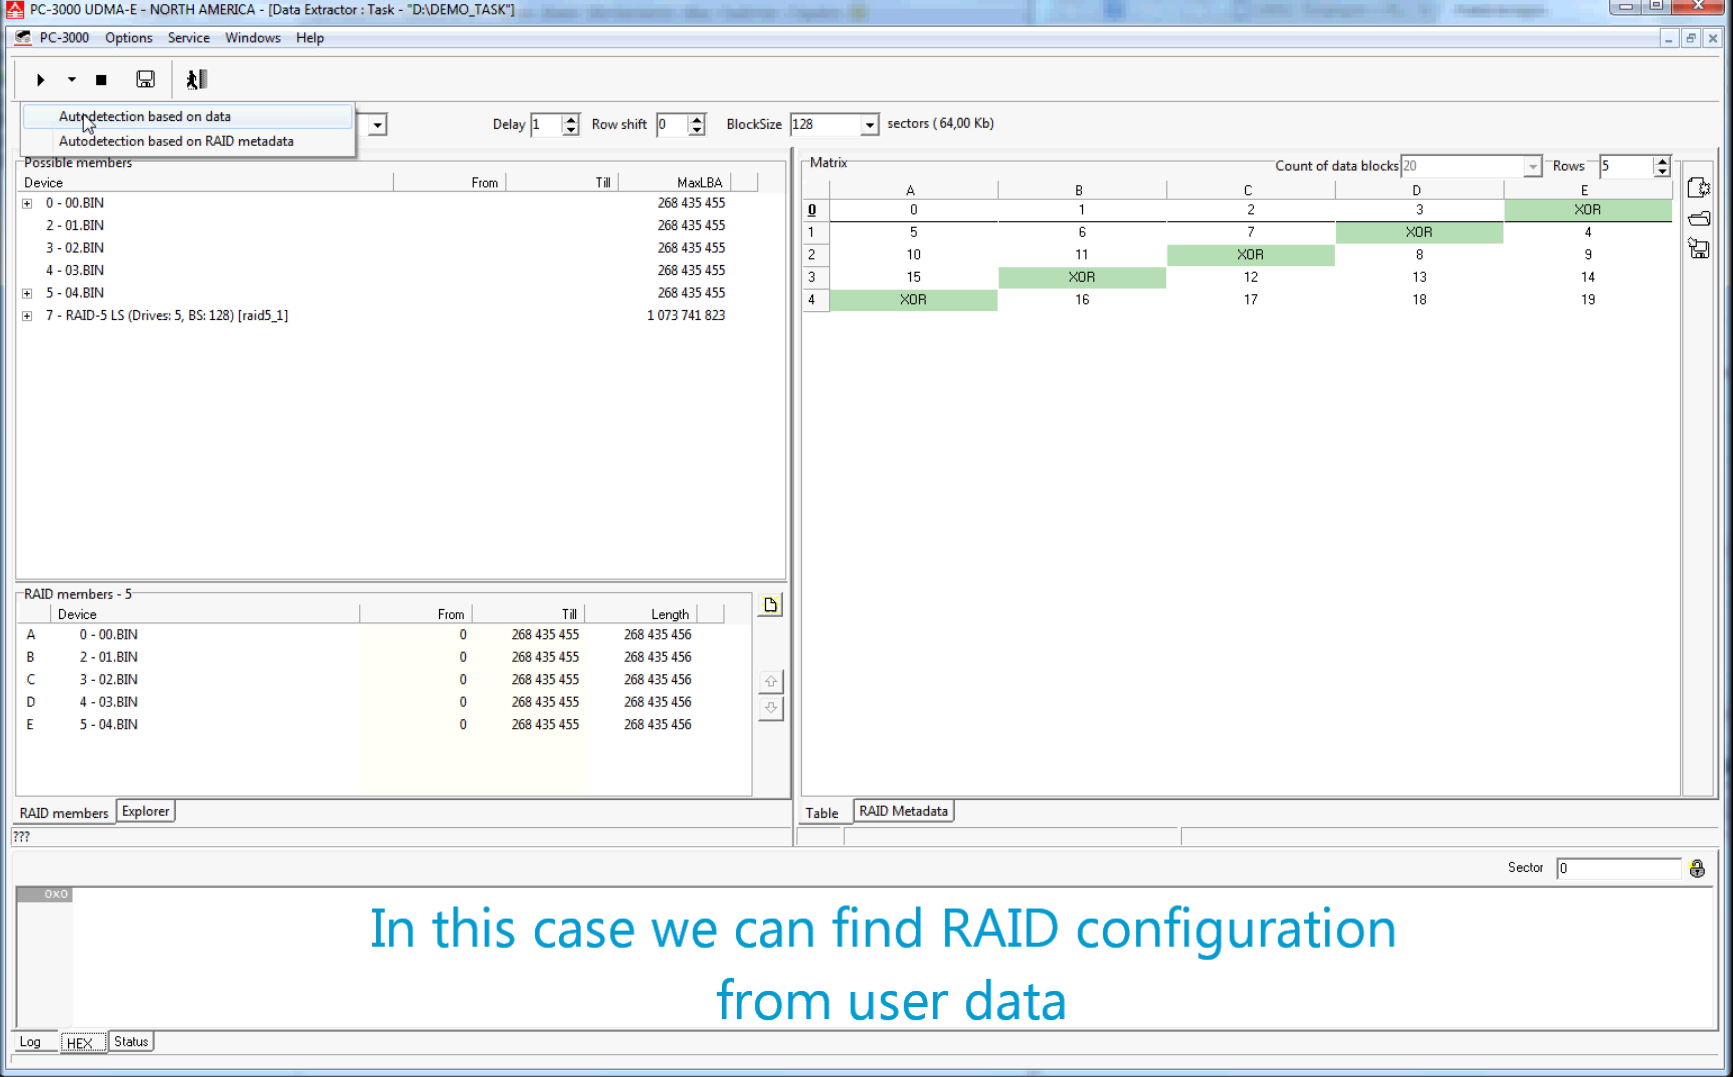
– Auto-detection based on user data.
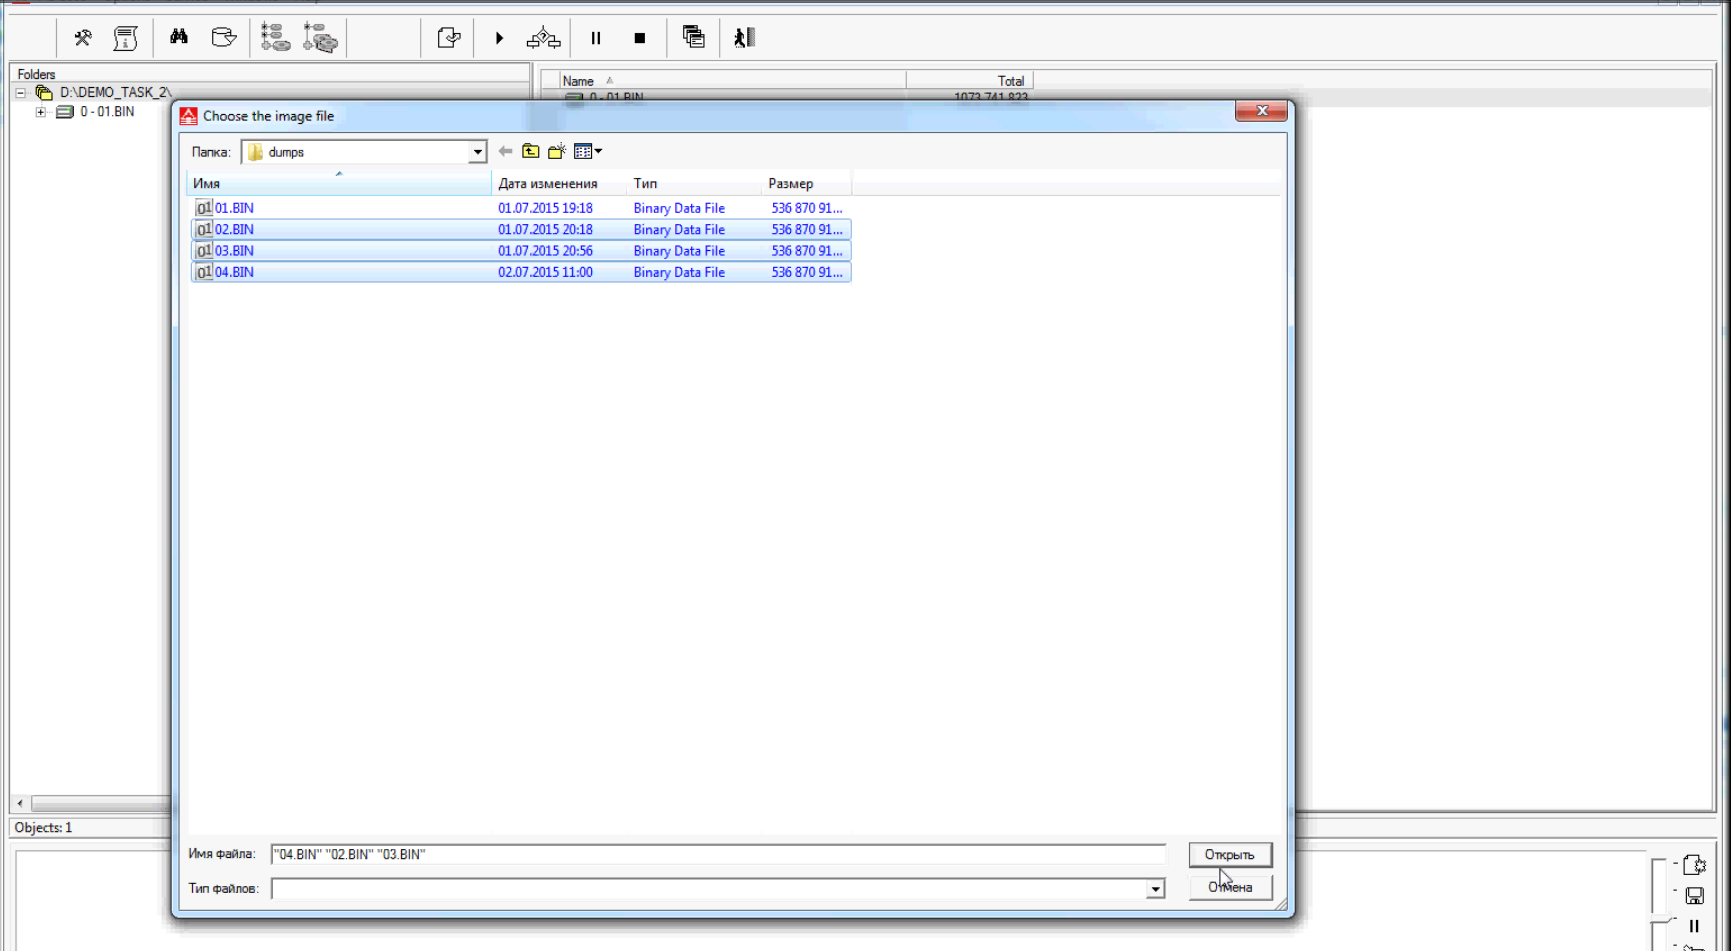
First you have to add all RAID members in the task.
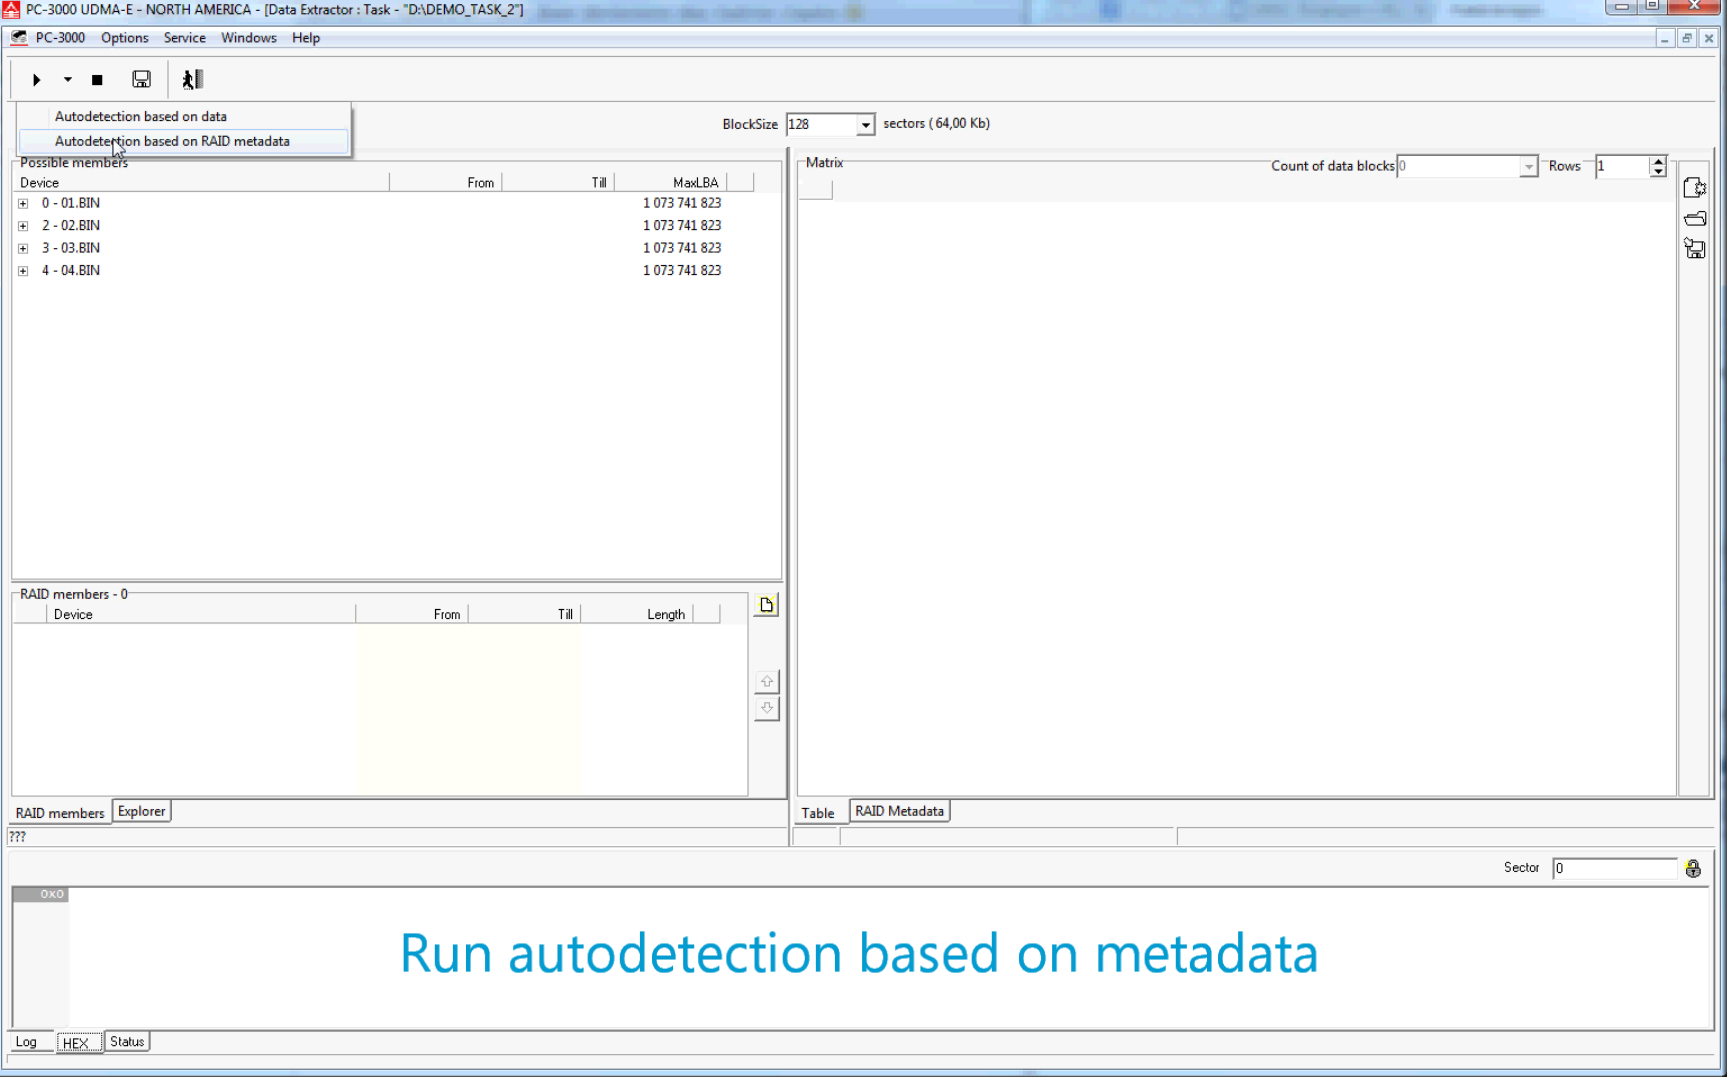
Run auto-detection based on metadata.
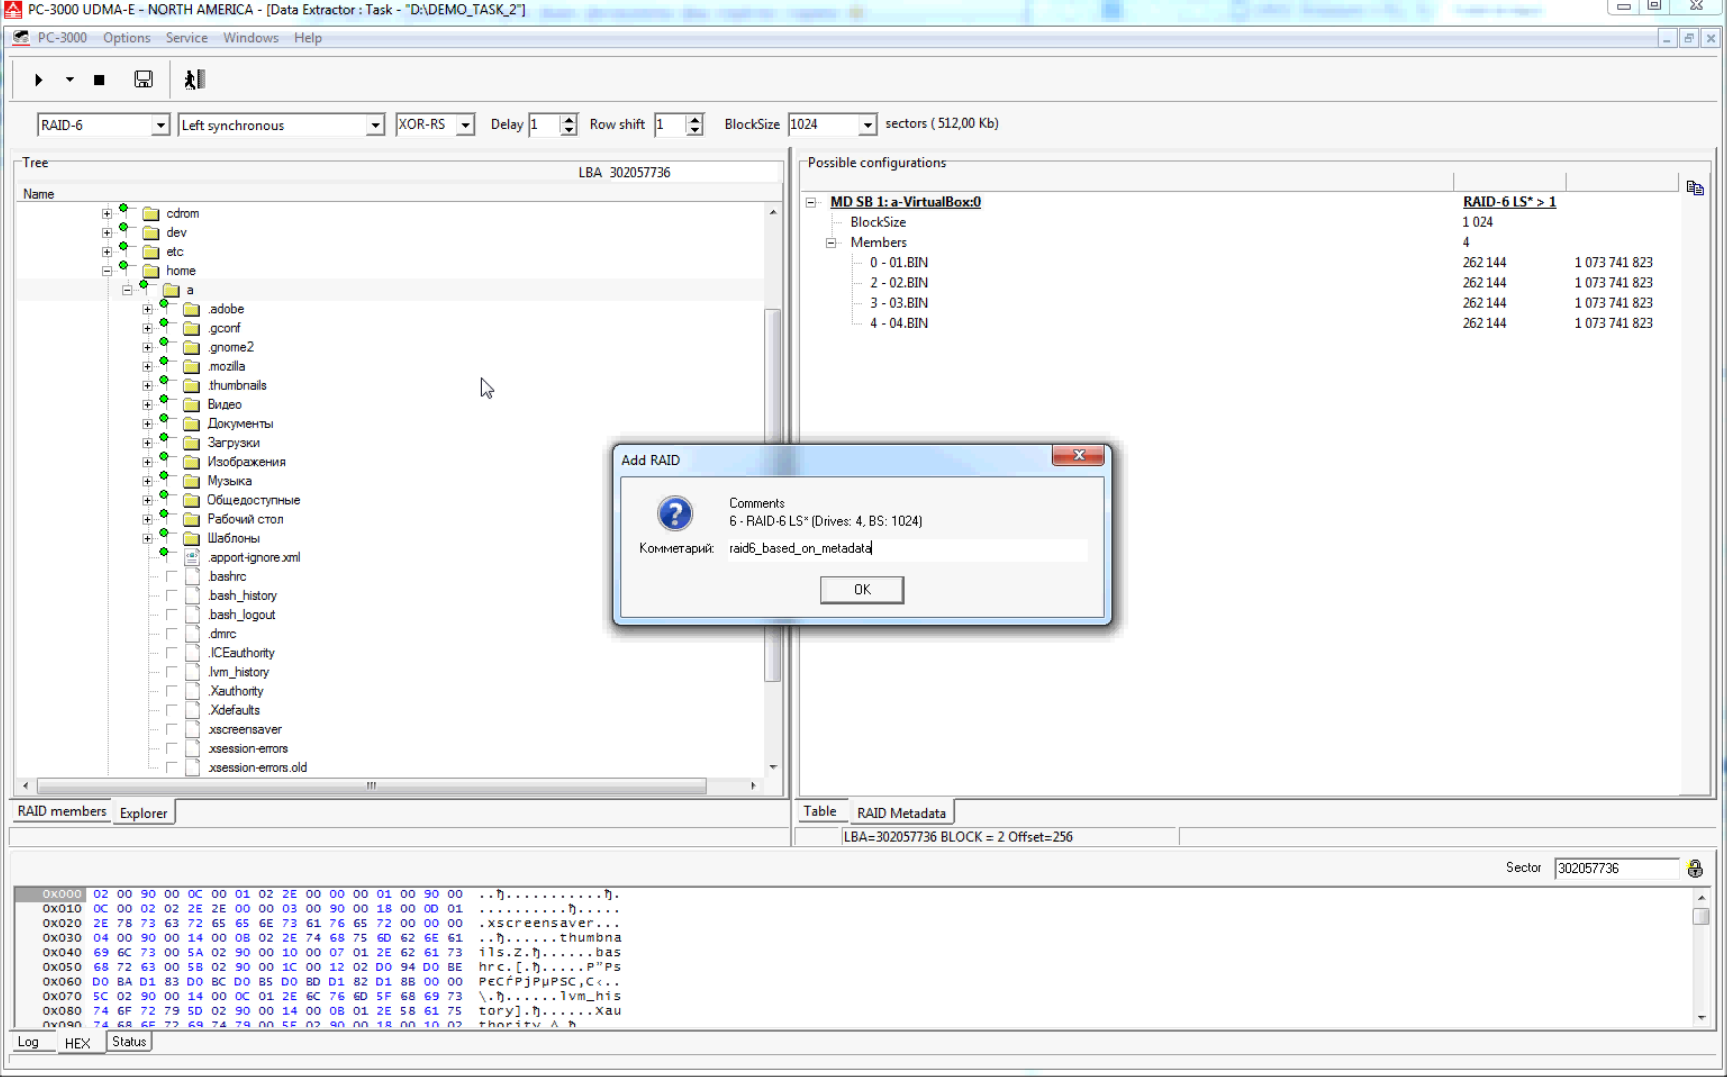
Edit found configuration.

Save the configuration.
Things to be note here:
Some RAID controllers don’t have metadata or metadata are damaged.
In this case we can run auto-detection based on user data. Data Extractor RAID Edition will try to find a RAID configuration with minimal error number.
Let’s see how it works:
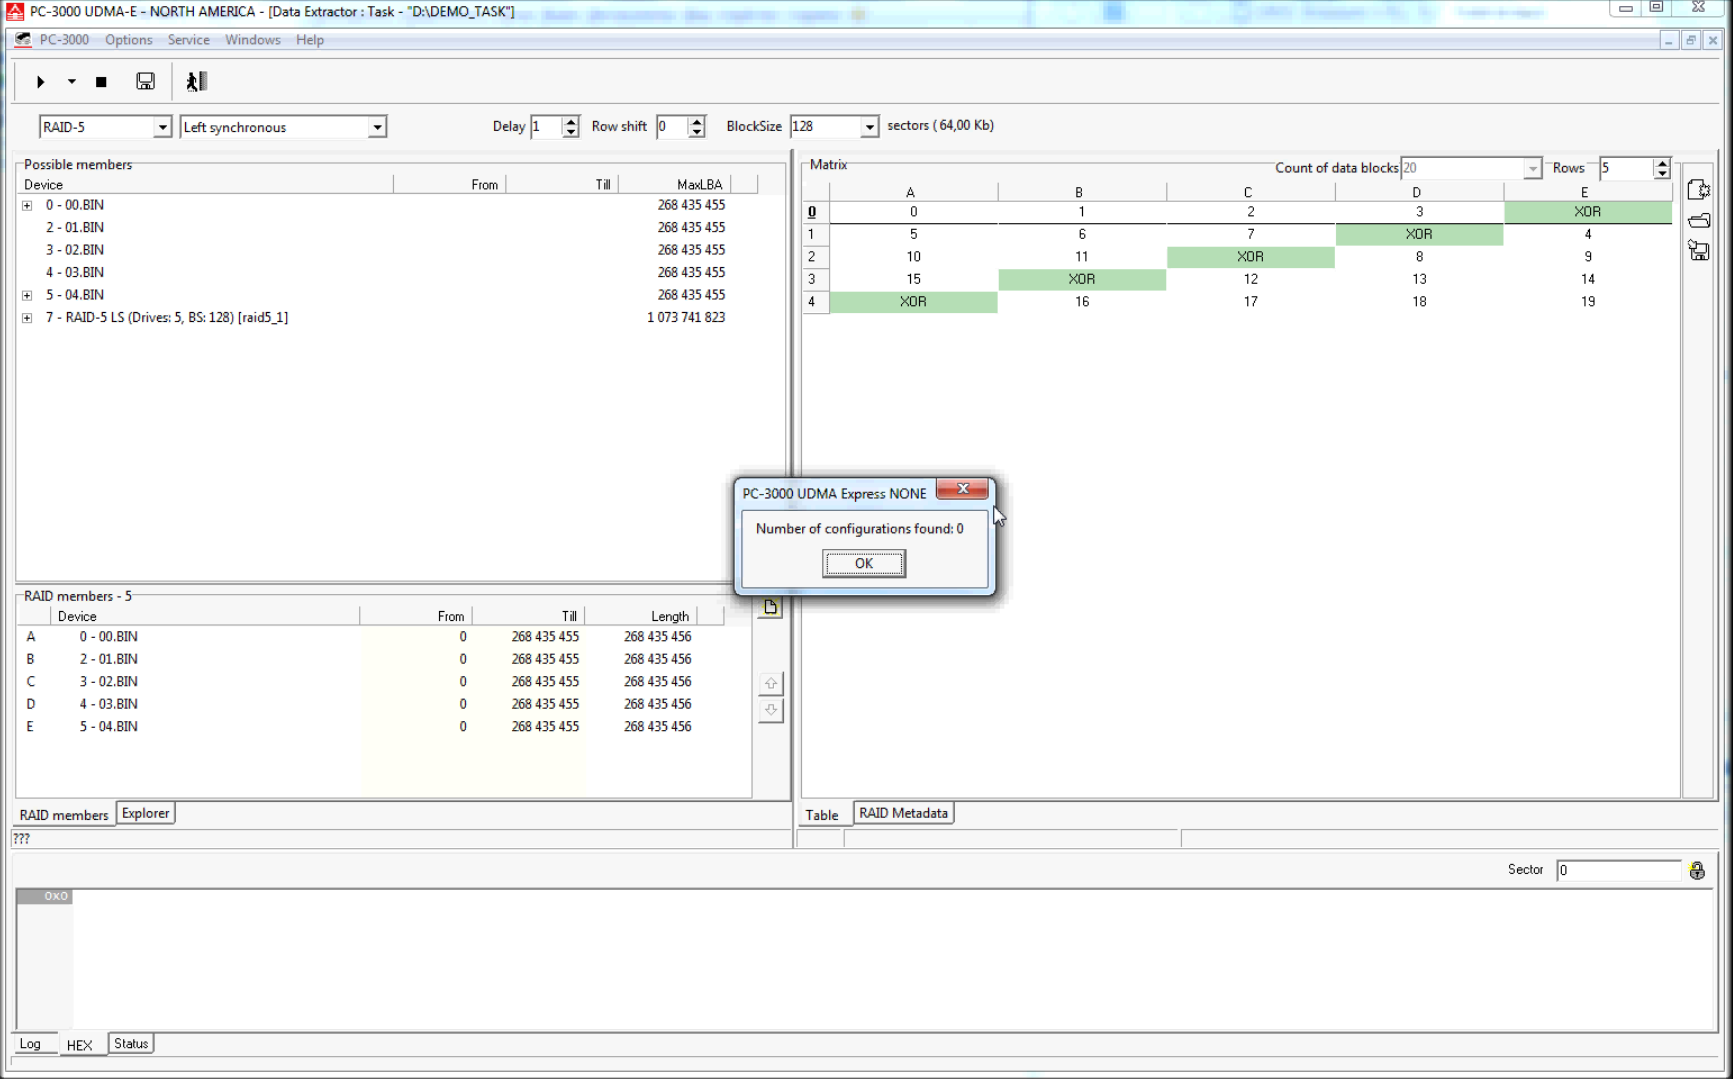
None of possible RAID configuration is found.
Run auto-detection based on metadata.
Specify RAID parameters.

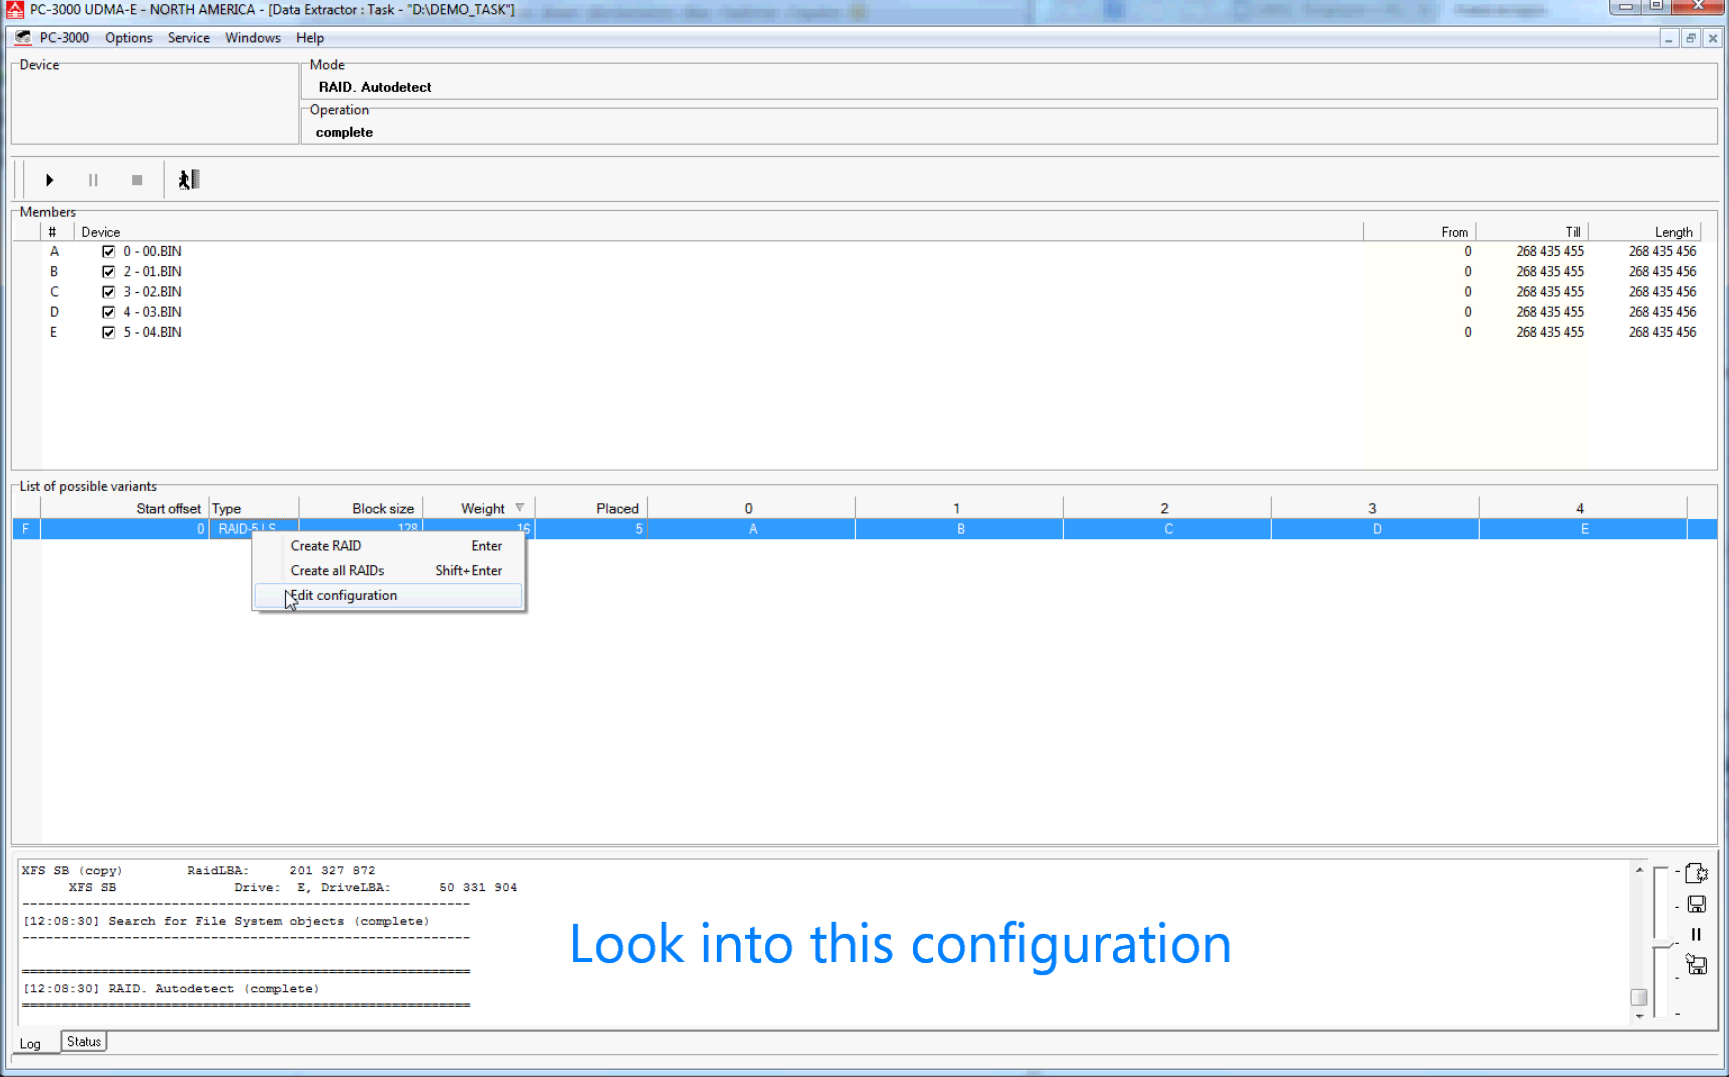
Edit the RAID configuration.
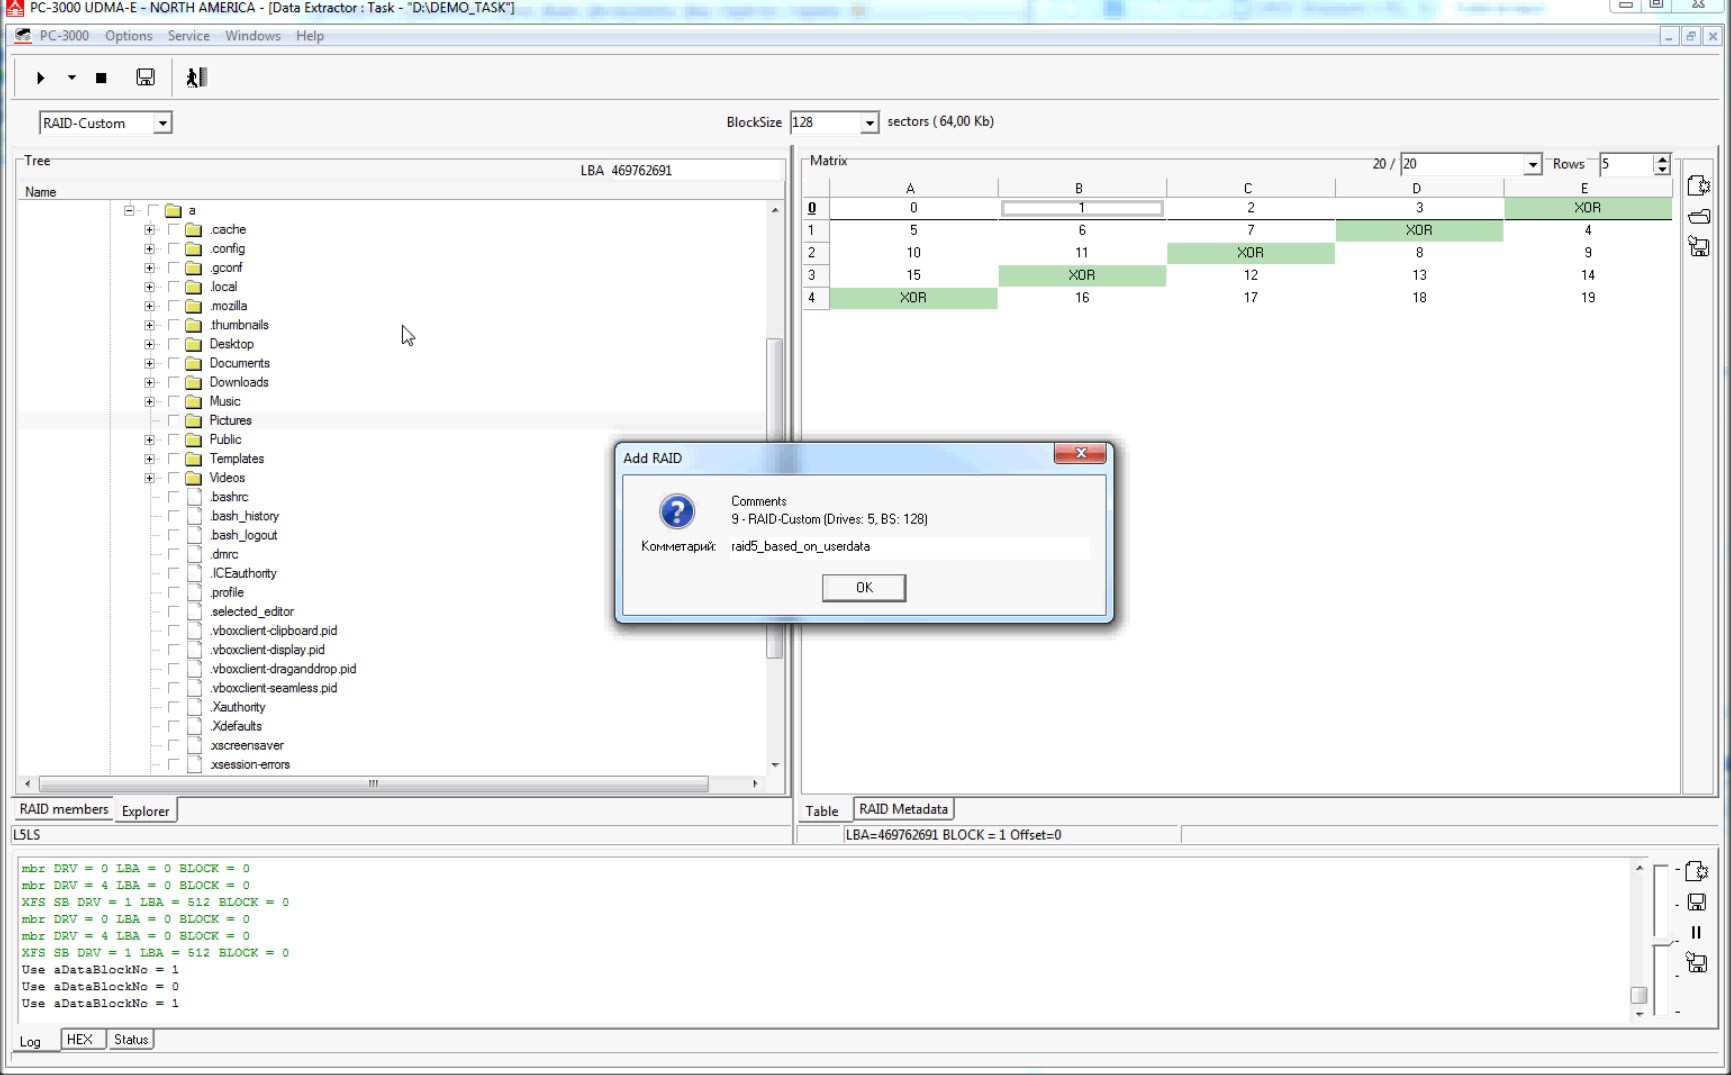
Save the RAID configuration.
Please see the video for more details.
If auto-detection doesn’t help, read part 3 of our guide to start working with RAID array in interactive mode.
Learn more about Data Extractor RAID edition in our catalog.

