


Sometimes DR specialists start examining the drive from the wrong point that leads to unnecessary wasting of time or even to the situation when the drive becomes unrecoverable.
We want to present to you our recommended procedure of basic examining of the hard drive.
We won’t go deep into specific features of different architectures today. This instruction is common for all the drives.
At first we need to interrogate the owner of the drive and get as much information as possible about the drive.
It is strongly not recommended to power up the drive and moreover connect it directly to the motherboard and run Windows OS before that.
When Windows starts it can try to use its embedded software tools to recover the file system. Which can have very harmful consequences and can lead to make the drive completely unrecoverable.
Another possible scenario is when heads are stuck on platters and they can be torn off the arms when the drive is powered on. They can cause serious damage to the platter and destroy essential data.
Here is the checklist of the points we need to find out from the owner of the drive before any actions:
- How and when the problem appeared?
- What happened with the drive?
- What has been done to the drive before(software tools used, PCB replacement, HDA was opened)?
- Was it in another DR lab or was it assessed by another specialist?
- What data is essential for the customer to recover(all the data, partition, folder, some files)?
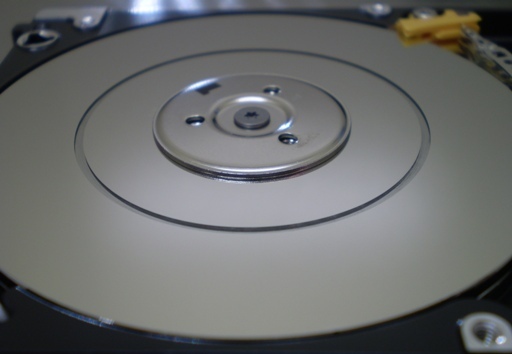
It is strongly not recommended to power on the drive is customer said it was dropped or drowned. In such case, open the HDA in the certified Class 100 cleanroom environment first and observe the heads and platters if they are damaged, and clean them if necessary. Such a controlled environment is essential to avoid contaminating the internal components.
Ask about current behaviour of the drive:
- Does it spin when powered-on?
- Does it make any unusual sounds(scratching sound, knocks/clicks, beeping, etc.)?
- Does it give the ID and capacity(correctly or not)?
- Does it give access to user data?
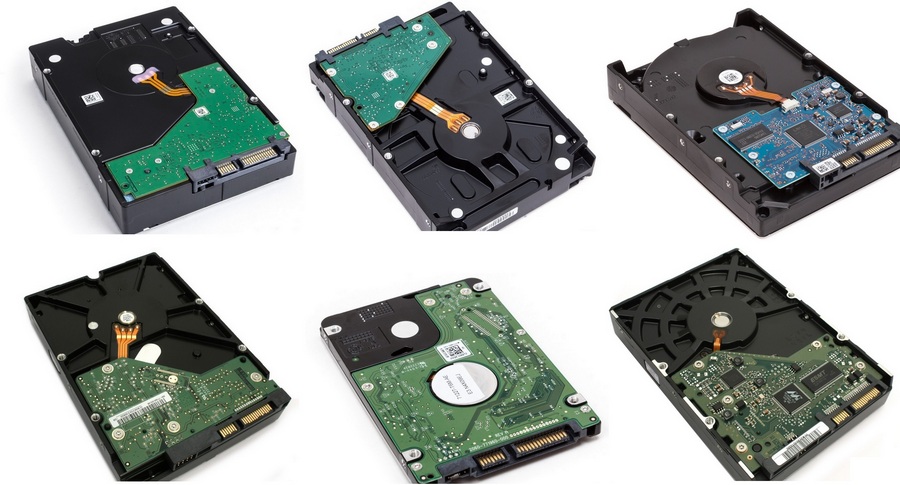
The next steps is a visual inspection of the drive.
We can devide it into two parts. HDA and PCB inspection.
HDA:
- Check the geometry of the HDA. It can be bent if the drive was dropped(usual for 2,5″ drives).
- Look at the corners and edges of the drive. There you can find dents or chips on the paint that can point that the drive was dropped or hit.
- Check the screws of the housing and the main label for toolmarks to find out if the drive was opened before. Some screws of the lid are usually covered by the sticker so if the lid was opened before you can see that it is damaged or absent. Carefully check the top label and see if it is torn off above the screws on top lid. That could be, somebody else worked on this drive before you.
- Before powering up the drive always try to shake the drive carefully from side to side and listen, if there are any moving parts bouncing inside the HDA. Powering on the drive in this situation is dangerous, because it may lead to platters scratching.
In the case when you can hear sounds of bouncing parts inside the drive it is better to estimate your skills and ask permission from drive owner for opening the drive’s lid and checking hard drive internal parts.
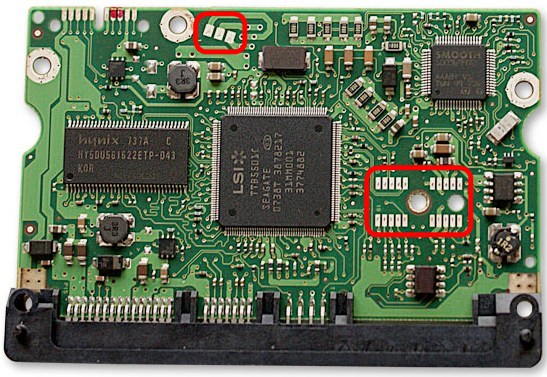
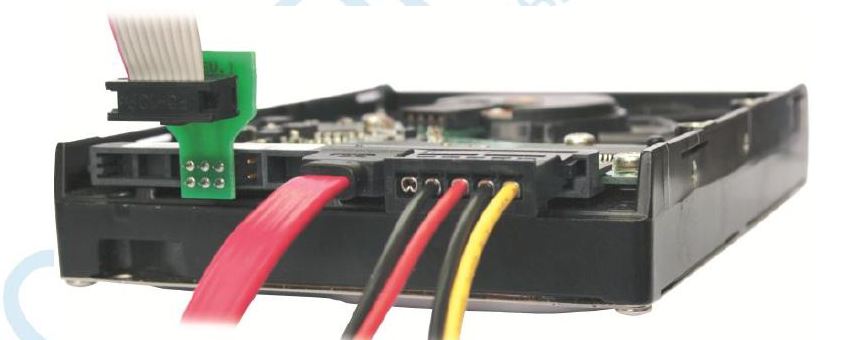
PCB:
Detach the PCB and look it through for burnt elements, corrosion, chips on elements, toolmarks, flux/soldering traces, ROM IC(present or not), jumpers position, SATA/PATA/SAS port condition.
Pay special attention to the HSA(Heads Stack Assembly) connector pads. They are often become oxidized making the connection not reliable. It is recommended to clean them gently with soft eraser until they are glossy.
On this step you should identify the model, architecture and other special features of the drive.
Then connect the drive to PC-3000 and perform the first power-on check.
When we turn on the drive for the first time it is recommended to hold the drive gently and firm in one hand near your ear and carefully listen to the sounds and sense the vibrations the drive produces when starts. Get your another hand ready to turn off the drives power immediately of you hear any “bad” noises (scratching, loud knocking, bouncing etc) or vibrations that are typical for heads sticking on the surface. In these cases you should turn off the drive and check the inside parts in a clean room.
If the drive looks good but does not not spin at all or can’t spin up to normal speed you should do electronics check:
- Spindle Motor windings (short, opening, disconnect);
- Fuses and TVS (Transient Voltage Suppression) diodes on power lines(+12V, +5V);
- Heads preamp;
There are just two spindle motor windings configurations:

You can easily check the resistance of the windings by multitester. You just need to measure the resistance between each pair of pads on the motor power lines. All the windings must have the same resistance about 2-4 Ohms. If one of them have too big resistance (break) or zero resistance(short) that means there is a windings problem. To recover such drive we need to transfer the platters to the donor HDA.
Heads preamp in most cases can be burnt simultaneously with the PCB. So it is always a good idea to check it before trying to install a donor PCB on such drive (if the heads preamp has short circuit the donor PCB can be damaged).
Also we should keep in mind that there is one typical hardware issue with old Seagate Barracuda drives – spindle motor seizure. But nowadays it is quite rare problem.
If the drive is spinning continuously without any strange sounds we can proceed to the Software Diagnostics.
After pressing of Power button on the panel look at the Status Registers panel during the drives start how they behave.
Here are three the most typical registers states:
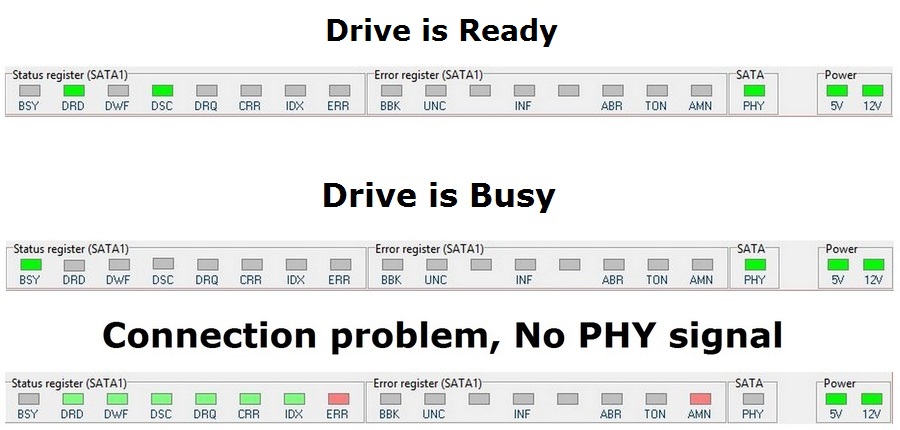
When we see that DRD and DSC registers are on that means the drive is ready and waiting for ATA commands form the computer. In most cases that means we can open an utility and continue diagnostics.
If the BSY register is ON permanently that means the drive is performing some internal procedure. In the drive stays in “Busy” state for a long time that means it has some Service Area problems, or Heads problems or PCB problems.
If all registers half-dimmed and the PHY register is not on that means there is a connection problem. Check SATA/PATA cable, check jumpers position (they should be always set in “Master” position) and try to replace the PCB.
Start the specific utility for the drive and look at the log messages during the initialization. It can give alot of useful information.
Check the HDD ID. Is it present? Is it correct? Does it have correct capacity?
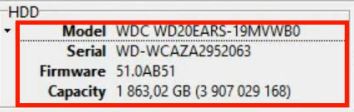

You can use the schematic diagram to understand the software diagnostics workflow.

STEP D1 – Drive powered-on correctly means that the drive is in Ready status and it shows Full HDD ID with correct capacity when we start the Universal utility.
STEP D2 – We can start Universal utility check the common information about the drive (such as Max LBA parameter status, S.M.A.R.T. parameters, Write buffer status, and HDD ID details) and read User area sectors, for example run Express test. Please be attentive when performing this test. Don’t leave the drive unattended for a long time. If the drive has heads or surfaces problems the test can be too stressful so it get serious damages. If the drive can read user data in most cases it’s better to start Data Extractor and read it before any long surface tests.
STEP D3 – If the drive has started successfully and has access to User area we can go to Data Extractor utility and create a new task. It is recommended to always create task with “Make Data copy” option enabled and when the task is created build a heads map first (the specific utility must be started in a background to perform that). In such case we can easily determine problems with the specific heads reading and surface problems.
STEPs S1-S4 are different for each specific drives arcitecture. They are performed in Specific Utilities (for each architecture)
When we work with Seagate or Samsung drives we always need to connect a USB-Terminal adaptor to see terminal output. Also it’s a good idea to check if you have terminal command access on the drive.

The further actions are depend on drive type behavior and condition, browse the blog, forum and manuals for problem solving, or contact ACE Technical Support team. Please attach all available information about the drive as well as logs and terminal outputs if they presented.
We will present examples of full examinations of different HDDs in another posts since it is specific for each manufacterer and architecture.

 (6 votes, average: 4.33 out of 5)
very nice article
thank you so much
Very and very helpfull!
Thank You very much
it’s very helpful and benefit artical
GO On>>>
superb article for newbees
very good blog
Hello to all,
Thanks a lot. Very useful article.
thanks
very informative & useful article. thanks for sharing this with all
Thanks for ACE TS Team…
I’d like to add a peace of information for WD PCBs, When Status register BSY is on I used to brush all electronics component of WD PCBs and golden contact of SATA , SATA power and Heads Contacts on HDA by toothbrush dipped in gasoline, When PCB became dray in most cases its works fine and BYS off.
My best Regard
O.S
Thank you for your hint!