A lot of ACE Lab customers from Europe and North America region ask us about possibility to install PC-3000 Flash or PC-3000 Portable on their MAC computers. These laptops provide good performance, they are quite light-weight, and finally – they are pretty good in all respects, starting from the screen and aluminium case, and ending with the quality and speed of hardware part.
But as you all know, PC-3000 does not support MAC OS system, and if you want to use our professional tools for Data Recovery, you will need to use only Windows NT family of Operation Systems:
- Windows XP (32/64 bit)
- Windows Vista (32/64 bit)
- Windows 7 (32/64 bit)
- Windows 8 (32/64 bit)
- Windows 8.1 (32/64 bit)
- Windows 10 (32/64 bit)
But as we said before, it’s really inconvenient for some of our customers, and instead of using PC-3000 on their MacBooks, they should buy another laptop based on Windows only for PC-3000 installation.
Of course, everyone can use Apple BootCamp to create a new partition on internal Macbook drive, but we can say that it’s not a good idea. First of all, there’s a free space problem. The most typical models of Apple laptops have limited space on their internal SSD – like 128-512GB. And after Windows installation, usually you have only a couple of gigabytes for the task creation, which is definitely not enough for a normal working process.
In this article we are going to describe another way, how you can make your MacBook to be compatible with PC-3000 products! Ready? Here we go!
First of all, it necessary to say that the number of supported Apple MacBooks models for this Windows installation operation is limited. We can recommend the following models of laptops:
- MacBook Air 13″ models from mid 2012 and above;
- MacBook Pro 13” Unibody models from mid 2012 and above;
- MacBook Pro 15″ Unibody models from mid 2012 and above;
- MacBook Pro 13” with Retina Display models from mid 2012 and above;
- MacBook Pro 15″ with Retina Display models from mid 2012 and above;
What about models from 2008-2011? They are also good for MacOS, but not for Windows and PC-3000 Installation. Main problem – all other models from this list do not support USB 3.0 interface, which is important for our experiments.
Which modern models of MacBook are compatible, but we do not recommend them for Windows installation?
- MacBook 12″ models from early 2015 and above
- MacBook AIR 11″ models from mid 2012 and above;
MacBook 12″ is rather weak in CPU part, and the power of Ultra Mobile CPU with passive cooling system will be not enough at all. Also, you can fry your new MacBook 12″ with full load of CPU! Please, don’t forget – it has only passive cooling system and optimized only for Mac OS!
MacBook AIR 11″ also does not have as fast CPU as PRO modifications, and its performance in PC-3000 Flash might be very poor. Also, the problem might be in screen size – 11 inches are not enough for comfortable usage. You still can try to use it, but we are not sure it’s a good idea 🙂
Additional Note: What about MacBook Pro 13″ and MacBook Pro 15″ 2016 with Touchbar? – Also good machines, but you will need to find at least two adapters USB Type C to USB 3.0.
So, what we are going to do?
We will try to install Windows 10 on a portable USB 3.0 HDD with 1Tb or 2Tb capacity, and create a well-optimized portable workstation for PC-3000 Flash or PC-3000 Portable, which engineer can use during his business trips!
First of all – Main advantages of this method:
- You will create a portable Windows drive with high capacity, where you can store all your PC-3000 tasks! 2TB drive for Windows, backups, and PC-3000 cases would be much more than enough!
- Speed will be the same, as a speed of laptop drive! USB 3.0 interface in Apple laptops provide around 80-100 MB/s for reading and writing operations. In other words – you will not find any difference in working process between internal MacBook Pro 13″ 2012 HDD and USB HDD with Windows;
- Your MacBook internal SSD will be absolutely safe. You will not make any writing operation on it during Windows and PC-3000 usage. It will save the life time of your SSD.
- You can use Windows to GO on the portable HDD to copy data fast to it, or from it in any PC with Windows OS! Your installation of Windows-to-Go on portable HDD will not cause any harm.
- Process of initial installation and preparation will take around an hour of your time. But next loadings of Windows 10 to GO from external HDD will take no more than 60 seconds!
- You will get fully functional MacBook with Windows 10, where all drivers and all necessary things for normal functionality would be installed! TrackPad works the same as in Mac, all functional keys will be also workable.
At the same time, there are a couple of disadvantages:
- You must be careful with USB connection! When Windows to GO drive will be plugged, don’t try to move this drive or disconnect it. You might lose your data in the current session!
- Windows will discharge your MacBook much faster, than MAC OS. Better to use your laptop in pair with MagSafe charger.
- Some Windows apps require a lot of CPU performance, so your MacBook will heat up higher than in MacOS. Unfortunately, Windows isn’t optimized for normal MacBook fan rotation, and it starts to work only when the temperature of CPU goes above 100 degrees! We will try to set good options for Fans in MacBook to prevent overheat (see option 6 below).
What will we need?
- USB Flash stick with 8GB capacity;
- USB 3.0 HDD with 500-2000GB capacity (we recommend to use WD USB drives);
- Windows 10 64 bit .iso file. You can get it from official Microsoft web site;
- Windows 10 license key (need to buy it);
- AOMEI Partition Assistant Lite (Free);
- Macs Fan Control for Win (Free).
- Your MacBook Air or MacBook Pro!
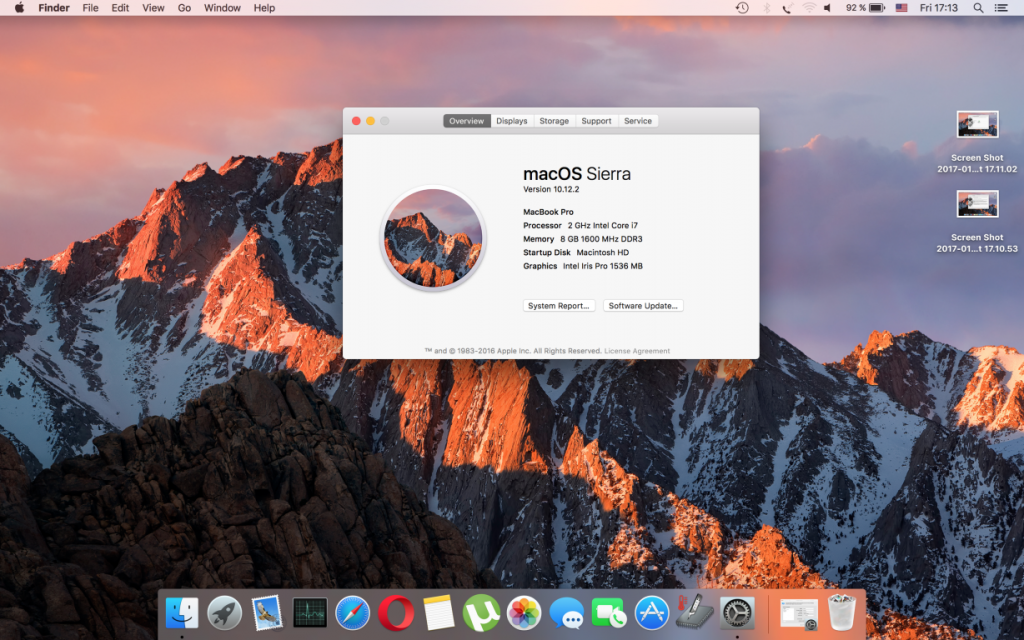
In our article we are going to use MacBook Pro 15″ with Retina Display Late 2013 model of Apple laptop. We think that this model is perfect for Windows installation and for PC-3000 usage. It has Intel Core i7 CPU (4 physical cores + HT, with 2.0-3.0GHz frequency), 8GB of DDR3 RAM and 2 USB 3.0 ports. This configuration is more than enough even for the most complicated Flash, SSD and HDD Data Recovery cases!
LETS BEGIN!
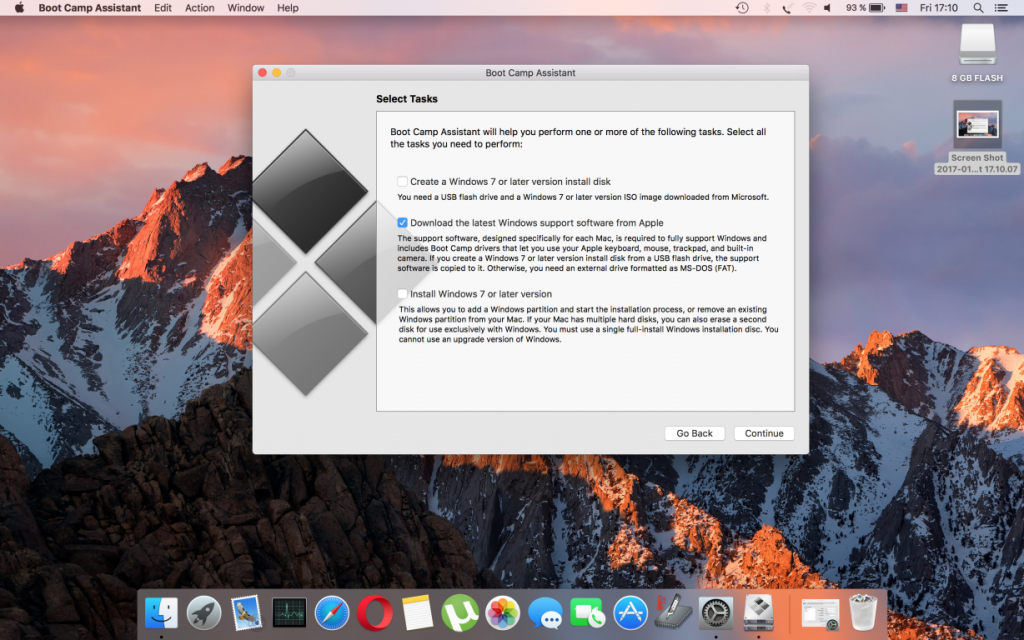
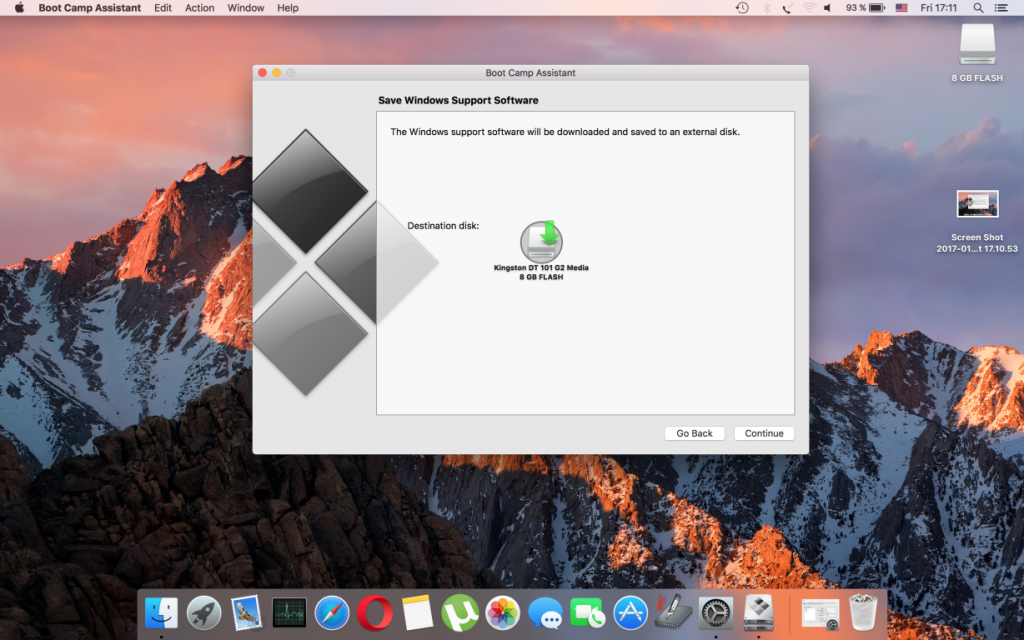
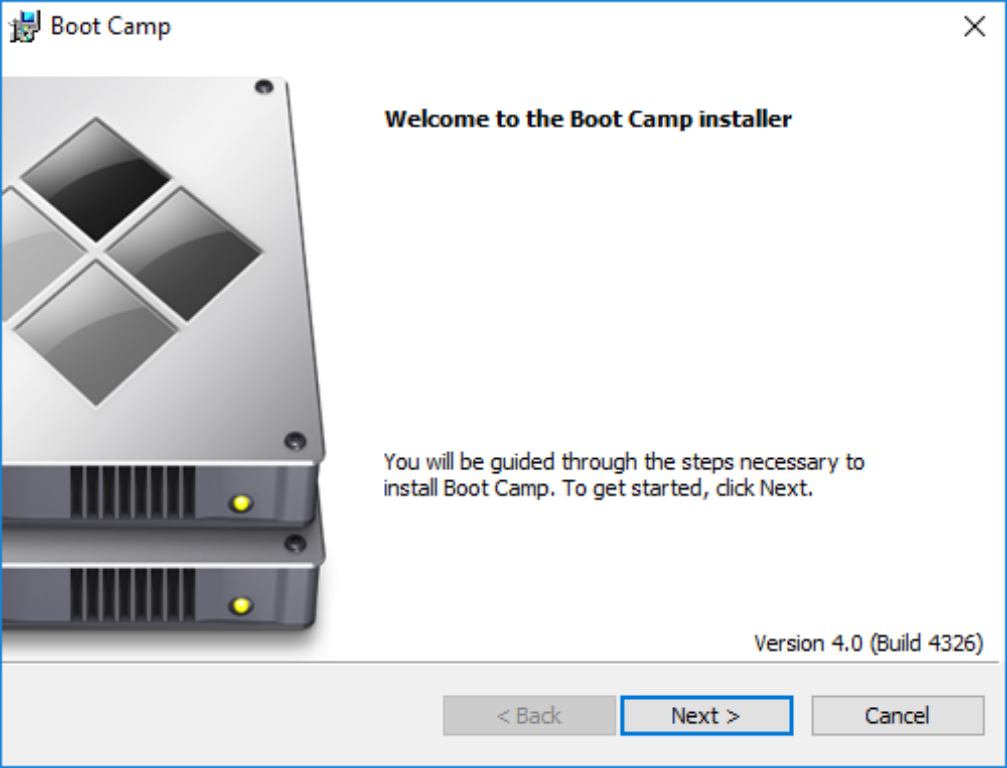
- We will need to take 8GB USB stick and plug it to your MacBook. Then, load MacOS, chose Utilites and find BootCamp. We will use Apple official method for Windows 10 drivers downloading.
2. With the help of another Windows-based PC download AOMEI Partition Assistant Lite (Free), Macs Fan Control for Win (Free), Windows 10 64 bit .iso file;
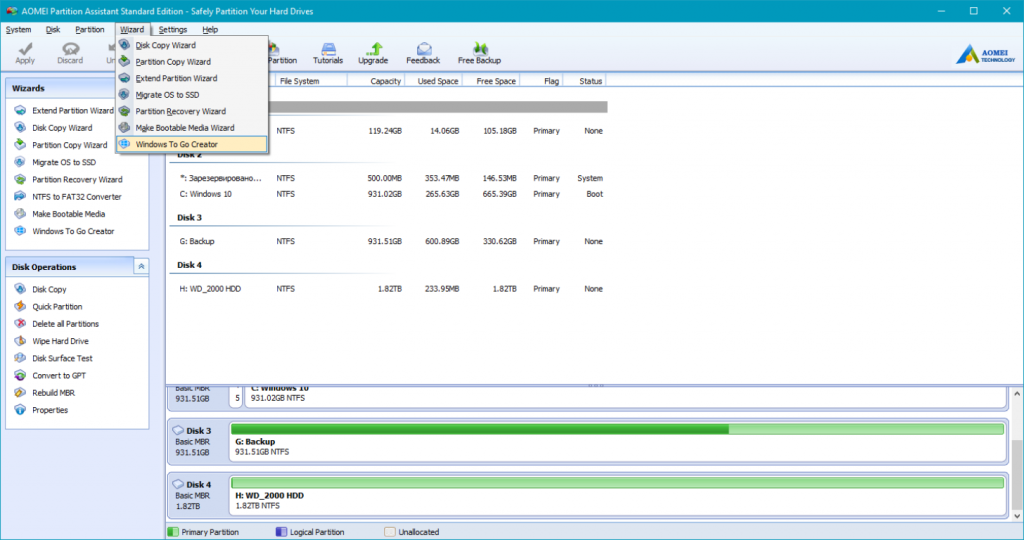
3. With the help of another Windows-based PC, install AOMEI Partition Assistant Lite. Start it and choose: Wizard -> Windows to Go Creator.
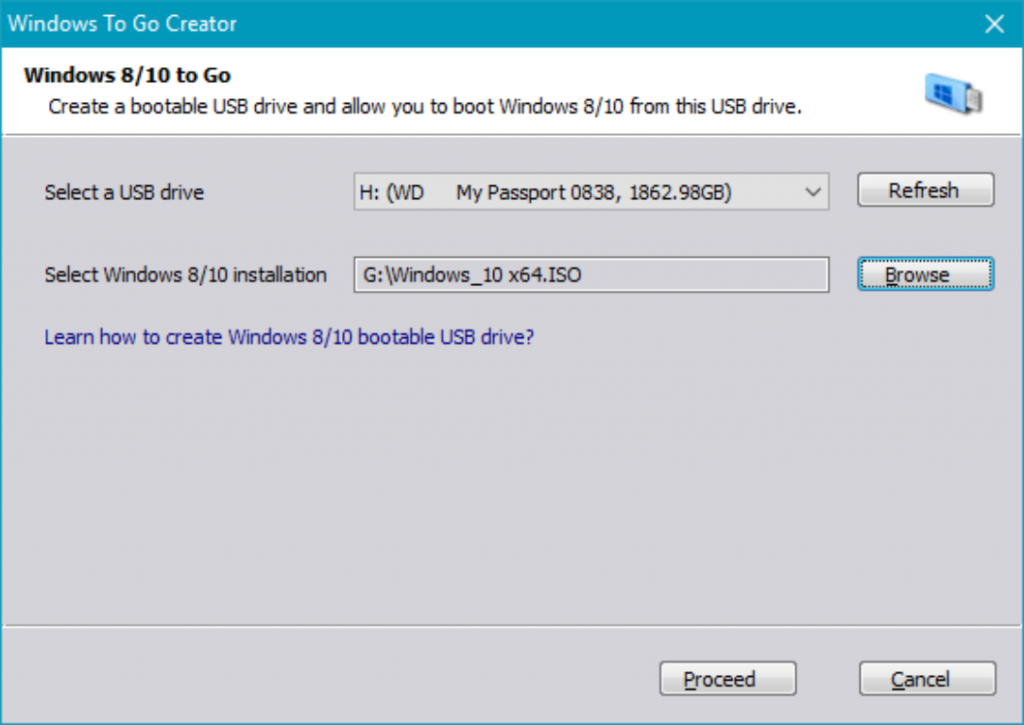
4. Connect USB WD drive with 2Tb capacity. Choose it as a source to create in AOMEI utility:
5. During installation of Windows on our portable HDD, you can drink a cup of coffee! The process will take 15-20 minutes 🙂
After that, prepare everything together:
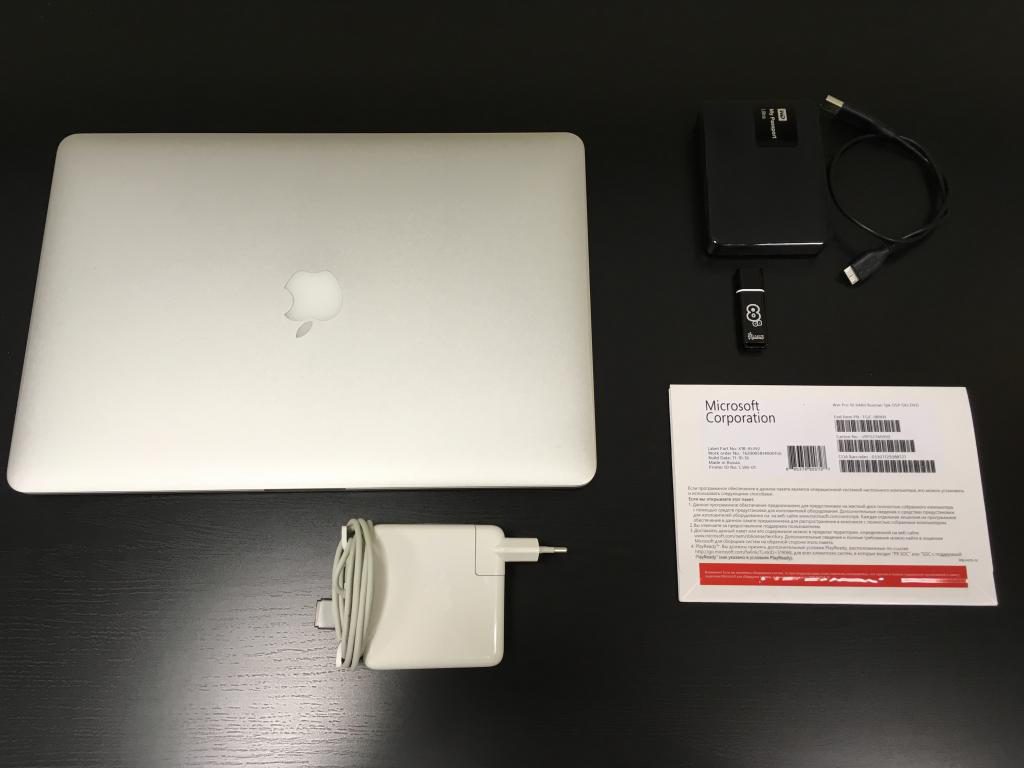
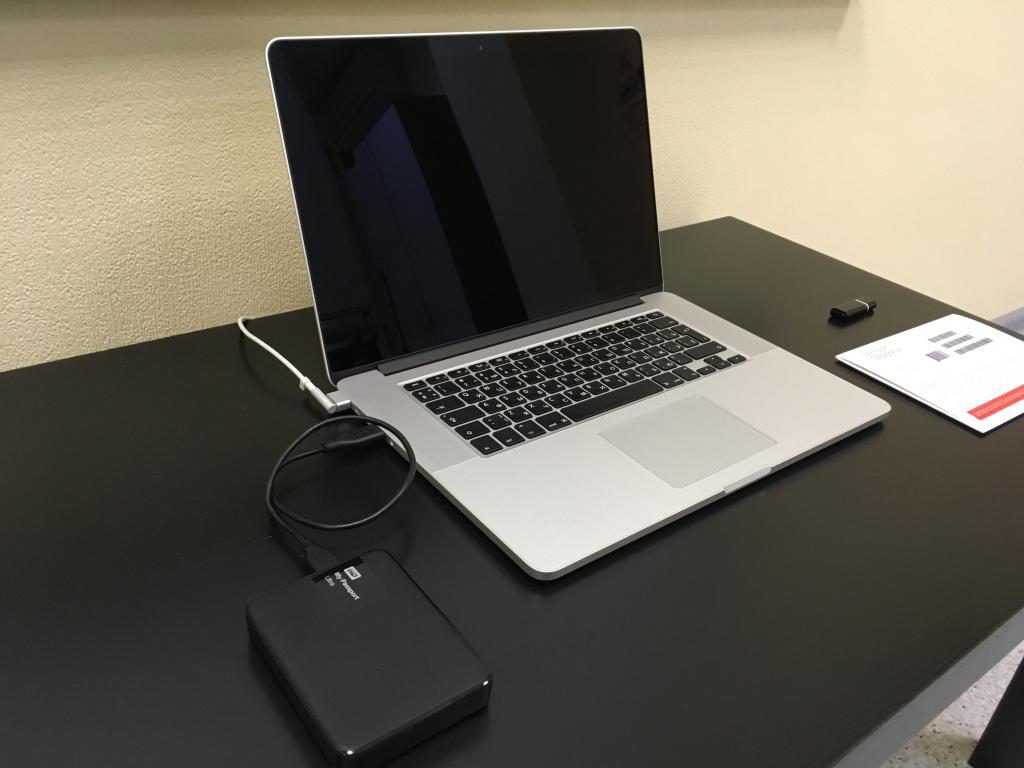
- Our MacBook Pro Retina 15″;
- MagSafe 2 charger;
- Windows 10 64 bit license code;
- USB stick with BootCamp drivers;
- HDD with installed Windows To Go;
6. Plug WD USB HDD 2 Tb with Windows 10 to GO:
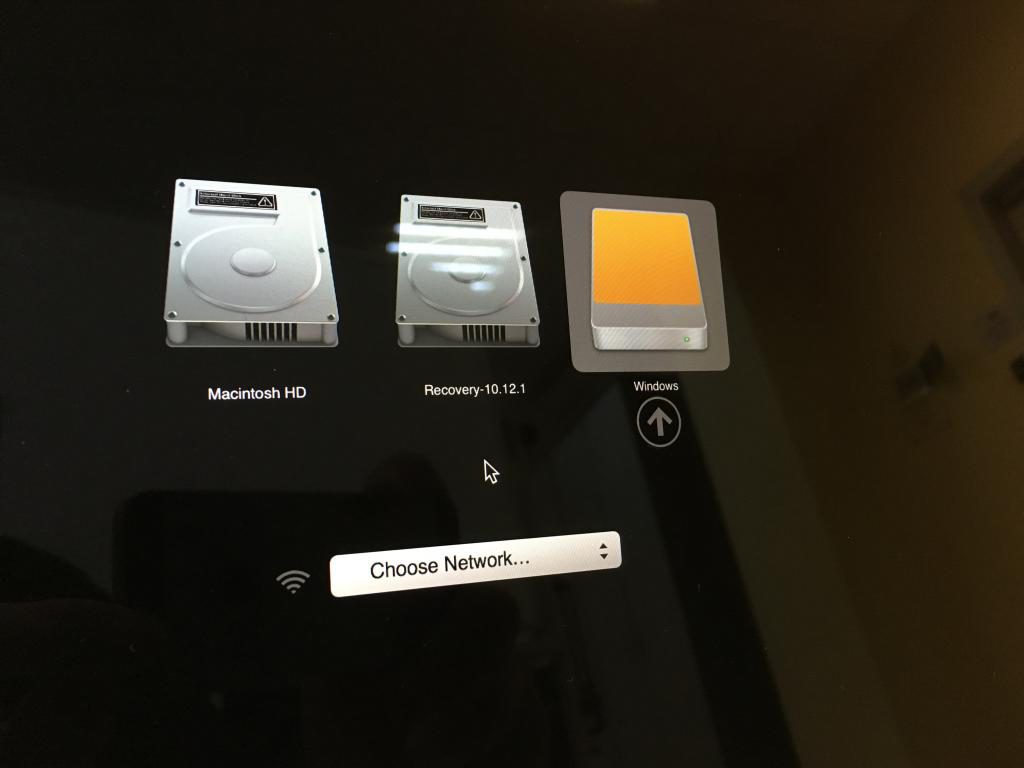
7. Turn ON MacBook holding ALT button. A new window should appear. Choose our Windows 10 HDD:
8. Wait while OS installation process will be complete. Activate the Windows with a official license key.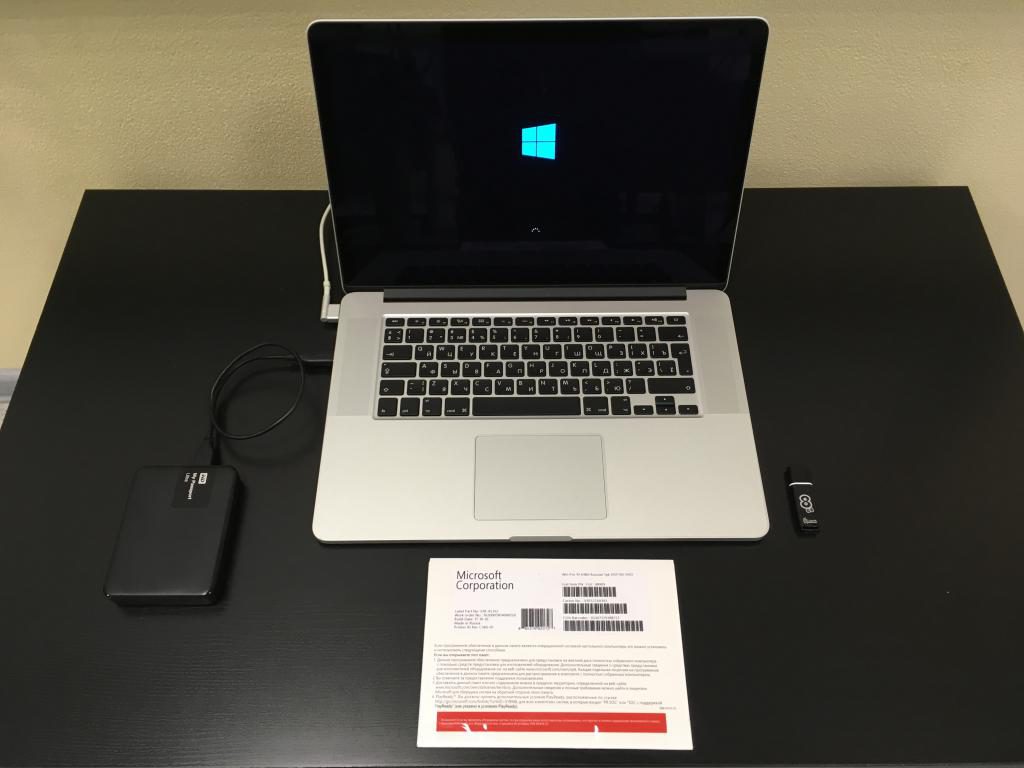
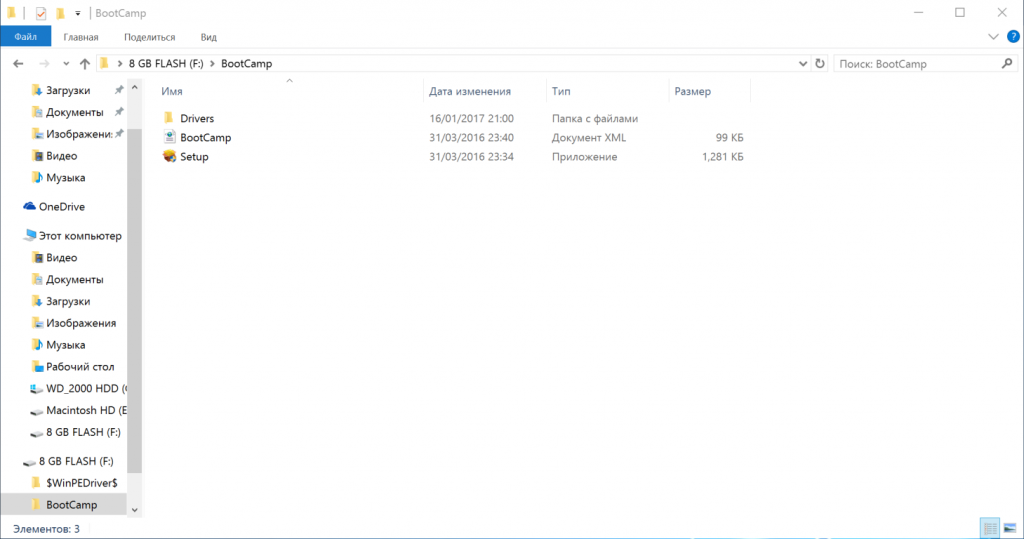
9. The Windows is installed! Now we need to install all native drivers from BootCamp (it’s on out 8GB USB Flash stick):
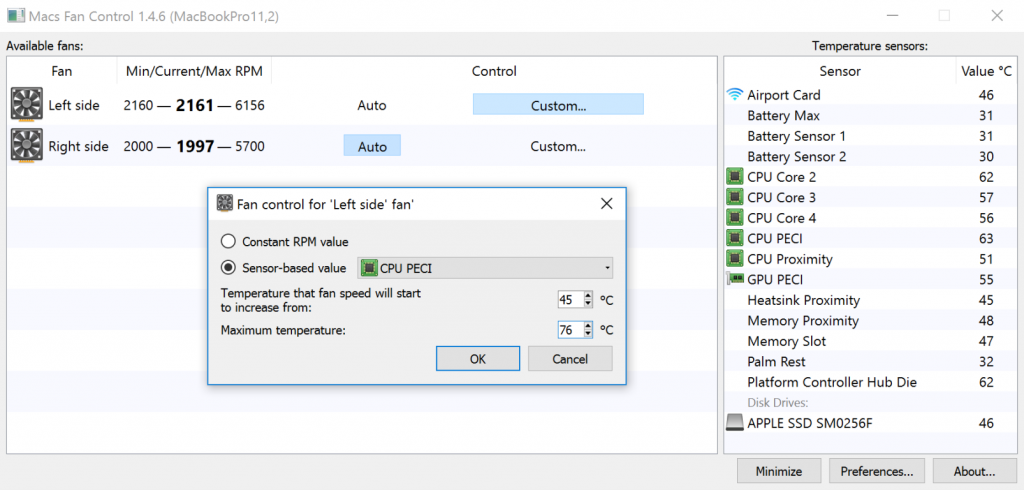
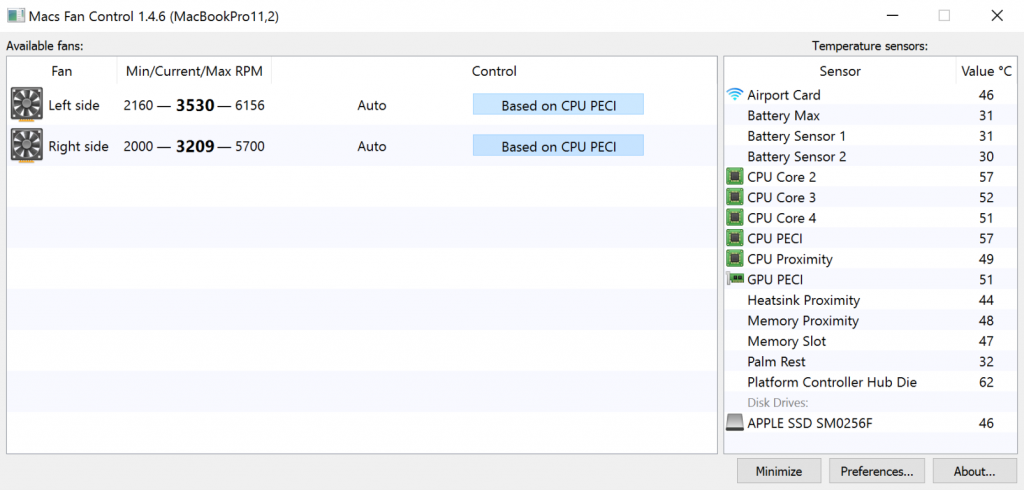
10. Almost done! The final thing – install Macs Fan Control. We will need it for fan configuration and optimization. We recommend to use CPU PECI as a sensor for automatic setting a rotation speed. With 45 degree both Fans will be activated, with the temperature of 76 degree both Fans will rotate with maximal speed. In this range of temperature, our Mac will stay cold during normal Windows 10 usage, and will be cool enough during high load mode.
11. Don’t forget to turn-off User Account Control! This option, which appeared in Windows Vista and is still used in Win 7, 8, 8.1, Win 10, can make a lot of head-ache for your Data Recovery job.
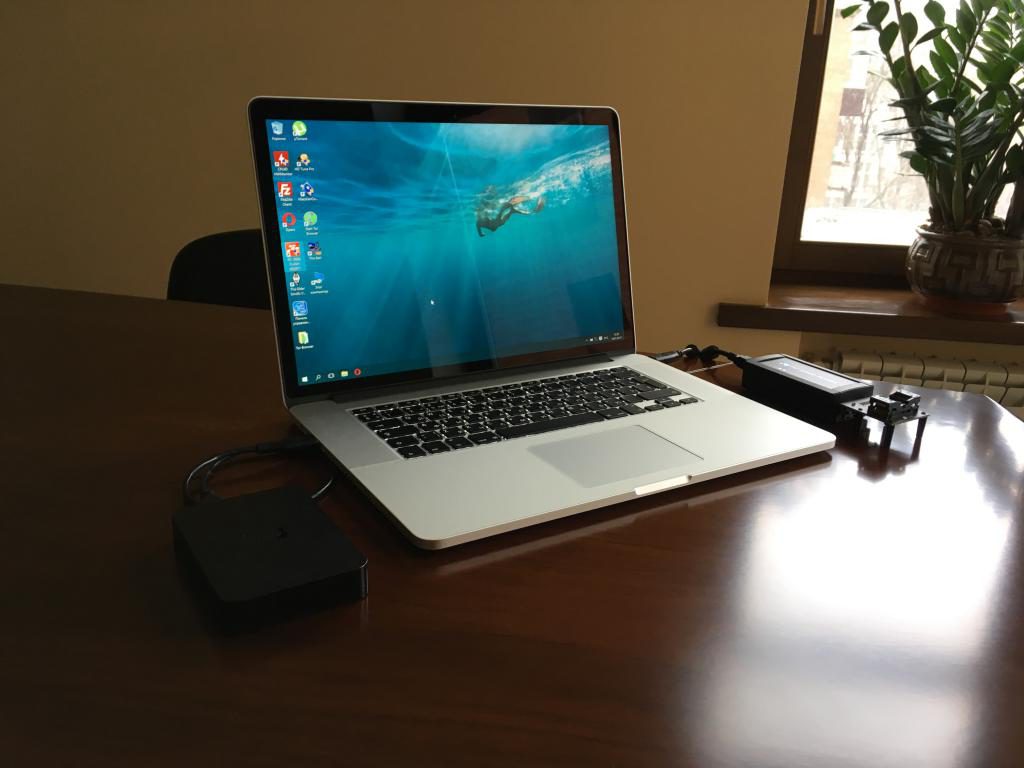
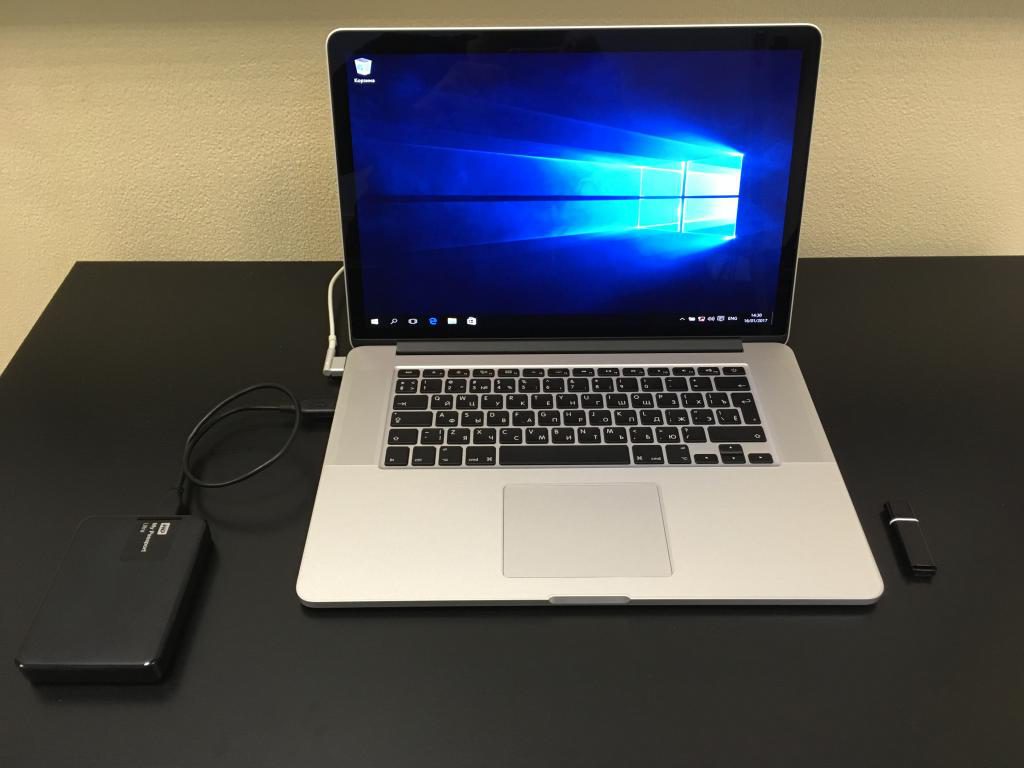
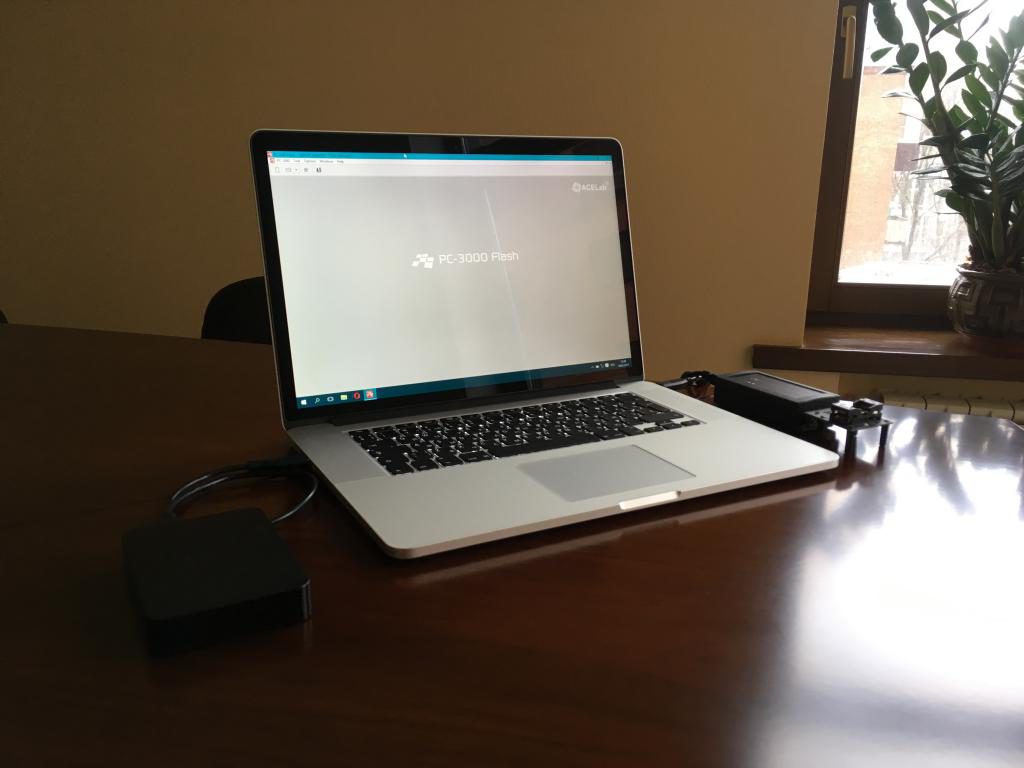
12. Install PC-3000 Flash as usual. That’s all! We can use Windows 10 and PC-3000 Flash on MacBook without any problems!
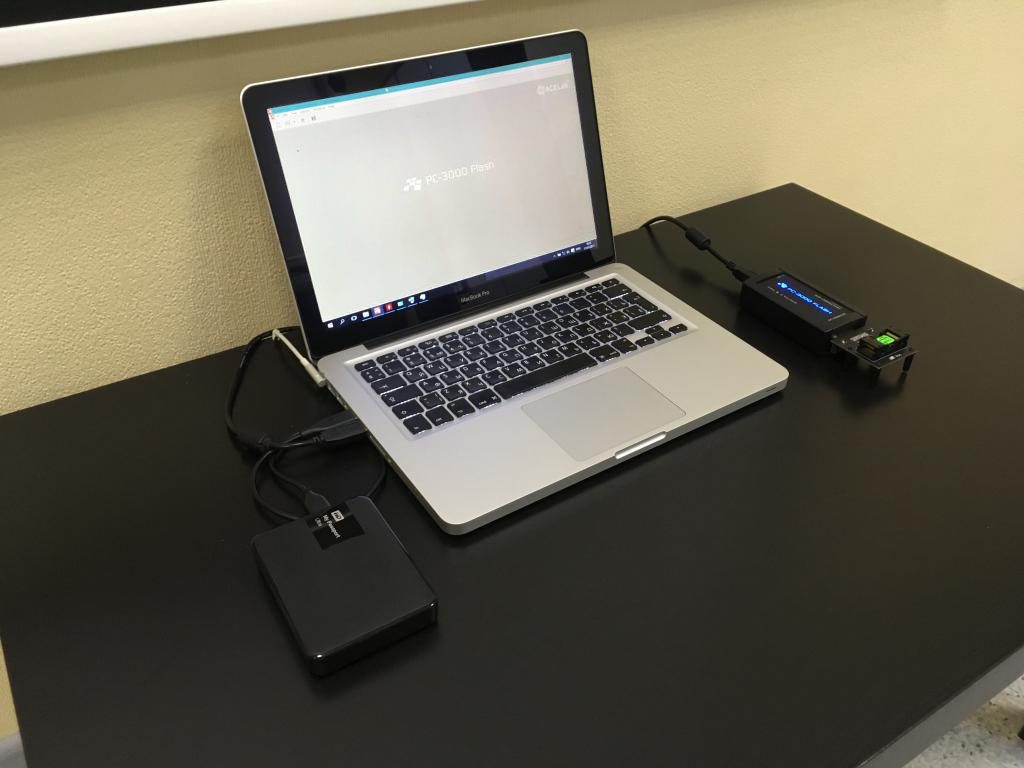
MacBook Pro 15″ with Retina Display late 2013 and PC-3000 Flash
MacBook Pro 13″ Mid 2012 and PC-3000 Flash
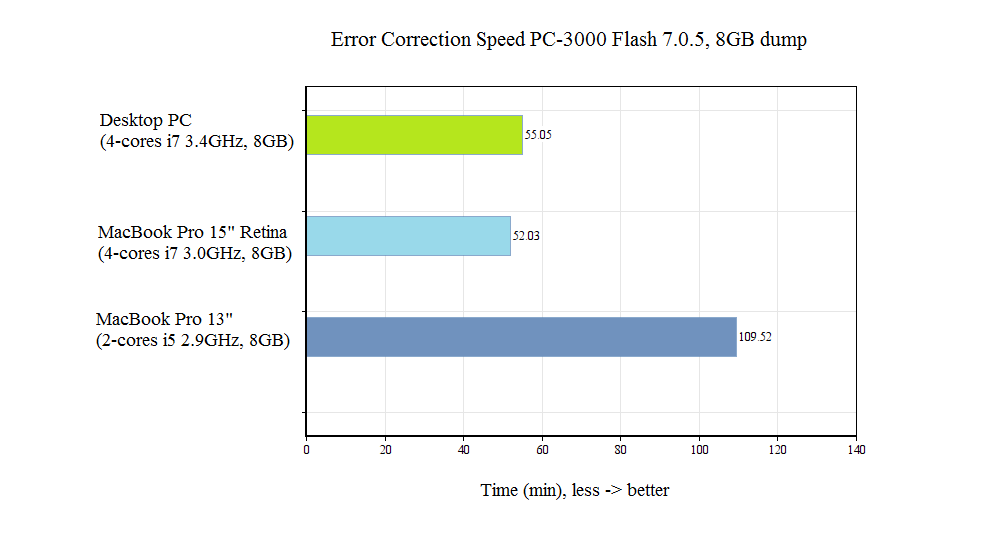
Speed of working process on MacBook Pro 15″ Retina and MacBook Pro 13″ is really awesome! We tried to compare some configurations and solve the same task on 3 different machines and calculate – how much time the same process will take on different configurations:
- MacBook Pro 13″ Mid 2012 (Core i5-3210M 2.9GHz (2-cores + HT), 8GB DDR3 RAM 1333 MHz);
- MacBook Pro 15″ with Retina Display late 2013 (Core i7-4750 3.0GHz (4-cores + HT), 8GB DDR3 RAM 1600 MHz);
- Desktop PC (Core i7-2600 3.4GHz (4 cores + HT), 8GB DDR3 RAM 1333 MHz).
The task was: AU6998EN with 8GB MLC chip (0xECDE88BF ). Time of ECC correction:
You will ask us: –Why 3GHz Core i7 in Macbook is faster than 3.4GHz Core i7 in Desktop PC?
Everything is simple – Desktop CPU is based on 2d gen of “Core i” architecture Sandy Bridge, and mobile CPU is based on Haswell architecture (4th gen). That’s why difference in frequency is eliminated with new CPU optimizations 🙂
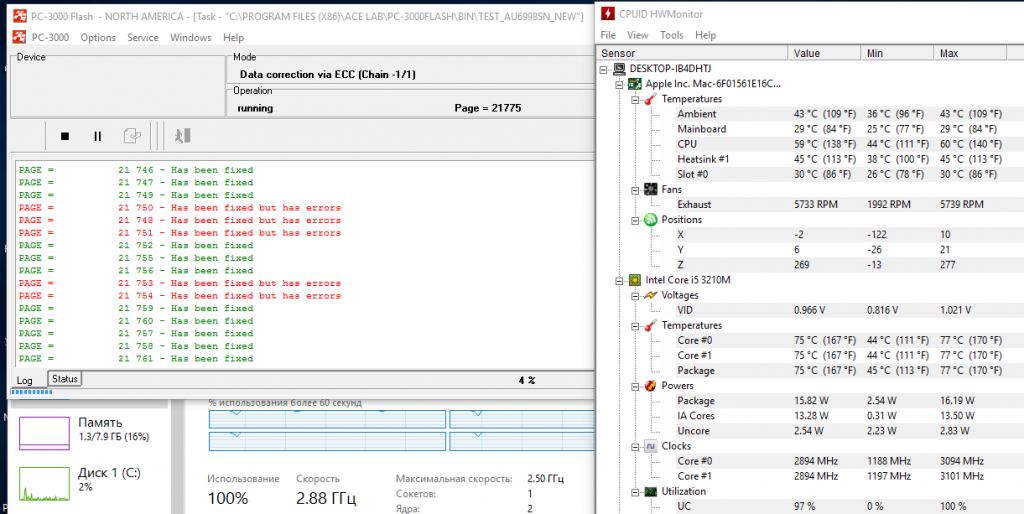
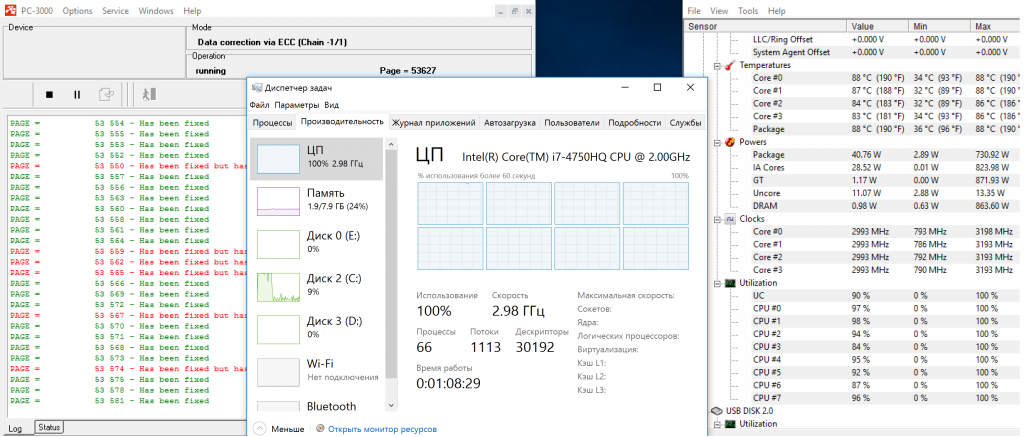
MAX temperatures during ECC correction (99-100% load of all CPU cores and threats):
MacBook Pro 13″ Core i5-3210M
MacBook Pro 15″ with Retina Core i7-4750HQ
It’s a great result! Intel critical CPU temperature is around 105C degree, in our case Core i5 with 2 cores heat up to only 77C degree, and Core i7 with 4 physical cores heat up to 88C degree! Not bad, especially if we remember that ECC correction is the most resource demanding operation among all PC-3000 products! 🙂 Not sure that it’s possible to heat CPU more, during Windows 10 usage.
And of course, these results are possible only in case of usage Macs Fan Control! It allows to turn on the Fans when the temperature is around 40 degree. Without this tool, you can overheat MacBook during ECC correction!
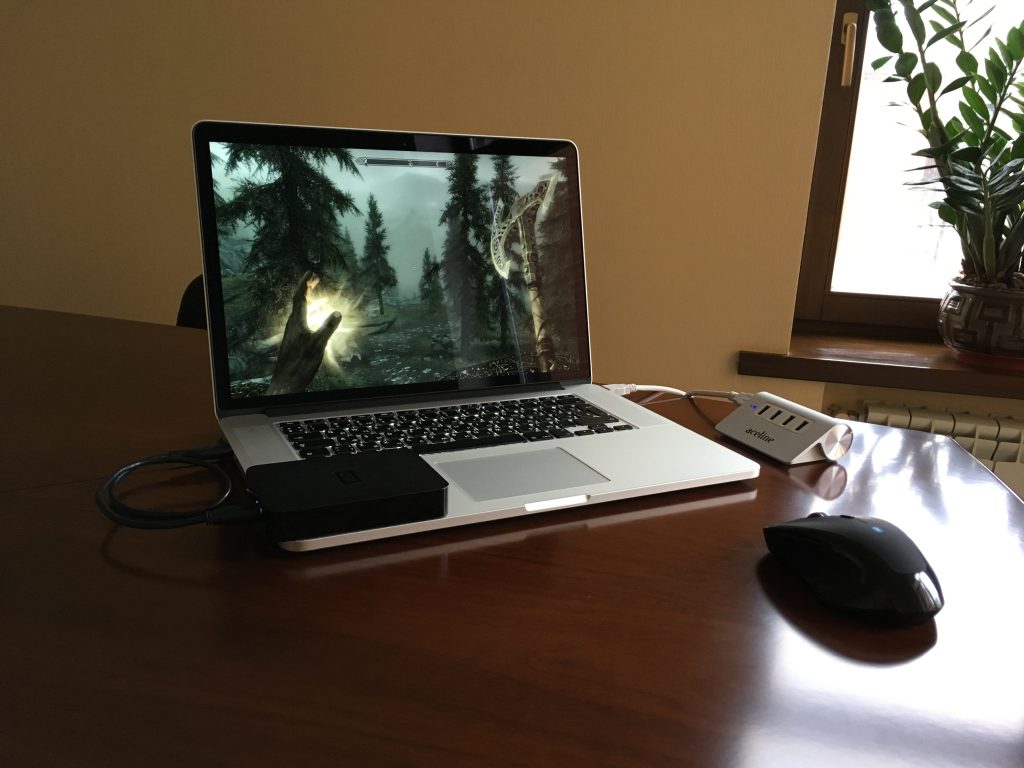
So, if you need to work with PC-3000 Flash and with Windows – just plug Windows 10 to Go USB HDD to your Macbook, and you can do whatever you do with any other classic Windows laptop! Even play Skyrim 😀
P.S. Please note that it’s not instruction for building an IDEAL workstation for PC-3000. We still recommend to use your own build custom PC configurations. This guide can help to create a portable workstation if you have only MacBook, but you need to use PC-3000 tools outdoors or on-site.
What can be better then to spend your weekend on a mountain lake shore with Flash Data Recovery going on your laptop?






This post is very informative one. I read this blog with caution and learnt a lot by reading this article. Thank you very much for such kind of knowledge sharing and looking for such posting in future too.
Thank you for your warm feedback. We will try our best for making more interesting and useful articles in future! 🙂
Can I getback data form SDD on Mac with PC 3000??
Hello!
Yes, you can, if your Macbook drive based in the following controllers: S3C29MAX01-Y340 and S4LJ204X01-Y040.