In this article we are going to describe the first steps of PC-3000 system usage.
- Where to get new manuals?
- Where to get Updates?
- How to activate your PC-3000 Tool?
- Where you can get Technical Support?
All these questions will be described below:
;
In this article we are going to describe the first steps of PC-3000 system usage.
All these questions will be described below:
In our final part of article Methods of data correction, we will speak about voltage control. In which cases voltage control can help us to fix errors?
If to say in a few words – it can help only in the most problematic cases, where the number of bit errors still very high even after ECC correction and readout procedure. Basically, voltage control – is a sort of ReadRetry operation, but in a manual mode. Instead chip itself, we set our own voltage for reading each page in NAND chip using software control.
This voltage control option is available only in following PC-3000 Flash devices:
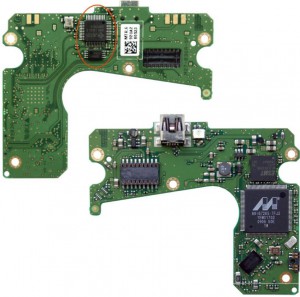
We get many questions from our customers about how to determine the points where to solder SATA connector on SAMSUNG Spinpoint USB drive.
Here is the easiest method.
There are two types of USB PCBs:
1. With separate SATA-USB bridge;
In previous article we spoke about ECC correction – first and the main way of bit error correction. Sometimes this feature might be very effective, but in case if your NAND chip base on TLC architecture, there is a high chance that after ECC correction a huge part of data will be still damaged. Because as we know – Error Correction Codes can fix only limited number of errors. If for example, on one range (1024 bytes of DA) we have 50 bytes of ECC, it possible to fix only around ~25 bytes of errors. And in case if the number will be bigger (26-27 bytes), errors will be not corrected and our range will stay damaged.
In this line of articles we will speak about different ways of dump correction. I think that it is not a secret that during NAND memory chip reading some bit errors might appear. The number of bit errors depends from the following things:
And of course, if you want to get 100% recovery from user flash drive, first of all you need to fix as much ECC errors, as you can. Otherwise all data will be corrupted, not workable or partially damaged:
Just remember that BIT ERROR CORRECTION IS EXTREMELY IMPORTANT!
Starting from the version of PC-3000 SSD 2.0.3, it become possible to recover Samsung 840 EVO, Samsung PM 851 and Samsung 850 Pro drives. One of the main problem of this drives – is a very-very bad quality of NAND memory chips. As the result – a huge number of ECC errors and NAND degradation.
At the same time, this family of Samsung SSD has very complicated internal structure of Firmware with full encryption. Besides, in this family of SSD drives for working with Technological Mode, we need to use terminal connection, because ATA commands become blocked in case of FW internal corruption. It means that if we need to switch drive in technological mode, we should plug PC-3000 terminal.
Sometimes advanced users ask us about how to write own code which interacts with PC-3000 and for what it could be useful. Answering.
As you know Western Digital drives have a SATA or an USB interface (2.0 or 3.0).
For work with the USB drives better to connect them to PC-3000 via SATA, ’cause USB connection have a restrictions and a lot of preparations can’t be performed via USB interface.
Of cource you can use the compatible SATA board for USB WD drives based on USB v. 2.0.
But what about USB drives based on USB v. 3.0…
Or maybe you haven’t or don’t want to purchase a compatible SATA board for your USB WD drive (on USB v. 2.0)
In this article we will describe how to add new type of file in Data Extractor search engine reference.
Let’s consider an example – client asks us to recover *.qbw files.
People who apply for data recovery services, are often asked to return the data from the partition that “suddenly disappeared”.
Reasons of data loss can be very different: power and microcode failures of drive, failed experiments with drive reallocation, viruses and so on. In this article we will try to understand why we can’t see the data and how it can be restored via DataExtractor features.