Hello friends! Beginning with Data Extractor 5.1.8, users can interact with their customers by creating a kind of report about the structure (files and folders) of user data found during data recovery. We called it DEViewer. In this article we review the functions of DEViewer.
Purpose
The main goal of the report is to inform the customer of a service center about the final or intermediate results obtained during data recovery, and to collect feedback including additional information and requirements regarding the files to be restored.
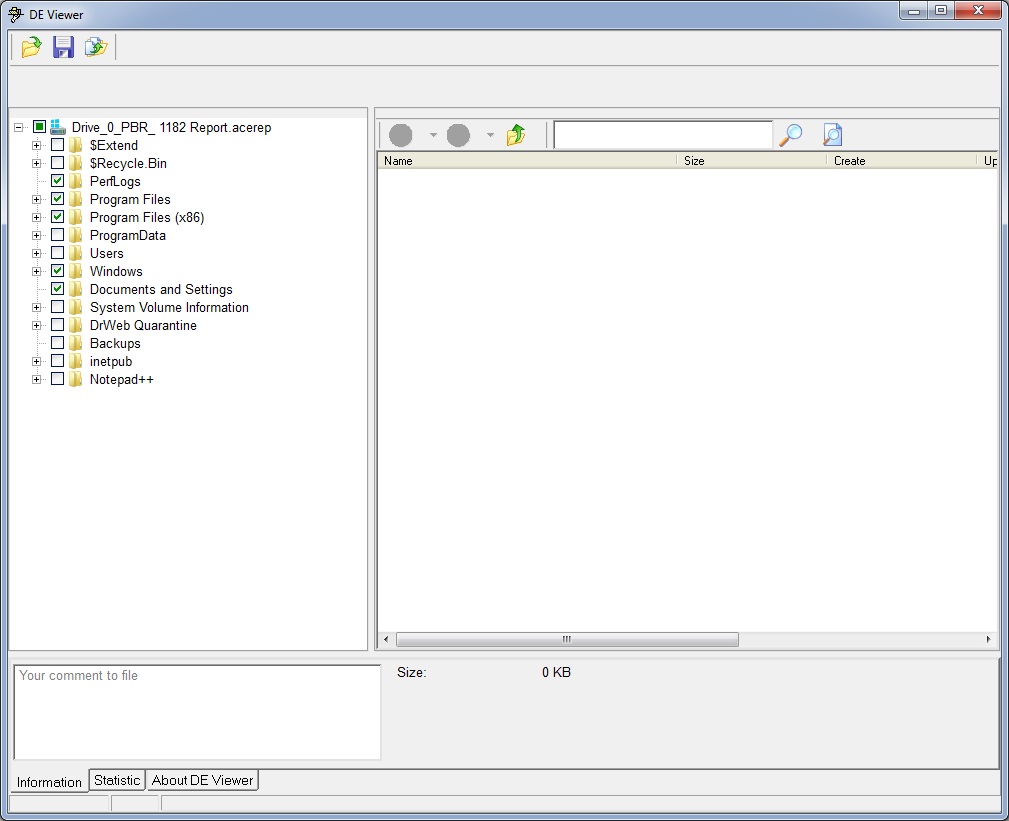
DE Viewer allows the user to view and select the files to be restored. For details on DE Viewer please refer to the DE Viewer documentation file.
Procedure
- Generation (export) of the report file for the selected file system and its delivery to the customer.
- Customer review and editing of the received file in DE Viewer.
- Generation and return of the resulting file (selected items and comments) by the customer.
- Import of the selected items and comments in the program.
Generation (export) of the report file for the selected file system
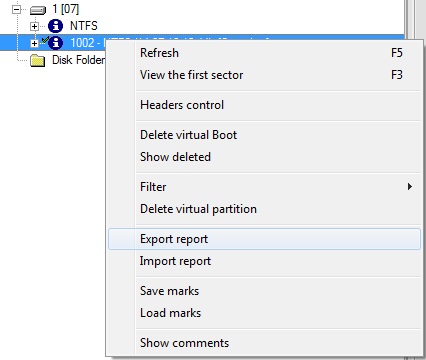
To generate a report, you have to select the virtual file system produced as a result after source analysis or a ‘snapshot’ (see further), open its context menu and choose the command to ‘Export report’.
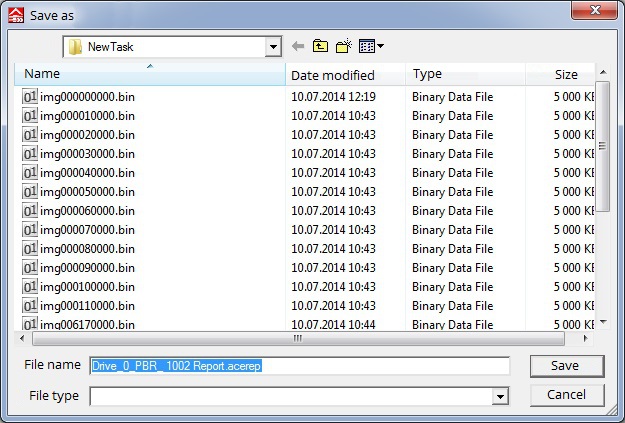
Then define the name for the file.
The report cannot be generated for the native file system because during work with damaged media every read attempt may return different results of directory and file search.
Once the procedure completes, the program will create a file with the “.acerep” extension, which should be sent to the customer.
ATTENTION! Do not delete the scan/analysis results used as the basis for report creation. Further work with the report will only be possible with these results at hand.
Review and editing of the received file in DE Viewer
Generation and return of the resulting file
For details on DE Viewer please refer to the DE Viewer documentation file.
Import of the selected items and comments in the program (Import report)
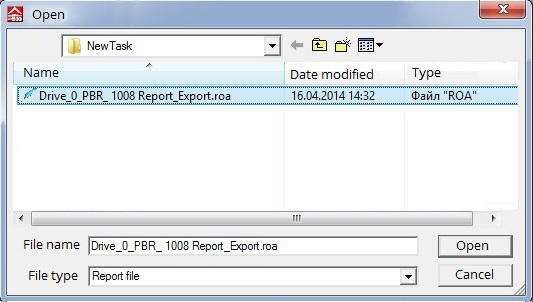
To view the files selected by the customer, you need to load the results of his/her work using the ‘Import report’ command from the context menu with the analysis results used to generate the original report earlier. Use the displayed dialog to select the corresponding file with the “.roa” extension.
File system snapshot
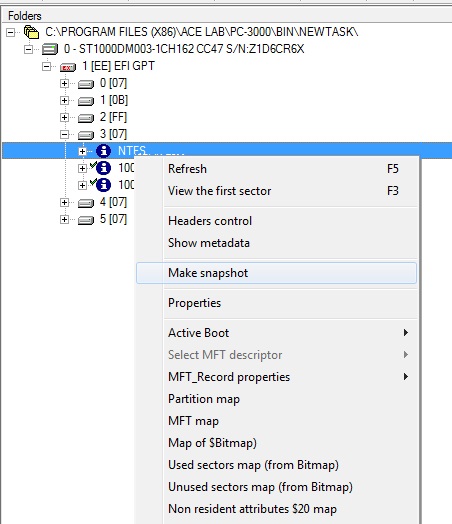
The purpose of a file system snapshot is to ‘freeze’ the state of data read from disk in order to work further with that reference point including generation of a report on the data. To make a snapshot of a native file system, right-click it with the mouse and select the command to ‘Make snapshot’ from the displayed context menu.
That’s all. If something is unclear, please feel free to contact ACE Technical Support.




We NEED a Mac version. Also, we need to see the total size of “checked” files/folders.
We are working on Mac version and new features.
Is it possible to remove Reference to ACE WEB Site if DE Viewer is sent to Customer?
It’s something like ask Microsoft for delete four color squeares from Windows Logo… 😀
Thank you for the rapid response…..
You are correct …. !
Clarification is always good 🙂
Haa Haa ,
That Was a Good One Acelab