


Hello everybody!
Sometimes, when the proven solutions can’t be applied to your problem, you need to change the approach and experiment a little. Let’s discuss the alternative method of data recovery from a burnt SSD.

Several years ago our company switched our way of working with SSDs from the PC-3000 Flash to PC-3000 SSD. Why did we do it?
The reason was that recovering data with the chip-off method from SSDs was difficult and time-consuming. It took around 1 week to detect the correct order of the memory chips, fix the ECC errors, eliminate all the controller preparations and, finally, build the image.
It was a real pain even back then, but nowadays it is even more complicated to recover data from SSDs using the chip-off method due to the full encryption of the data inside the NAND memory chip or encryption with the AES-128 key.
These issues can be easily solved and bypassed via the PC-3000 SSD Software for the PC-3000 Express/UDMA/Portable III tools. We add more and more SSDs and features on how to work with them with each update.
Still, there is a situation when you need to use the unsoldering method to recover the data from the SSD and it will actually work. One of our users came to us with the Patriot Blast with controller PS3110 and 120GB capacity. This drive had some burnt elements on the PCB and a dead CPU due to the short circuit. We offered him a solution: unsolder the chips from the burnt PCB and solder them to the new one from the donor.
But there was one thing. Searching for the same model took some time and the manufacturer changed the PCB in some way. Let’s look at the pictures!
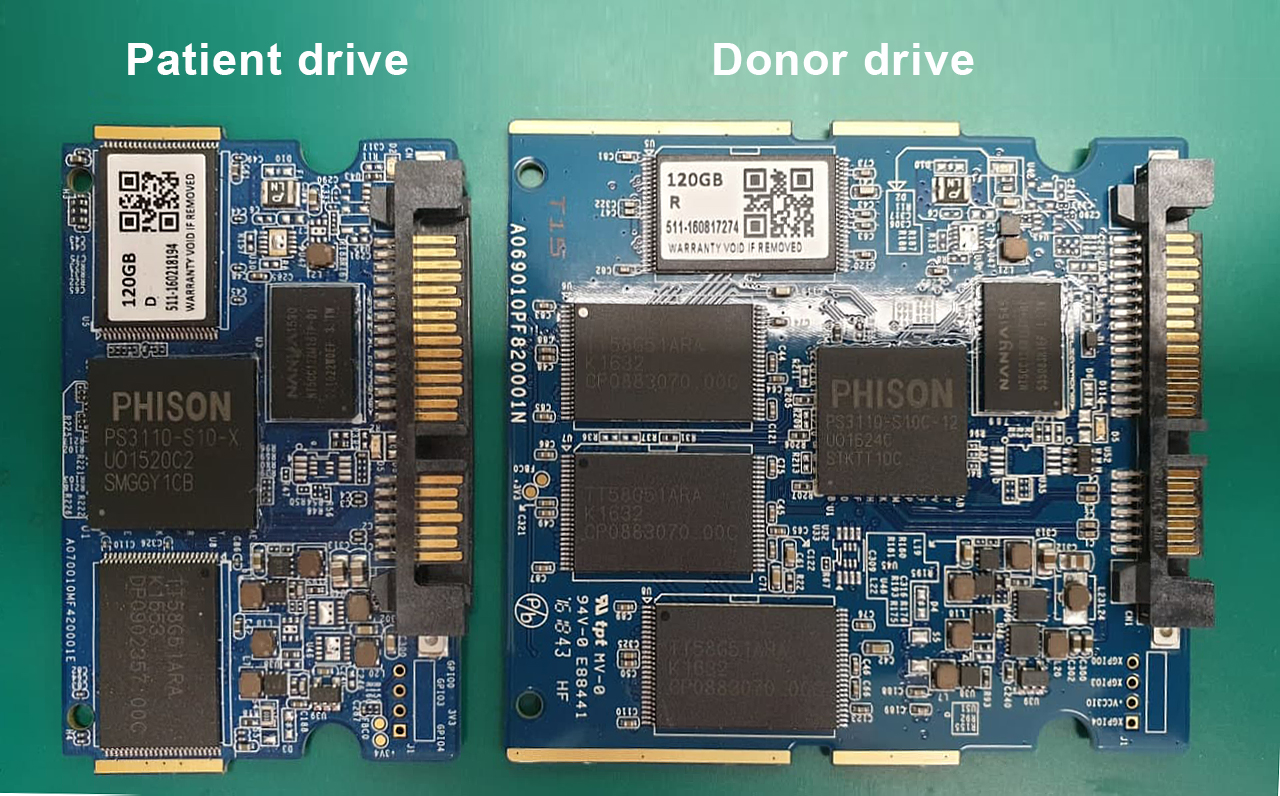
As you can see, there is a significant difference in the size of the PCB, but the main parts like the controller and the number of chips are still the same. So there was a chance it could actually work.
The next steps were made:
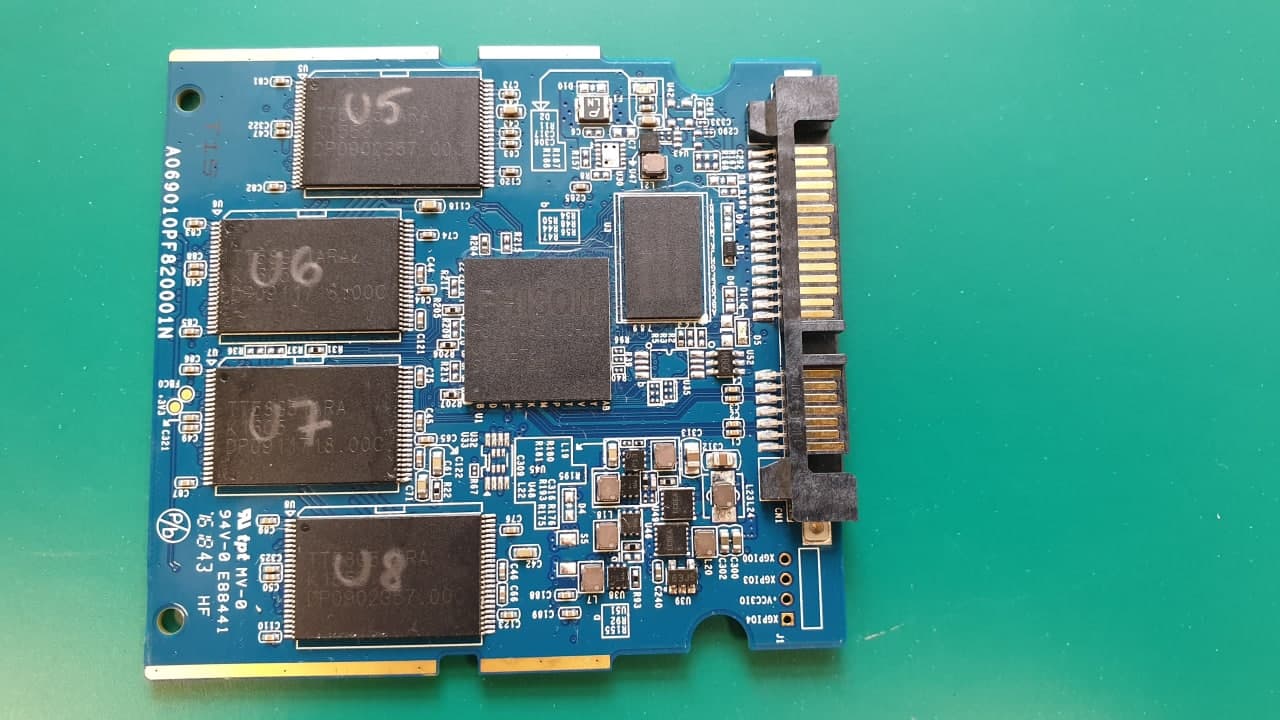
1. Marked all chips by their location names (U5, U6, U7, U8). You can find these symbols on the PCB near the chips.
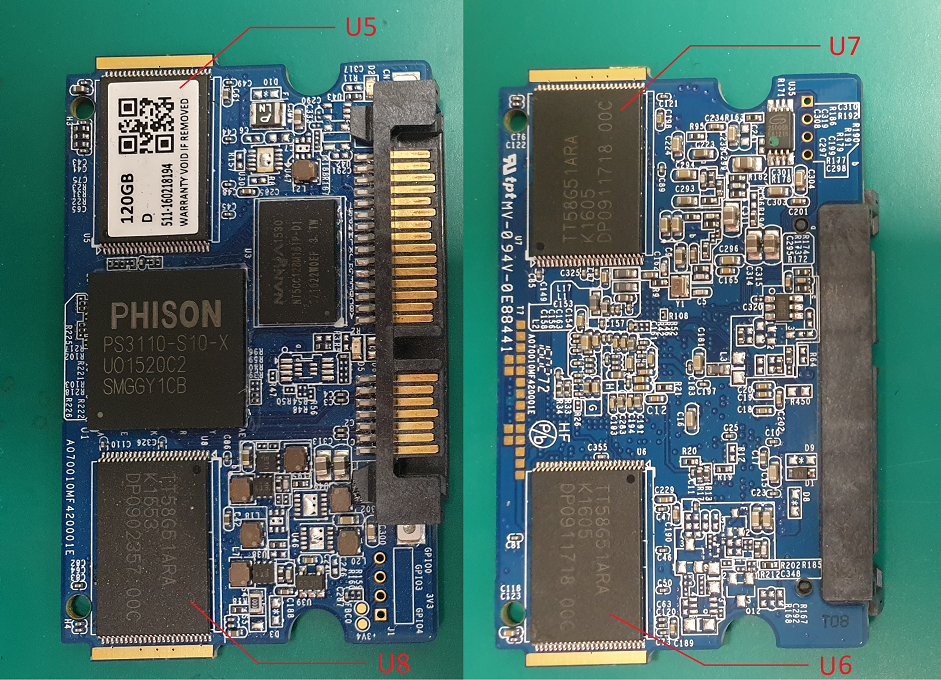
2. Unsoldered the memory chips using Rose’s metal (it has been done to lower the melting temperature in order not to damage the NAND chips)
3. Soldered the memory chips to the marked locations on the donor PCB (U5, U6, U7, U8). So the order of the chips should be the same (U5 to U5, U6 to U6…)
In the end, the SSD started without problems. There was no need to upload the LDR (loader) or build the translator. The client even said that it worked just like before the short circuit.
In case if the drive didn’t start working as before the short circuit, we should have tried to upload the LDR to make sure whether it would work well in the TechnoMode. Sometimes there might be a combination of SSD injuries: the hardware corruption of the PCB and the logical damage of the firmware area. In this case, the PC-3000 would be the only option:
This is it! Let’s summarize what you need to have and do to recover data from an SSD with a burnt PCB:
1. Find a compatible donor. It should be from the same model, have the same controller and capacity as your patient SSD. (Some manufactures use different controllers in one model, so you need to be very attentive)
2. Transfer the chips from the patient PCB to the donor with the same chip layout.
If you have any questions, please contact our Technical Support department.

 (6 votes, average: 4.33 out of 5)
Impressive! You guys have been busy